
Cross-stitching is a delightful and intricate craft that involves various colors of floss and precise patterns, making organization a crucial element of success. A well-organized cross-stitch floss organizer can save you time and frustration, ensuring that you have easy access to the right colors when you need them. This article will guide you through the creative process of how to make a cross stitch floss organizer.

We’ll explore different methods and materials, from using plastic bobbins to crafting fabric or paper organizers, and even employing digital tools for modern convenience.
By the end of this guide, you’ll be equipped with the knowledge and skills to keep your cross-stitch floss collection neatly organized and accessible, making your stitching projects more enjoyable and efficient. Whether you’re an experienced cross-stitcher or a novice, an efficient organizer is a valuable addition to your crafting toolkit.
The Purpose of a Cross Stitch Floss Organizer
If you’re new to cross stitching, you may be wondering why floss organizers are needed in the first place. After all, can’t we just keep our threads and needles in a simple box or bag? While that may seem like an easy solution, having a designated floss organizer has its benefits.
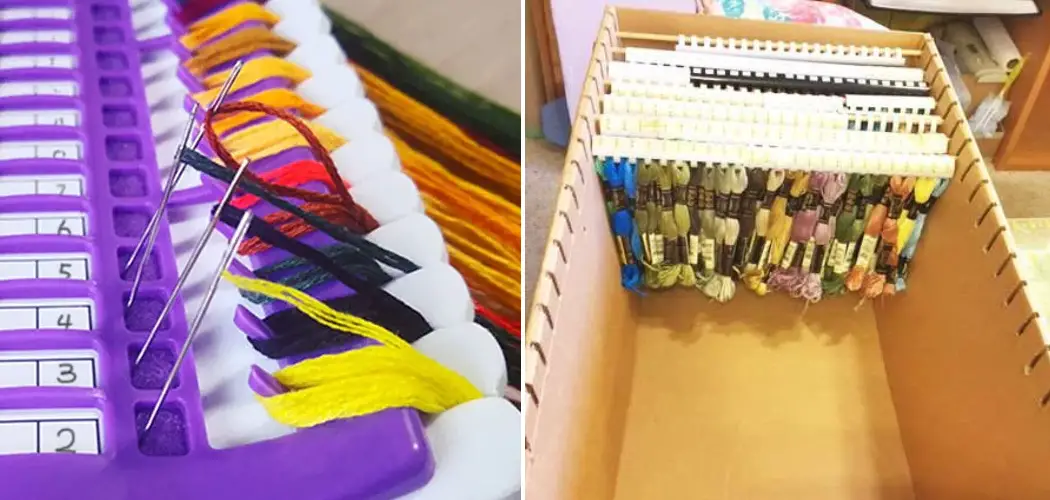
Firstly, a floss organizer allows you to keep your embroidery floss neatly organized, preventing tangles and knots. When working with multiple colors of thread, this can save you time and frustration in untangling them.
Secondly, a floss organizer helps you keep track of your thread inventory. This is especially useful when working on larger projects that require many different colors. By keeping your floss organized by color, you can easily see which colors you have and which ones you need to restock.
Another advantage of using a floss organizer is that it can help save space. Instead of having multiple boxes or bags of threads lying around, a compact floss organizer can hold all your threads in one place. This makes it easier to store and transport your cross stitching supplies.

Additionally, a floss organizer allows for better color coordination and matching. By having all your threads organized in one place, you can easily compare colors and make sure they match before starting a project. This is especially helpful when working on intricate patterns that require precise color placement.
Benefits of Using a Floss Organizer
Using a floss organizer is an essential tool for cross stitch enthusiasts and beginners alike. It helps keep your embroidery floss organized, easily accessible, and tangle-free. Let’s take a closer look at some of the benefits of using a floss organizer in your cross stitch projects.
1. Keeps your Floss Organized
One of the most significant advantages of using a floss organizer is that it helps keep your embroidery floss organized. You can sort your floss by color or number and store them neatly in the designated compartments. This makes it easier to find the specific color you need for your project, saving you time and frustration.
2. Prevents Tangles
Tangled floss is a common headache for cross-stitchers. Not only does it slow down your progress, but it can also ruin the quality of your work. Floss organizers have individual compartments for each color, preventing them from getting tangled with one another. This ensures that your floss stays in perfect condition and is ready to use whenever you need it.
3. Easy to Transport
Floss organizers are compact and lightweight, making them easy to transport. You can easily take them with you on the go, whether it’s to a stitching class or while traveling. This allows you to work on your projects wherever and whenever you want without having to worry about organizing your floss.
10 Methods How to Make a Cross Stitch Floss Organizer
1. Gather Supplies
To make a cross-stitch floss organizer, you will need some basic supplies such as embroidery hoops, fabric, scissors, and thread. You can find all of these items at your local craft store. Additionally, you may want to pick up some clear plastic bags or containers to store your finished pieces in. Once you have gathered all of the necessary supplies, you are ready to begin!

2. Cut Fabric
Once you have gathered your supplies, it is time to cut the fabric for your cross-stitch floss organizer. To do this, measure out a piece of fabric that is twice the size of your embroidery hoop and then cut it accordingly. Make sure that the edges are even and that there are no loose threads or fraying fabric.
3. Sew Edges
Once you have cut the fabric for your cross-stitch floss organizer, it is time to sew the edges together. To do this, use a simple running stitch along both sides of the fabric. Make sure that your stitches are even and secure so that they will not come undone when you start stitching on your project.
4. Attach Hoop
The next step is to attach an embroidery hoop to one side of the fabric so that it forms a pocket for storing your floss threads. To do this, simply place the hoop over one side of the fabric and then secure it with a few stitches around its circumference. This will create a pocket-like shape that will hold your threads in place while you work on them.
5. Add Threads
Now it’s time to add the thread strands into their respective pockets in your cross-stitch floss organizer! Begin by placing each strand into its own pocket and making sure that they are securely fastened in place with a few stitches around their circumference as well. This will help ensure that they stay put while you work on them!
6. Label & Organize Threads
Once all of the threads have been added into their respective pockets in your cross stitch floss organizer, it is time to label and organize them according to color or design motifs! To do this, simply write down each thread’s corresponding number onto a piece of paper or cardstock and then attach it to its respective pocket with tape or glue dots so that you can easily identify which thread goes where when needed!

7. Create a Color Chart
For larger projects such as quilts or wall hangings where multiple colors may be used at once, creating a color chart can be very helpful! To do this, simply draw out each thread’s corresponding number onto a piece of paper or cardstock and then attach it near its respective pocket with tape or glue dots so that you can easily identify which color goes where when needed! This will save you time and frustration when working on complex projects involving multiple colors!
8. Store Extra Threads
If there are any extra threads left over after completing a project, they should be stored away in an airtight container such as a zip-lock bag or plastic box so that they remain clean and free from dust until needed again! This way, they won’t get tangled up with other threads in storage, which could lead to confusion later on down the line when trying to use them again for future projects!
9. Hang Up Organizer
When all else is done organizing, your cross stitch floss organizer can be hung up on a wall using nails or tacks for easy access whenever needed during projects! This way, everything remains neat and tidy while also being readily available when needed without having to search through boxes or drawers looking for specific colors/threads every time something new needs to be worked on!
10. Enjoy Cross Stitching!
Now comes perhaps one of the most enjoyable parts – actually getting started with some creative stitching projects using all those different colored threads stored neatly away inside their designated pockets within our newly created cross-stitch floss organizer!

Whether creating something small like greeting cards or something more complex like quilts – let creativity take over now, knowing everything is organized just right for success every step along the way towards completion!
Things to Consider When Make a Cross Stitch Floss Organizer
When it comes to organizing your cross stitch floss, there are a few key factors to keep in mind. These considerations can help you create an efficient and effective system for storing and accessing your floss.
- Number of Colors: Before starting your organizer, take inventory of how many different colors of floss you have. This will give you an idea of the size and number of compartments you will need in your organizer. You may also want to consider grouping similar colors together for easier access.
- Space Available: Consider where you plan on storing your floss organizer and how much space you have available. This will determine the overall size and design of your organizer.
- Material Options: There are many materials that can be used to make a cross stitch floss organizer, including plastic containers, cardboard boxes, and even specialized organizers made specifically for floss. Think about which material will work best for your needs and budget.
- Labeling: It’s important to label each compartment of your organizer with the corresponding color or number of floss. This will help you quickly find the color you need without having to open every compartment.
- Portability: If you plan on taking your floss organizer with you on trips or to crafting events, consider making it portable by using a small container or organizing your floss in individual bags that can easily be transported.

Conclusion
To sum it all up, making a cross stitch floss organizer is an easy and affordable way to keep your spooled floss organized and make sure you remember the colors for each project. With the right materials and equipment— like needlework hoops, dowels, pegboards, or plastic embroidery stitching boxes—you can easily create a customized cross stitch floss organizer that works perfectly for your needs.
Now that you know how to make a cross stitch floss organizer, why not give it a try? Grab some supplies and get creative–you’ll be glad you did! After all, the organized embroiderer is the happiest one of all. So now that you have successfully learned to make a cross stitch floss organizer, get stitching!