
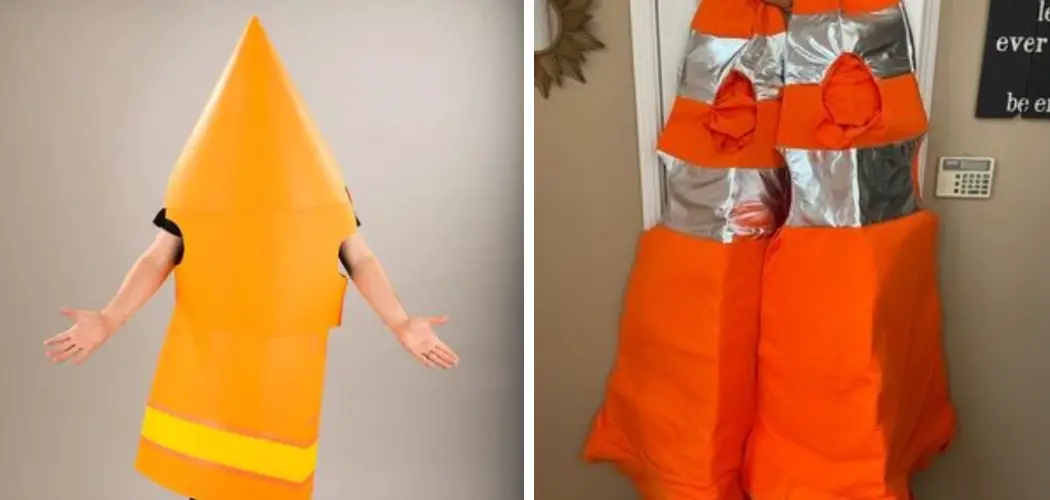
Making a cone costume is a fun and unique way to dress up for Halloween, costume parties, or even just for fun! It’s also a great project to do with friends or family. In this guide, we will go over the steps on making a cone costume so that you can create your own DIY masterpiece.

The advantages of making a cone costume are numerous. First and foremost, it is a fun and creative activity that can be enjoyed by people of all ages. It allows for self-expression and imagination, as you can customize your cone costume in any way you want. In this blog post, You will learn in detail how to make a cone costume.
Materials You Will Need
- Poster board or cardboard
- Scissors
- Tape or glue
- Measuring tape or ruler
- Compass (optional)
- Pencil
- Paints and brushes (optional)
- Colored paper, fabric, or tissue paper (to decorate the cone costume)
- Ribbon or elastic band (for tying under chin)
- Cone hat template (available online)
Now that you have gathered all your materials, it’s time to start making your cone costume.
Step-by-step Instructions for How to Make a Cone Costume
Step 1: Inspect the Materials
Before you dive into making your cone costume, it is important to gather all the necessary materials and inspect them. Make sure that they are clean, in good condition, and ready to be used. Find a spacious work area where you can lay out all your materials and have enough space to move around. This will ensure that you have a smooth and efficient crafting experience.
Step 2: Measure and Cut the Fabric
Using a measuring tape, measure the circumference of your head and add an inch to it. This will be the length of fabric you need for your cone costume. Cut out a triangle-shaped piece from your fabric with this measurement. Fold the long edge of the fabric over by half an inch and sew it in place. This will create a neat and sturdy hem for your cone costume.

Step 3: Create the Cone Shape
Take one corner of your triangle-shaped fabric and bring it to the opposite side, creating a cone shape. Use pins to hold this shape in place. Sew along the edge of your cone shape, making sure to keep the fabric in place. Once you reach the top of the cone, sew a few stitches in a circular motion to secure it.
Step 4: Cut off Excess Fabric
Trim any excess fabric from the tip of your cone costume, leaving about half an inch for hemming. Fold the top edge of your cone costume by half an inch and sew it in place to create a clean hem. Now comes the fun part! You can choose to decorate your cone costume with paint, fabric markers, sequins, or any other materials you desire. Get creative and make your costume truly unique.
Step 5: Create Straps
To keep your cone costume securely on your head, you will need to create straps. Cut two long strips of fabric and sew them onto opposite sides of the bottom edge of your cone shape. Before finishing off your costume, try it on and make any necessary adjustments to ensure a comfortable and secure fit.

By following these simple steps, you can easily make your own cone costume and stand out at any costume party or event. Remember to have fun and let your creativity shine.
Tips for How to Make a Cone Costume
When making a cone costume, it is important to prioritize safety. Here are some tips to keep in mind:
- Use materials that are non-toxic and safe for children, especially if the costume is for a child.
- Wear protective gear such as gloves, goggles, and masks when working with potentially harmful materials like hot glue or sharp scissors.
- Use caution when using heat sources such as a glue gun or iron.
- Do not leave hot glue guns unattended and keep them away from children.
- Make sure the costume is comfortable and allows for easy movement to prevent any accidents.
- Choose materials that are lightweight and breathable to avoid overheating while wearing the costume.
- Always have adult supervision, especially if children are involved in making the costume.
By following these safety precautions, you can ensure a fun and safe experience while making your own cone costume. Remember to always prioritize safety over aesthetics when it comes to creating costumes.
What is the Best Way to Attach the Cone to Your Body?
There are a few different methods for attaching the cone to your body, depending on the materials you are using and your personal preference. Here are some of the best ways to secure the cone costume onto your body:
1. Elastic Straps
This is a popular method for securing cone costumes as it allows for easy movement and can be adjusted for different body sizes. Simply attach elastic straps to the inside of the cone and fasten them around your shoulders.

2. Velcro Strips
Another option is using adhesive velcro strips to attach the cone to your clothing or undergarments. This allows for a more secure hold and can be easily removed if needed.
3. Safety Pins
For a quick and easy method, you can use safety pins to attach the cone to your clothing. However, be cautious when using this method as the pins may poke through the fabric and cause discomfort.
4. Sewing
If you have basic sewing skills, you can sew the cone directly onto a piece of clothing such as a shirt or dress. This will provide a seamless look and ensure that the cone stays in place while wearing.
Choose the method that works best for you and make sure to test it out before wearing the costume for an extended period of time. It is also a good idea to have extra materials on hand in case any repairs are needed.
How Long Does It Take to Make a Cone Costume?
Whether you are planning for a Halloween party, a costume themed event or just looking to impress your friends with your creativity and crafting skills, making a cone costume is definitely an exciting project to take on. However, if it’s your first time attempting to make such a costume, you might be wondering how long it will take.

The truth is that the time taken to make a cone costume can vary depending on your crafting skills, materials used, and the complexity of the design. But don’t worry, we have some tips to help you estimate the time needed for your specific project.
Is There a Specific Technique or Method for Making the Cone Shape?
Yes, there are a few different techniques and methods that can be used to create the cone shape for your costume. The method you choose will depend on the materials you have available, as well as personal preference and skill level.
One common technique is using wire or stiff material (such as cardboard or plastic) to create a support structure for the cone shape. This can be particularly helpful for larger or taller cones that may need more stability. You can then drape fabric or other materials over the support structure and secure it in place.
Another method is creating a series of flat panels that are sewn together to form the cone shape. This works well with lightweight fabrics, such as felt or cotton, and allows for more control over the final shape of the cone.
If you are using a stiffer material like foam or cardboard, you can also try cutting out a series of triangular shapes and piecing them together to form the cone. This method may require more precision and planning, but can result in a very structured and clean-looking cone shape.

How Should You Store Your Cone Costume When Not in Use?
After creating your very own cone costume, you might be wondering how to properly store it when it’s not in use. Whether you plan on wearing it again for future events or simply want to keep it as a keepsake, proper storage is key to maintaining its shape and overall quality. Here are some tips on how to store your cone costume:
- Clean and dry your cone costume before storing it. This is especially important if you’ve worn it for an event and there are any dirt or stains on the fabric. Use a gentle cleaner and make sure to let it fully dry before proceeding.
- Stuff the cone part of the costume with tissue paper or newspaper to help maintain its shape. You can also use foam cones or cardboard cutouts for larger cones.
- Hang the costume in a closet or place it in a storage container. If hanging, make sure to use a padded hanger to prevent any creasing or damage to the fabric. If using a storage container, make sure it’s large enough for the costume and has enough space between other items so as not to crush the cone shape.
- Avoid storing your cone costume in a humid or damp environment. This can cause the fabric to mildew and the shape to become distorted.
- If you have multiple cone costumes, try to store them separately if possible. Storing them together can cause friction and damage the delicate fabrics.
By following these tips, you can ensure that your cone costume stays in pristine condition for future use. Happy costuming! So, these were some basic tips to store your cone costume when not in use. Remember to take good care of it and it will last for many events to come.
Conclusion
In conclusion, making a cone costume is a fun and creative activity that can be enjoyed by people of all ages. From young children to adults, this DIY costume idea allows individuals to express their creativity and showcase their unique style. By following the simple steps outlined in this blog post, you can easily create your own cone costume without breaking the bank.
With just some basic materials and a little bit of time, you can transform yourself into a cone-shaped object and stand out at any costume party or event. Not only is making a cone costume an affordable option, but it also allows for endless customization possibilities.
You can choose your own colors, patterns, and decorations to make your cone costume truly one-of-a-kind. I hope this article has been beneficial for learning how to make a cone costume. Make Sure the precautionary measures are followed chronologically.