

Making your own candlestick holder can be a fun and creative way to add some personality to your home decor. Not only is it an enjoyable activity, but you also have the satisfaction of knowing you made something with your own hands. Plus, making your own candlestick holder allows you to customize it to fit your personal style and preferences.
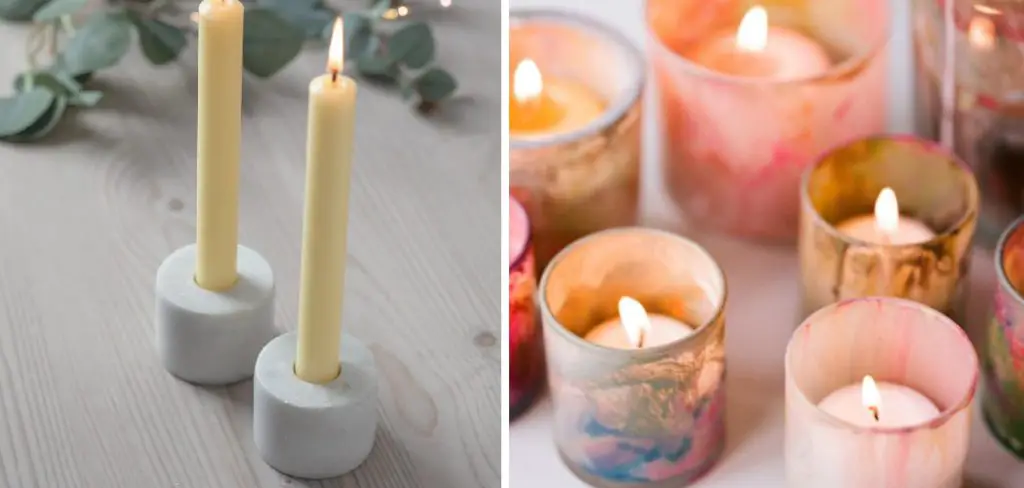
Creating your own candlestick holder is not only a fun and easy DIY project, but it also has many advantages. Not only will you have a unique and personalized piece for your home decor, but you will also save money by making it yourself rather than buying one from a store. In this blog post, You will learn in detail how to make a candlestick holder.
Materials You Will Need
- A wooden block or dowel
- Craft glue
- Scissors
- Ruler
- Pencil
- Paintbrush
- Acrylic paint
- Painter’s tape
- Decorative elements (such as beads, sequins, glitter)
Step by Step Processes for How to Make a Candlestick Holder
Step 1: Inspect and gather your materials
Before you get started, make sure you have all the necessary materials. This includes a candlestick holder base, 2 wooden dowels, 1 wooden circle, wood glue, clamps, sandpaper, and a saw.
Step 2: Measure and cut your dowels
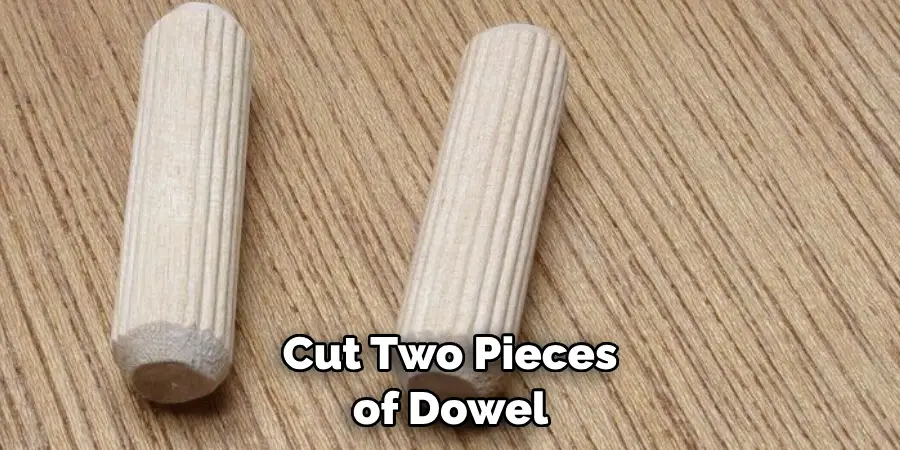
Using a saw, measure and cut two pieces of dowel to the desired length for your candlestick holder. This will serve as the arms of the holder. Using sandpaper, smooth out any rough edges on the dowels and wooden circle. This will ensure a clean and polished look for your candlestick holder.
Step 3: Glue the dowels to the base
Using wood glue, carefully attach the two dowels to the base of your candlestick holder. Use clamps to hold them in place until the glue dries. Once the dowels are securely attached to the base, use wood glue to attach the wooden circle on top of the dowels. This will serve as a platform for your candle.
Step 4: Let it dry
Allow enough time for the glue to completely dry before moving on to the next step. This will ensure a sturdy and durable candlestick holder. Once the glue is dry, use sandpaper to smooth out any excess glue that may have leaked out during the drying process. This will give your candlestick holder a clean finish.
Step 5: Paint or decorate (optional)
If desired, you can paint or decorate your candlestick holder to personalize it. This is a great opportunity to get creative and add your own personal touch. If you have painted or decorated your candlestick holder, make sure to let it dry completely before using it. This will ensure that the paint or decorations do not come off when handling the holder.
Once your candlestick holder is completely dry, add your favorite candle and light it up. Now you have a beautiful homemade candlestick holder that will add charm to any room or table setting.
Precautions for How to Make a Candlestick Holder

- Always work in a well-ventilated area to avoid inhaling harmful fumes.
- Wear protective gear such as goggles and gloves to protect yourself from the hot wax.
- Keep a fire extinguisher or baking soda nearby in case of any accidents involving fire.
- Use caution when handling sharp objects such as scissors or knives while making the candlestick holder.
- Be mindful of the temperature of the melted wax to avoid burns.
- Do not leave any heated materials unattended and always turn off heat sources when not in use.
- Keep children and pets away from the workspace to prevent accidents.
Making a candlestick holder can be an enjoyable and rewarding experience, but it is important to prioritize safety while working with hot materials and equipment. By following these precautions, you can have a safe and successful candlestick holder making experience.
How Long Does It Take for the Wax to Cool and Harden Into a Solid Form?
The cooling and hardening time for the wax will vary depending on the type of wax used, the thickness of the candlestick holder, and the ambient temperature. Typically, it can take anywhere from 1-2 hours for the wax to fully cool and harden into a solid form.
It is important to let the wax cool completely before handling or decorating your candlestick holder to avoid any mishaps. Patience is key when making a candlestick holder, so it’s best to wait for the wax to cool naturally rather than using artificial cooling methods such as placing it in the fridge.
What is the Best Way to Remove the Finished Candlestick Holder From Its Mold?
One of the final steps in making a candlestick holder is to remove it from its mold. This can be a tricky process, especially if you are new to candle making or have never used that particular mold before. There are several methods for removing a finished candlestick holder from its mold.
One common method is to gently tap the sides and bottom of the mold with a rubber mallet or a kitchen utensil to loosen the candlestick holder. Another method is to place the mold in the freezer for a few minutes, which will cause the wax to contract and make it easier to remove from the mold.
Another important tip is to always use caution when removing a candlestick holder from its mold, as hot wax can cause burns if not handled carefully.It is also important to make sure the candlestick holder has completely cooled and hardened before attempting to remove it from the mold.
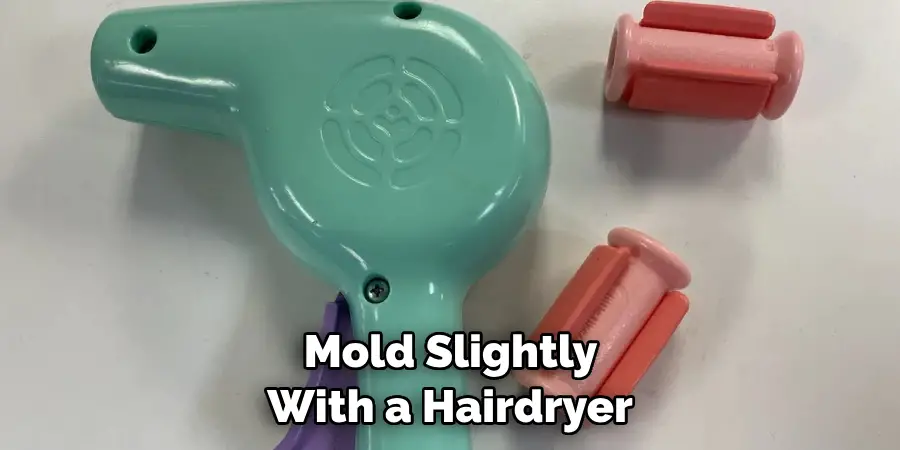
In some cases, a candlestick holder may not come out of its mold easily or may even break. If this happens, do not panic. You can try reheating the mold slightly with a hairdryer or hot water to help loosen the candlestick holder.
How Important is the Quality of the Wax Used in Making a Candlestick Holder?
When it comes to making a candlestick holder, the quality of wax used plays a crucial role in creating a beautiful and long-lasting finished product. While there are various types of wax available in the market, not all of them are suitable for making candlesticks.
Firstly, it is important to understand that candlestick holders are not just functional items but also serve as decorative pieces in our homes. Therefore, using high-quality wax ensures that the candlestick holder not only serves its purpose but also looks aesthetically pleasing.
One of the key factors to consider when choosing wax for a candlestick holder is its melting point. The melting point determines how well the wax will hold its shape and prevent it from dripping or sagging when the candle is lit. For candlestick holders, waxes with higher melting points such as paraffin wax or beeswax are preferred.
In addition to the melting point, the color and scent of the wax also play a significant role in the overall appearance of a candlestick holder. The color of the wax can be customized to match the theme or décor of a room, while scented waxes can add a pleasant fragrance to the space.
Are There Any Special Techniques for Achieving a Smooth and Polished Finish on the Candlestick Holder?
When it comes to making a candlestick holder, achieving a smooth and polished finish is crucial for creating a professional-looking piece. While there are many techniques that can be used to achieve this, here are some of the most popular options:
1. Sanding
One of the easiest ways to get a smooth finish on your candlestick holder is by sanding it. Start with a coarse grit sandpaper and gradually work your way up to a finer grit. This will help to remove any imperfections or rough spots on the surface of the holder.
2. Wood Filler
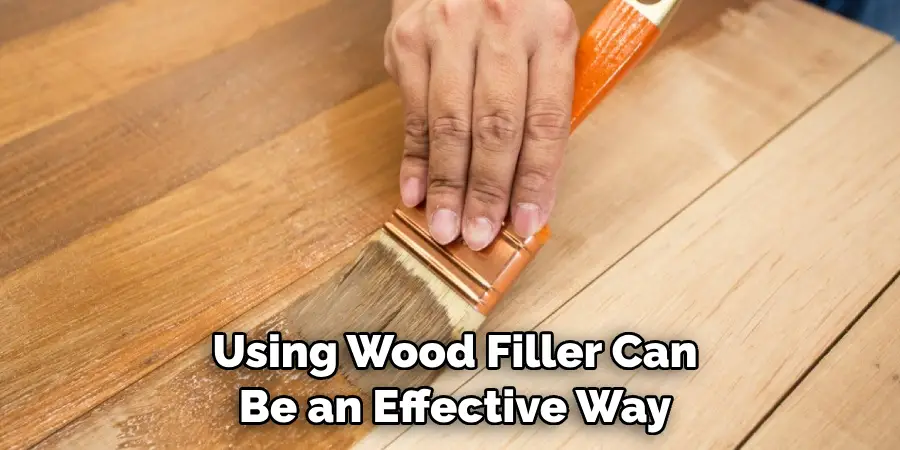
If you’re working with a wooden candlestick holder, using wood filler can be an effective way to fill in any cracks or gaps and create a smooth surface. Simply apply the wood filler, let it dry, and then sand it down to achieve a smooth finish.
3. Paint
Another option for achieving a polished look is by painting your candlestick holder. This can help to cover up any imperfections on the surface and give you a sleek, modern finish. Just be sure to use a high-quality paint and apply multiple coats for the best results.
4. Sanding Sealer
If you’re looking for a quick and easy way to achieve a smooth finish, using a sanding sealer can be a great option. This product not only helps to fill in any gaps or imperfections, but it also creates a smooth surface that is ready for painting or staining.
No matter which technique you choose, taking the time to achieve a smooth and polished finish on your candlestick holder will make all the difference in the final product. So don’t rush this step, and be sure to pay attention to detail for a professional-looking result that you can be proud of.
Conclusion
In conclusion, making your own candlestick holder can be a fun and rewarding experience. Not only does it allow you to add a personal touch to your home decor, but it also gives you the opportunity to unleash your creativity and create something unique. However, like any DIY project, there are some disadvantages to consider before embarking on this crafting journey.
Furthermore, if you are not an experienced craftsman, there is a risk of making mistakes or ending up with a less than ideal final product. This could lead to frustration or disappointment, especially if you were looking forward to showcasing your homemade candlestick holder.
I hope this article has been beneficial for learning how to make a candlestick holder. Make Sure the precautionary measures are followed chronologically.