
Have you ever wanted to make a fashionable beret-style crochet? If so, you’re in luck! This blog post will provide detailed instructions on how to make a beret crochet. With just a bit of time and the right materials, you can create a unique accessory that is sure to add personality to any ensemble.

If you want to accessorize your wardrobe and make a unique statement in a stylish, eye-catching fashion, then creating your own beret crochet is the ideal way to add some pizzazz. This project takes minimal materials and time, but results in an amazing accessory that stands out from the crowd.
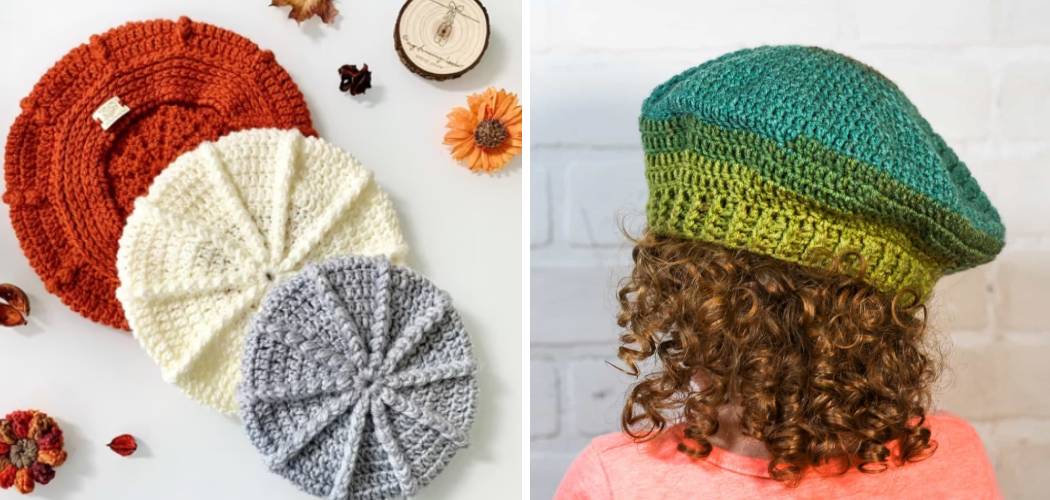
Not only do you decide what colors to use, but also incorporate special touches like lacy stitches or pom-poms for added flair! Whether this is your first foray into crocheting or you consider yourself an old pro with a hook and yarn at hand, follow this guide on how to make a beret crochet with step-by-step instructions that can take any look from drab to fab.
Benefits of a Beret Crochet
1. Stylish and Timeless Fashion Accessory
One of the biggest benefits of making a beret crochet is the stylish and timeless fashion accessory it creates. Wearing a beret can add an elegant touch to any outfit, from casual daytime looks to more formal evening attire. The beret’s classic shape and style will never go out of fashion, meaning you can wear yours for many years to come!
2. Easy to Customize
Making a beret crochet also gives you the opportunity to customize it with different colors and patterns. With just a few simple techniques, you can make your beret as unique as you want it to be! You can even use multiple colors in the same project to create a truly one-of-a-kind piece.
3. Quick and Easy Project
Creating a beret crochet is also a relatively quick and easy project that can be completed in just a few hours or less. The basic pattern is simple to follow, making it an ideal DIY project for beginner crocheters. Plus, once you’ve mastered the basics of making a beret crochet, you can use the same techniques to make more complex designs and projects.
By learning how to make a beret crochet, you can create a stylish and timeless fashion accessory that’s easy to customize and quick to complete. So why not give it a try? You’re sure to love the unique look of your handmade beret!
How to Make a Beret Crochet in 6 Easy Steps
Step 1: Gather the Materials Needed
The very first step in making a beret crochet is to make sure you have all the supplies needed. These include: light-weight (DK or sport), yarn, a size H (5mm) crochet hook, and scissors. Also, if you choose to decorate your beret crochet, you will need the desired decorations.

Step 2: Make a Chain
Start by making a chain of 11 stitches using the size H (5mm) crochet hook and yarn. Then, slip stitch into the first stitch to join it into a ring shape. Also, make sure your chain is not twisted. Be careful to ensure your chain is not too tight!
Step 3: Make the Rounds
Now you will need to create 8 rounds of single crochet stitches. To do this, start by inserting your hook into any stitch on the ring and pulling up a loop. Then yarn over with the working yarn and pull through both loops on your hook. Repeat this process for all 11 stitches on the ring. To make sure you are making 8 rounds, count your stitches after each round and add a stitch marker if necessary.
Step 4: Make the Brim of the Beret Crochet
Next, you will need to make the brim of your beret crochet. To do this, start by making a series of half-double crochet stitches. This involves inserting your hook into any stitch and pulling up a loop, yarn over, then pull through all three loops on the hook. Make sure to repeat this process for each stitch on the round until you reach 11 stitches.

Step 5: Make the Sides of the Beret Crochet
Now you will need to create the sides of your beret crochet. To do this, chain 3 stitches and make a single crochet into each stitch along the brim. Then, continue creating single crochets until you reach 11 stitches on each side.
Step 6: Finish the Beret Crochet
Finally, once all the parts of the beret crochet have been created, it is time to finish off your project. To do this, insert your hook into any stitch and pull up a loop. Yarn over with the working yarn and pull through both loops on the hook. Repeat this process for each stitch along the brim and sides until you reach 11 stitches total. Finally, fasten off the yarn and weave in any ends.
Some Tips to Make a Beret Crochet
1. Do Not Rush
This is a project that will require patience and careful planning. Take your time to plan out the design of your beret, choose colors wisely, and make sure you are working slowly but steadily. Also remember that this is not a project you can finish in one sitting, so be sure to take breaks and come back fresh.
2. Select the Right Yarn
The type of yarn you choose will have a major impact on how your beret looks and feels. There are many varieties of yarn out there, so make sure to do your research and pick one that is soft, durable and appropriate for the project.
3. Choose a Pattern
There are several patterns available online or in books to help you create a beret crochet. Choose one that will match the color palette of your yarn and design elements you have chosen. Make sure to read the instructions carefully before beginning the project.
4. Gather Necessary Materials
Before you begin, make sure to gather all of the materials necessary, including crochet hooks and other accessories such as stitch markers or measuring tape. This will help make sure that you are able to complete your beret without any surprises.

5. Take Breaks
This is an important part of any crochet project, and it’s especially important when making a beret. Working on the same pattern for too long can lead to mistakes or burnout. Take regular breaks to rest your eyes and hands so that you can come back refreshed and ready to tackle the next step.
Frequently Asked Questions
What Precautions Should I Take Before Making a Beret Crochet?
It is important to use the right hook size and yarn weight for the project. A hook that is too large or small can dramatically affect the outcome of your project.
Also, be sure to read through your pattern carefully and pay attention to any special techniques you may need to know. Finally, when crocheting with a beret in mind, it is important to remember that the hat should fit snugly; if it is too loose, the beret will not look as intended.
What Kind of Yarn Should I Use for a Beret Crochet?
The type of yarn you use for your project will depend on the desired look and fit of your beret. If you are looking for a light, airy fabric, then a lightweight yarn such as a cotton blend or baby alpaca would be best. If you are going for more of an elegant, structured look, consider using a wool yarn or other heavier weight material.
Do I Need Any Special Supplies to Make a Beret Crochet?
In addition to yarn and the appropriate-sized crochet hook, other supplies you may need include a tapestry needle for weaving in ends, stitch markers to help keep track of where you are in your pattern, and scissors. Additionally, having a measuring tape handy is always helpful. Also, you may want to invest in a blocking board and pins to help shape your beret after it is finished.

Conclusion
Now you know how to make a beret crochet! With patience, proper planning and the right supplies, you will have a beautiful hat to show off in no time. Have fun with your project and don’t be afraid to experiment with different colors and designs. Crafting can be a wonderful and satisfying hobby with many benefits: it allows for flexible hours, encourages creativity and inspires personal growth.
Whether you strive to become an expert at crocheting berets or simply want to try something new and fun, the steps above can help you get started on the right track. All it takes is a few supplies, the willingness to practice, and some patience! Who knows? You might end up making something that you’ll wear proudly around town. So go ahead, grab your crochet needles, yarn, and notions – let’s get started crocheting our own beret today!