
Are you looking for a fun and creative way to pass the time? Have you recently been trying to find an easy but rewarding craft project to do with your family or friends? Making paper bees is not only a great way to spend quality time together, but it also introduces kids (and adults, too!) to the world of origami.

This blog post will provide all the instructions needed so that everyone can learn how to make a bee with paper right at home! So grab some pieces of scrap paper, and let’s get started!
Can You Make Your Own Queen Bee?
Yes, you can! To make your own queen bee, start by folding a piece of scrap paper in half. Then, cut out two wings and a head from the folded paper. Use your imagination for the shape of the wings and head — it doesn’t have to be perfect!
Now all you need to do is glue the wings and head to the body of your bee. Additionally, you can use markers, crayons, or other craft supplies to draw details such as stripes and antennae onto your paper bee.
You Can Check It Out To Make a Paper Bonnet
9 Methods How to Make a Bee with Paper
1. What You’ll Need
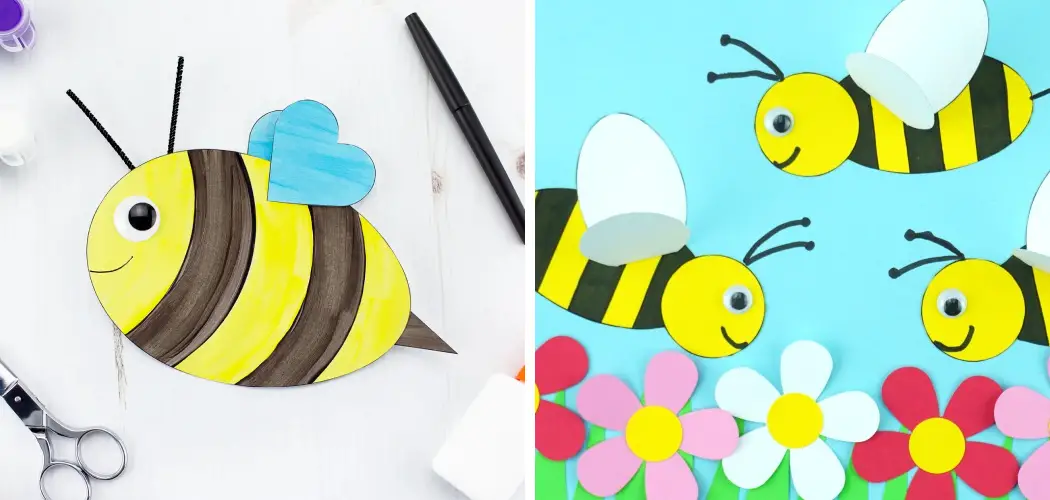
To make a paper bee, you’ll need a few supplies. You’ll need some yellow and black construction paper, scissors, glue, and a pencil. You can also use googly eyes if you’d like, but they are unnecessary. If you don’t have black paper, you can draw a bee with a pencil or marker. While these are not necessary, they can add a lot of personality to your bee.
2. Trace the Body
First, you’ll need to trace the bee’s body onto the yellow construction paper. You can either freehand this or use a template. Once you have the body traced out, cut it out with scissors. If you have a hard time getting the edges of the bee sharp and precise, you can always use a craft knife to get those perfect lines. However, be careful that you don’t cut yourself!

3. Trace the Wings
Next, you’ll need to trace the wings onto the black construction paper. Again, you can either freehand this or use a template. Once you have the wings traced out, cut them out with scissors. Try to get a nice, clean cut by taking your time and using care. Make sure the wings are symmetrical. If you want, you can even use a ruler to make sure both wings are the same size and shape!
4. Glue the Wings Onto the Body
Now it’s time to start assembling your bee! Take your wings and glue them onto the body of the bee. Make sure that they’re symmetrical and evenly spaced. Once the glue is dry, your bee will be ready to go. Although the wings don’t actually move, they will make your bee look more realistic and complete. Make sure to take your time and be careful when gluing the wings. If you rush this step, the wings may not be attached properly.
5. Draw on the Face
Next, you’ll need to draw on the face of your bee. This is where you can get creative! You can give your bee any expression that you’d like. Once you’re happy with the face, go ahead and add some googly eyes if you’d like.
Though they aren’t necessary, they do make your bee look even cuter. Make sure to use a black marker to draw on the face and eyes. However, if you don’t have a black marker on hand, any color will do just fine. When you’re done with the face and eyes, move on to the next step!
6. Cut Out the Stripes

Now you’ll need to cut out some stripes for your bee’s abdomen. You can either freehand this or use a template. Once the stripes are cut out, glue them onto the bee’s abdomen in an even pattern.
However, make sure to leave some space between the stripes so that each one is visible. If you’re working with a template, trace out the stripes on the bee and then cut them out. Though the stripes can be any color you wish, the traditional colors are yellow and black.
7. Draw on the Legs
The next step is to draw on the legs of your bee. Again, feel free to get creative with this! Once you’re happy with the legs, go ahead and cut them out with scissors. If needed, use a ruler to measure the length and width of your bee’s legs. Although you don’t need to be precise, making sure the legs are all even will give your bee an aesthetically pleasing look. When you’re done, glue the legs onto your bee in the desired location.
8. Glue on the Legs
Now it’s time to glue on the legs! Start by attaching two legs to each side of the bee’s body. Once all of the legs are attached, turn your bee over and glue on two more legs in between each of the first sets of legs. This will give your bee a total of eight legs. Make sure that all of the legs are securely glued in place. Once your bee is complete, it’s time to have some fun! Your bee can fly around your house, buzz from room to room, and be your best friend. Enjoy your bee creation!
9. Enjoy Your Bee Creation
Now that your bee is complete, it’s time to have some fun! Your bee can fly around your house, buzz from room to room, and be your best friend. Enjoy your bee creation! With a bit of patience and creativity, you can make a bee that will last for years to come. So grab some supplies, get creative, and have fun with it!
By following this article, you should now have a cute and colorful bee that is ready to buzz around your house. Have fun with it! With a bit of patience and creativity, you can make a bee that will last for years to come. So grab some supplies, get creative, and have fun with it!
You Can Check It Out to Gift Wrap a Crochet Blanket
Things to Consider When Making a Bee With Paper
1. Choose the Right Type of Paper:
Depending on the type of bee you want to make, select a suitable paper for your project. If you are making a small honeybee, consider using card stock or construction paper. For larger bees with more details, use heavier poster boards or craft foam sheets.
2. Use Templates:
If you don’t have much experience making paper crafts, consider finding or creating templates online or in magazines that can be used as guides while crafting your bee. Templates can help provide structure and measurements to ensure that your finished product looks professional and matches the desired design.

3. Add Color:
Bees come in a variety of colors depending on species and region, so adding vibrant hues. Consider using colored pencils, markers, or paint to give your bee some life. If you are making a realistic bee, use yellow and black for stripes and patches.
4. Adorn with Accessories:
After the basic structure of the bee is in place, consider adding accessories like wings, antennae, and eyes to enhance its design. For honeybees specifically, add a stinger at the end of its abdomen made from pipe cleaner or craft wire.
5. Glue & Seal:
When all of your craft elements are in place, glue them together securely to prevent any pieces from falling apart. Consider using a sealant like a mod podge or clear spray paint to ensure that all pieces stay together without any damage or smudges.
6. Display:
When your bee is complete, proudly display it in a special spot where you can enjoy its beauty and craftsmanship! Consider mounting the bee onto a board or canvas for extra stability, or make an entire bee-themed collection of crafts to create an eye-catching accent wall.
7. Have Fun:
Making crafts should be a fun and relaxing activity, so don’t worry about perfection or efficiency. Every project is unique, so enjoy the creative process and have fun with it! You may even discover new techniques that can be applied to other projects in the future. Good luck!
8. Be Patient:

Paper crafting requires patience, as every step must be done carefully for the best results. Don’t rush any part of your project; take your time and ensure you are being precise when cutting, gluing and sealing elements together. This will ensure that you end up with a bee that looks great and lasts a long time!
Conclusion
You can make a paper bee with ease by following these simple steps. In no time, you’ll have a whole swarm of buzzing insects to add to your bug collection. These bees also make great gifts for friends and family members who appreciate the finer things in life – like homemade paper crafts!
We hope this guide on how to make a bee with paper was helpful. Please share it with your friends on social media if you find it useful. And be sure to check back here soon for more informative guides like this one.
You Can Check it Out Make Doorstop