
Creating 3D paper flowers is a great project for anyone looking to add some beauty and color to their home. The best part? You can make them from materials you likely already have in your house: construction paper! Whether you’re looking for just something new and exciting, or maybe you need a simple last-minute decoration idea for an upcoming celebration – this craft is perfect.
In this blog post, we’ll be walking through the steps on how to make 3d flowers with construction paper Create these colorful flowers with just a few simple supplies. From start to finish, it should only take about 30 minutes, so get your craft supplies ready and let’s dive into it.

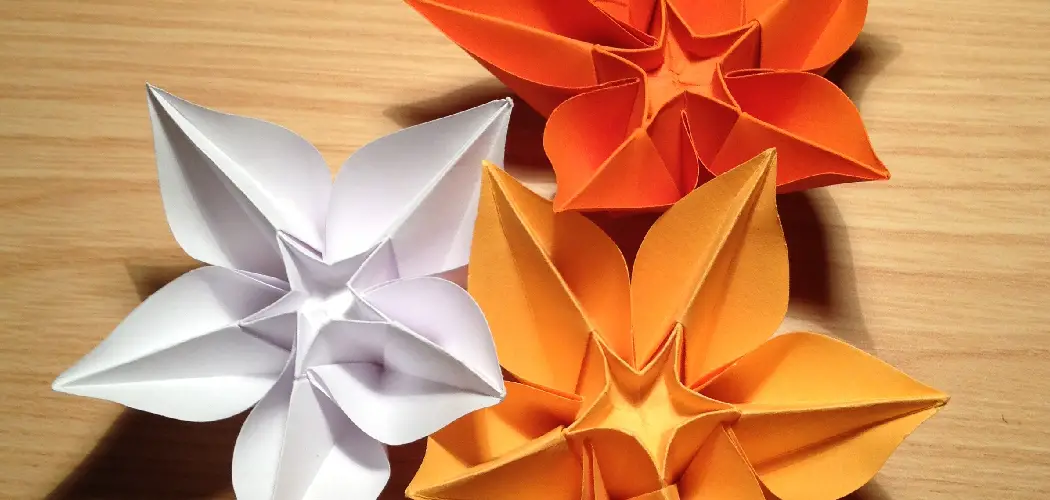
From bright bouquets and shades of pastel, or even elegant monochrome rainbow designs– get ready to be blown away with the stunning results!
What to Keep in Mind When Making 3D Flowers With Construction Paper
1. Thickness of Paper
When making 3D flowers from construction paper, there are a few things to keep in mind. First and foremost, be sure that the paper you select is thick enough for your project. If it’s too thin, it won’t hold its shape when you bend it– so opt for a thicker cardstock-type of construction paper.
2. Color Combinations
The next thing you’ll want to consider is the color combination of your paper flowers. You can go for a classic monochrome style, choose two shades of a single color for an ombre effect, or mix and match vibrant hues. Whatever you decide, make sure the colors will look great together when placed in an arrangement.
3. Working With Templates
If you want to make perfectly symmetrical paper flowers, try using a template or stencil for your project. You can easily find these online, print them off and trace them onto your construction paper. This will help create beautiful shapes that are precise and consistent in size– perfect for a bouquet of 3D paper flowers.

What Will You Need?
Now that we’re familiar with the basics let’s start crafting! Here’s what you’ll need:
- Construction paper in various colors/shades
- Scissors
- Glue stick
- Pencil/pen
- Template (optional)
10 Easy Steps How to Make 3D Flowers With Construction Paper
Step 1: Gather Supplies
Start by gathering all your supplies and preparing your workspace. Gathering and organizing your materials before getting started can help make the process simpler and more efficient.
Step 2: Cut Out Your Petals
If you’re not using a template, start by drawing your petals on paper with a pencil or pen. If possible, draw them in slightly different sizes so that they look natural when assembled into a flower. Once finished, cut out the petals with scissors and set them aside.
Step 3: Fold Petals
Now it’s time to add texture to your paper flowers! Take each petal one by one and fold slightly inwards along the length of the petal– this will give your flower a more three-dimensional look.

Step 4: Glue Petals Together
Now, start assembling your paper flower by gluing the petals together at their centers. Start with the largest petal, and working in a circle, glue each smaller petal above it until you’ve reached the center of your flower. Continue this process until you’re satisfied with the size of your flower.
Step 5: Add a Middle Piece
Once you’ve glued all the petals together, it’s time to add a middle piece for extra dimension and texture. To do this, cut out a circle from construction paper in any color you wish and glue it in the center of your flower.
Step 6: Cut Leaves
After the middle piece is set, cut out some leaves in different shades of green paper. Again, if you’d like to use a template for this step, feel free to do so. The leaves should be slightly larger than the petals and rounded at the edges.
Step 7: Glue Leaves
Take the leaves one by one and glue them on the back of your flower. Start in the center and work your way outwards. Make sure to add enough leaves to create a full, lush-looking flower.
Step 8: Make Stems
To give your paper flowers a realistic look, you may want to include a stem. To do this, simply cut out two thin strips of green paper and glue them together to form the desired shape and size.

Step 9: Glue Stems
Once your item is ready, glue it onto the back of your flower– make sure it’s centered on the leaves so everything looks even. Glue it tightly to make sure it won’t come apart.
Step 10: Add a Final Touch
The last step is optional but adds a nice extra touch– rather than gluing the stem on straight, try crisscrossing the strips of paper for a more natural look. If desired, you may even add some glitter or sequins to the center of your flower to give it a bit of sparkle!
Following these steps, your paper flowers will be ready to display in no time. Whether as a centerpiece for a special occasion or simply just to brighten up your living space – now you can create 3D paper flowers using construction paper in 10 simple steps.
8 Common Mistakes to Avoid
Making paper flowers from construction paper can seem intimidating, but don’t let that stop you! Here are 8 common mistakes to avoid when crafting your 3D flowers:
- Not using thick enough paper. Be sure to choose a cardstock-type of construction paper for the best results. Also, avoid using glossy papers as they’re difficult to work with.
- Not cutting the petals symmetrically or neatly enough. If you’re not using a template, be sure to take your time when drawing and cutting out your petals for the best results.
- Not folding petals correctly or evenly. When folding each petal, make sure to do so inwards along the length of the petal for a 3D effect.
- Not gluing the petals together properly. Be sure to start with the largest petal and glue them together in a circle until you reach the center of your flower.
- Not adding enough leaves. Make sure to add enough leaves at the back of your flower for a full, lush look.
- Making stems that are too thick or short/long. Opt for two thin strips of green paper and make sure they’re glued on tightly in the center of your flower’s backside.
- Not crisscrossing the stem for a more natural look. If desired, try crisscrossing your stem strips before gluing them on to add more texture and realism.
- Not adding a final touch (optional). To further personalize your paper flowers, feel free to add some glitter or sequins in the center of the flower.
With these tips in mind and a little bit of patience, you’ll be able to make beautiful 3D paper flowers from construction paper like a pro! So, don’t hesitate to get creative and have fun with it– the possibilities are endless!

Frequently Asked Questions
How Long Will It Last?
3D flowers created with construction paper can last a very long time, especially if they are kept in a dry environment and away from direct sunlight. They will still retain their vibrant colors and shape since the paper is quite durable! It will also stand up better to humidity and other environmental conditions than other paper art mediums.
What Kind of Construction Paper Should I Use?
The best kind of construction paper to use for making 3D flowers is cardstock, as it is much thicker and more durable than regular construction paper. The heavier weight will help the flower stay together without needing too much glue or tape. Colored cardstock is also a great choice because it will help bring out the colors of your flower and make it even more vibrant.
What Other Materials Do I Need?
In addition to construction paper, you’ll need a pair of scissors, some glue, and some clear tape. You’ll also want to have some string or ribbon handy for attaching the flower to a stem or branch. You may also want to consider adding colorful beads, glitter, sequins, and other decorations to your 3D flower for extra sparkle!
Conclusion
Crafting 3D flowers is a great way to bring some vibrant and intricate color into your home. Whether you’re making these flowers for yourself or as a gift, they are sure to be appreciated by viewers of any age. Crafting projects such as these not only keep us creatively engaged but also provide us with a unique sense of accomplishment when we take the time to create something with our own two hands.
So, if you’re looking for an interesting paper crafting project that’ll impress your friends and family, try making some 3D flowers! You may discover a new passion along the way. Follow the steps on how to make 3d flowers with construction paper outlined above to create a colorful bouquet of paper flowers with construction paper and let your creativity bloom!