
Do you ever look at the stuff in your office and wish it didn’t feel so drab? Have you been searching for some simple projects to brighten up your workspace and give it a personal touch? Decorating a clipboard is one easy way that will help you add some charm to any place in no time. This project won’t cost much or require advanced craft skills, yet it offers an unlimited amount of creative potential.
Whether you choose brightly colored washi tape to decorate the edges of the clip area or dress up its flat surface with an eye-catching pattern, manually embellishing this functional tool can infuse vibrancy into any space. Ready to join us on our fabulous decorating journey? Read on to learn how to decorate a clipboard.

The Benefits of Decorating a Clipboard
1. To Stay Organized
A clipboard is an essential tool for any office, classroom, or workstation. It provides a convenient way to keep papers organized and accessible at any time. Its flat surface also creates the perfect canvas to add to your personal style. This subtle yet meaningful tweak can motivate you during the mundane tasks of daily life. With just a few accessories, it will become an eye-catching reminder of your creative spirit.
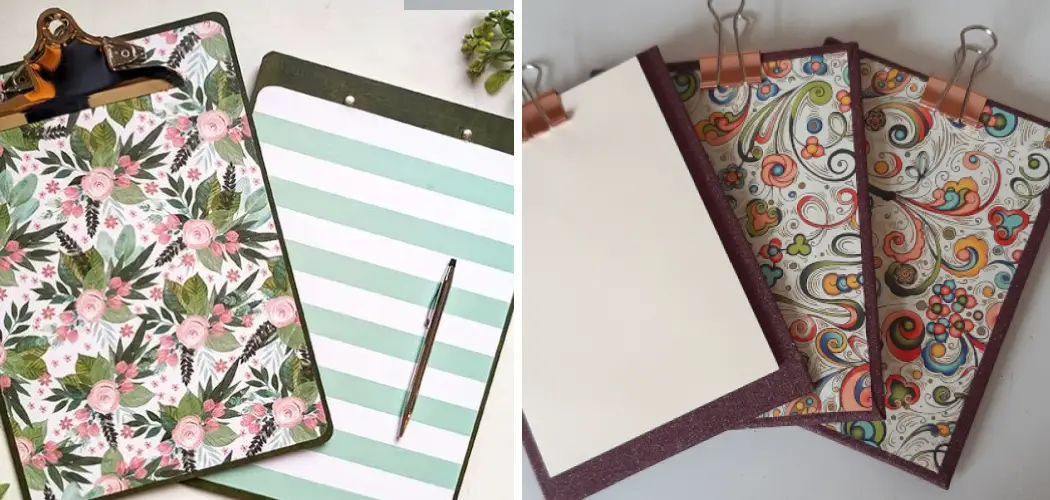
2. To Create a Personalized Look
Adding decorations to a clipboard can transform its plain looks into something unique and eye-catching. Whether you choose bright colors or classic patterns, it’s the small details that will give personality to any workspace. Get ready to show off your original ideas!
Required Items
Before getting to work, make sure you have the following items at hand:
- A clipboard of your preferred color and size
- Washi tape, colored paper, or any other decorative elements
- Pencil and scissors
- Glue or adhesive (optional)
How to Decorate a Clipboard in 10 Easy Steps
Step 1: Gather the Supplies
The supplies you’ll need for this project are easy to find and inexpensive. Some items like patterned scrapbook paper, stickers, or washi tape can already be found in your home. However, if you’re looking for something specific, check out your local craft store or browse the internet.

Step 2: Choose a Color Scheme
Next, determine the colors you want to use in your project. If you want an elegant look for your clipboard, choose neutral hues such as white, gray, and beige. For a bolder design, opt for bright colors like yellow, teal, and pink. Feel free to mix and match different shades until you achieve the look you’re going for.
Step 3: Cut Your Paper or Washi Tape
Cut your desired paper or washi tape into thin strips of various sizes. Use scissors to make sure all pieces have straight edges. You can also use pre-cut decorative elements such as stars, circles or any other shape.
Step 4: Place the Elements
Once you have all your supplies ready, start adhering them to the clipboard. You can create a pattern by placing two strips of washi tape on each side of the clip area. For an even more modern look, arrange the tape in a crisscross pattern. Alternatively, you can cover the flat surface of the clipboard with paper or stickers.
Step 5: Secure The Items
After arranging your decorative elements on the board, secure them with glue or adhesive. Make sure that all the items are firmly attached to avoid any damage that could be caused by accidental movement.
Step 6: Add Finishing Touches
Use a pencil to trace any desired shapes on the flat surface of your clipboard. You can add circles, stars, or even words to create an original look. Then, use scissors and colored paper to cut out the figures you’ve just drawn. Finally, secure them with glue to the clipboard’s flat area.

Step 7: Stand Out
To make your clipboard stand out even more, add some extra embellishments such as stickers or buttons. You can also create a unique border along the edges of the clip area by using washi tape in different colors and patterns.
Step 8: Color Coordinate
If you want to take your clipboard to the next level, consider coordinating its colors with the rest of your workspace. Try to find items that match or complement the colors and patterns on your board. For instance, if you’ve used a blue paper, look for a matching pen holder or wall art piece.
Step 9: Place it Somewhere Special
Now that you’ve finished decorating your clipboard place it in an area where it’s easily visible. Doing so will help you appreciate the hard work and creativity put into this project every time you look at it. It can also serve as a source of inspiration for future projects.
Step 10: Enjoy the Results
There you have it! Your unique and stylish clipboard is now ready to make a statement. No matter how busy your workspace gets, this vibrant board will be there to remind you of its cheerful presence. You can take pride in knowing that it’s one-of-a-kind and offers an original touch to any place in your home or office.
Whether you choose to decorate a clipboard with washi tape, paper, or stickers, the possibilities for creativity are endless. You can add colors and patterns that will make your workspace come alive and give it an unmistakable personal flair. So now that you know how to decorate a clipboard.
8 Common Mistakes to Avoid
1. Not Taking Measurements
Before adhering any decorative elements to a clipboard, make sure you take the correct measurements. This will help you determine how much material you’ll need and avoid creating a design with too many pieces that could cause your clipboard to look cluttered.

2. Using Too Many Colors
Adding too many colors can make your clipboard look overwhelming and messy. Stick to a color scheme that works with the overall design of your workspace for a more cohesive look.
3. Not Choosing the Right Material
The materials you use will determine the durability of your design. For example, if you’re planning on using adhesive, make sure it’s strong enough to securely hold the decorative elements in place. Similarly, if you’re using washi tape, opt for a waterproof version to extend its lifespan.
4. Not Securing the Elements
Adhere all decorative items with glue or adhesive to avoid any movement that could damage your clipboard. While this may seem like an extra step, it will ensure that your design lasts longer and looks great.
5. Not Testing the Color Combinations
Before committing to a color scheme, try out different combinations on paper until you find the right one. This will help you determine if certain colors work better than others and prevent any future mistakes.
6. Not Thinking of the Overall Design
When decorating a clipboard, don’t forget to consider how all the elements work together. Look at it from different angles and make sure that none of the pieces clash with each other.
7. Not Taking Time to Perfect It
Take your time when creating your design. Even if you think something looks good enough, take a few extra minutes to go over the details. This will guarantee that your clipboard looks flawless and stands out from the rest.

8. Not Adding Finishing Touches
Adding touches such as stars or circles can give your clipboard an extra edge. These elements may seem small, but they can really elevate the overall design of your project and make it look more complete.
By following these simple tips, you can make sure that your clipboard looks amazing every time you use it. With a little bit of creativity and the right materials, decorating a clipboard can be an enjoyable and rewarding experience. So unleash your inner artist and create the ultimate accessory for your workspace!
Frequently Asked Questions
How Long Will It Take to Decorate a Clipboard?
It depends on the type of decorations you choose and how intricate your design is. You can generally expect to spend an hour or two completing a simple decoupage project, while more complex projects may take several hours.
What Kinds of Decorations Can I Apply?
The possibilities are almost endless! Common materials used for decorating clipboards include paper, fabric, vinyl stickers, and ribbon. You can also use paint, markers, and other craft supplies to create one-of-a-kind designs.
Conclusion
Crafting with a clipboard can help you brighten up your workspace and make mundane tasks more fun. With a bit of creativity, courage, and effort and this guide on how to decorate a clipboard, not only can you have a cute decorative piece but also a useful tool to make your workflow instructions easier to handle.
Try to think outside the box when looking for materials. Recycled scrapbook paper or vintage magazines can offer inspiring alternatives to what is typically available at stores.
Also, spray paint can add an extra twist if the desired color isn’t already in stock. No matter how you customize it, let this project be your reminder that work doesn’t always have to be boring—even organizing notes and documents can be a creative endeavor!
Let’s vow to make our clipboards even prettier than they already are. So go ahead—grab those construction scissors and let the crafting begin!