
Are you an avid knitter looking for a new and exciting challenge? Stripe knitting in the round is an incredibly gratifying endeavor that can transform your favorite projects into beautiful creations. This technique is relatively simple to master, so even if you’re a beginner knitter, you can start making spectacular stripe patterns without breaking a sweat!

This guide’ll walk you through the basics of creating stripes and some helpful tips to take it up a notch. If you’re ready to dive in, here are the steps you need to know. Just make sure you have the right supplies.
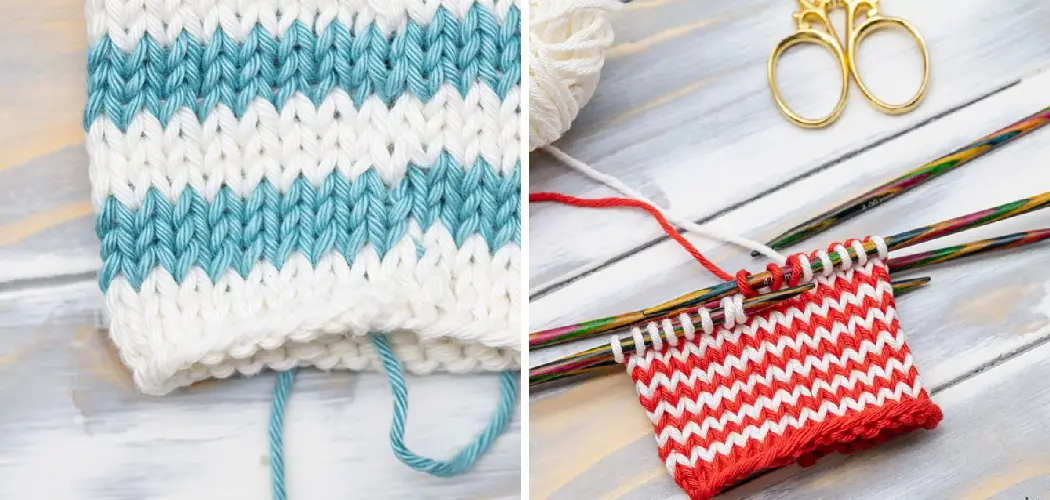
Read on for everything you need to know about how to knit stripes in the round!
What Will You Need?
To get started, you’ll need the following supplies:
- Yarn in two or more colors of your choice.
- Circular knitting needles (the size will depend on the yarn weight and pattern).
- Stitch markers.
- Scissors.
- Tapestry needle.
Now you’ll be ready to start knitting stripes in the round!
8 Easy Steps on How to Knit Stripes in the Round
Step 1: Choose Your Yarn
The first step in knitting stripes in the round is to select the yarn you will use. Depending on the complexity of the stripe pattern you want to create, you’ll need two or more colors. Colors can be contrasting for a bold effect or similar tones for a subtle blend.
Remember that the yarn’s weight and texture should be consistent across all chosen colors to ensure your stripes come out even. Remember, the beauty of knitting your own creations is that you have complete control over the color palette, so let your creativity shine!

Step 2: Cast On and Join in the Round
The second step involves casting on your stitches. The number of stitches you will need depends on your specific pattern and the desired size of your project. Once you’ve cast on the right number of stitches with your first color, you’ll need to join your work in the round.
Make sure your stitches are not twisted on the needles before you join. This is important because it ensures your stripes will align properly. Use a stitch marker to mark the beginning of the round. Now, you’re all set to start knitting your first round!
Step 3: Knit Your First Round
Now that you’ve joined in the round, it’s time to start knitting! Knit the first round using the first color of yarn according to your pattern. For a basic stripe, you can knit every stitch in the round. Just remember to slip the stitch marker when you reach the end of your round.
This will help you keep track of where each round starts and ends. You’re ready to introduce the second color when you’ve completed the first round. Remember, the length of each colored stripe is completely up to you.
Step 4: Introduce the Second Color
To begin your second round with a new color, simply start knitting with your second yarn color. Do not cut the first color yarn; let it hang down the inside of your work.
This lets you easily pick it up again when you’re ready to switch colors. As you knit with the second color, ensure that the yarn isn’t pulled too tightly at the join, which could cause puckering. Continue knitting in the round with the second color for as many rounds as you want this stripe to be.
Step 5: Switch Back to the First Color
After you’ve knitted in the second color for the desired number of rounds, it’s time to switch back to the first color. Pick up the first color yarn left hanging down the inside of your work and simply start knitting with it. Like with the second color, ensure the yarn isn’t pulled too tightly at the join to avoid puckering.

Continue knitting in the round with the first color for as many rounds as you want this stripe to be. The process of alternating colors is what builds your stripes. Keep switching colors after each set of rounds to continue making stripes.
Step 6: Continue Alternating Colors
At this stage, continue the process of alternating colors for each stripe. How often you switch colors and the width of each stripe is entirely up to your creative discretion. If you want to create an even striped pattern, try to maintain the same number of rounds for each color.
On the other hand, varying the number of rounds for each color can create a unique and dynamic effect. Remember always to leave the yarn you are not using hanging inside the work so you can easily pick it up again when it’s time to switch.
Step 7: Finishing Your Work
Once you’ve completed all the rounds and are satisfied with the length and pattern of your stripes, it’s time to finish your work. Cut the yarn leaving a tail long enough for weaving in later (usually about six inches). Use your tapestry needle to thread this tail and weave it in on the inside of your work. Make sure to do this for all colors. Congratulations, you have successfully knitted stripes in the round!
Step 8: Admiring Your Work
Take a step back and marvel at the stunning stripes you’ve created. Admire the alternating colors, the perfect symmetry, and the unique pattern you’ve crafted with your own two hands. You’ve successfully mastered the technique of knitting stripes in the round.
Whether you’ve created a beautiful scarf, a stylish hat, or a cozy blanket, you can take pride in your work. As you continue to practice, experiment with different colors, patterns, and stripe widths – the possibilities are endless when you’re the one in control of the needles!
By following these steps, you now understand how to knit stripes in the round. With practice and experimentation, you can create stunning projects with gorgeous stripes! Don’t be afraid to get creative – let your imagination take control and unleash your inner knitting genius.

5 Additional Tips and Tricks
- Avoid the Jog: In circular knitting, the beginning of a new round is often noticeable, disrupting the continuity of your stripes. To avoid this, try the “jogless stripe” technique which involves slipping the first stitch of the new color round.
- Handle Loose Ends: To keep your work tidy, weave in your ends as you go along. This can be done by twisting your old and new yarn colors at the beginning of each round.
- Control Tension: Keep an eye on your tension when changing colors. If the stitches are too tight, they may cause puckering, and if they are too loose, they can lead to gaps in your work.
- Try Helix Knitting: If you’re working with multiple stripes, helix knitting can ensure each stripe is a separate spiral, preventing a visible step between colors.
- Practice: Lastly, remember that practice makes perfect. The more you practice knitting stripes in the round, the more seamless and professional your end product will look.
With all these tips, you can easily create a knitted masterpiece with perfect stripes. So grab those needles and get knitting!
5 Things You Should Avoid
- Avoiding New Techniques: Be bold and try new techniques such as helix knitting or the jogless stripe technique. They may seem intimidating at first, but with practice, these methods can greatly improve the look of your stripes.
- Neglecting Tension: Maintain an even tension throughout your work. Ignoring this can lead to an uneven texture in your stripes, with some areas too tight and others too loose.
- Leaving Ends Loose: Don’t leave your ends hanging. Always weave them in as you work to maintain a clean, professional look.
- Rushing Your Work: Knitting requires patience, especially with complex patterns like stripes. Take your time with your work. Take your time to ensure each stitch is perfect.
- Skipping Practice: Remember, practice makes perfect. Don’t expect to nail it on the first go. Even experienced knitters need to practice new techniques. Be patient with yourself and take it one stitch at a time.
Avoiding these common pitfalls will help you create perfect stripes in your knitting projects. With the right approach and practice, you’ll produce beautiful knitted pieces quickly!

5 Patterns to Try
- Zig Zag Stripes: Create a bold zig-zag pattern with multiple colors for an eye-catching look.
- Rainbow Stripes: Add some fun to your project by using up all the rainbow colors!
- Gradient Stripes: Blend one color into another for a subtle but beautiful effect.
- Offset Stripes: Move one color forward and one back to create a unique pattern.
- Spiral Stripes: Create spirals of different colors for an interesting look.
With these 5 patterns, you’ll have many inspiring ideas for your next knitting project! Have fun experimenting, and don’t forget to practice to get the perfect stripes in your work
Conclusion
Now that you know the basics of how to knit stripes in the round, you can easily make a unique and interesting hat or scarf. Start by gathering the materials, deciding on the color combinations for your stripes, and then casting on.
Ensure that you have enough yarn for strands as you switch between colors and that each row is perfectly secure, not accidentally undo all of your hard work!
Finally, when it’s time to bind off and finish your knitted masterpiece, make sure it looks uniform, so be mindful of where each colored stitch meets each other. When done correctly, knitting stripes in the round is a great way to bring life into any project easily. Have fun with it!