
Are you looking to try your hand at a craft that’s both unique and rewarding? Tapestry knitting is the perfect activity for creative hobbyists of all ages! As one of the oldest forms of fabric-making, tapestry knitting is steeped in rich history and culture.

Not only can it be incredibly fun and relaxing, but creating handmade projects with this traditional art form also allows you to express yourself artistically. Get ready to learn how to create beautiful works of art as we take you through everything you need to know about how to knit a tapestry!
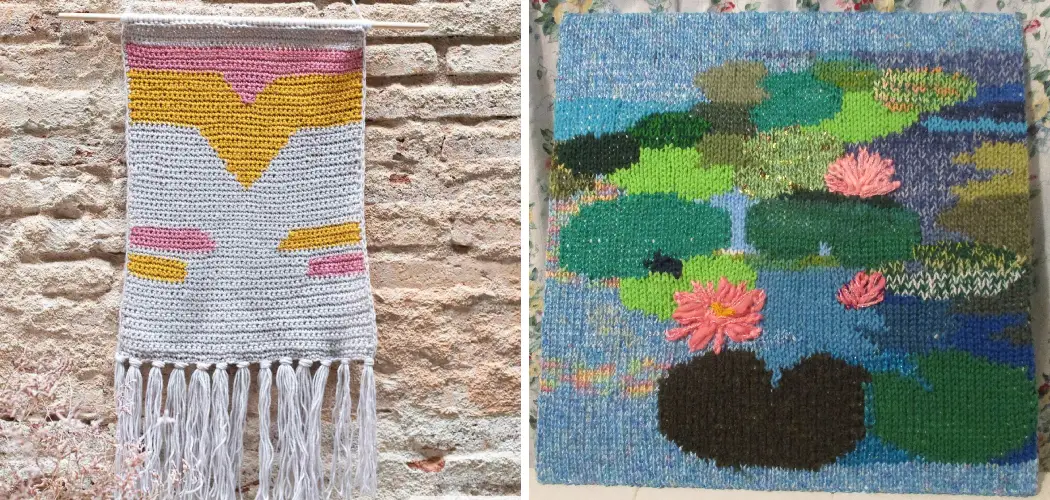
Step-by-step Guidelines on How to Knit a Tapestry
Step 1: Gather Your Tapestry Knitting Supplies
Before you can get started, gather all the supplies you will need for your project. You’ll need:
- Yarn (Various Colors)
- Needles (Wooden or Plastic)
- Scissors
- Tapestry Needle (for Weaving in Ends)
- Stitch Markers or Clips
- Scrap Paper and Pen
Step 2: Choose a Pattern
Once you’ve gathered up all the supplies, it’s time to choose your pattern. There are plenty of free tapestry knitting patterns available online that you can download and use for yourself. You can also find patterns in books or magazines. Look for intricate designs and beautiful color combinations that will give your project a unique touch!
Step 3: Cast On
Your project gets off the ground with this step. You’ll need to cast on by looping yarn around your needle several times until you have the correct number of stitches. This can be tricky if you don’t have much experience with knitting. If this is your first time, refer to a helpful video tutorial or ask for help from a more experienced knitter.
Step 4: Begin Knitting the Tapestry Pattern
Now it’s time to begin knitting your tapestry pattern! When following a specific pattern, you’ll need to pay careful attention to the instructions and keep track of your row count. You can mark the beginning and end of each round with a stitch marker or clip, which makes it easier to know when one round ends and another begins.

Step 5: Change Colors as Necessary
Your tapestry pattern will likely involve various colors of yarn. When it’s time to switch from one color to another, you’ll need to do a few simple things. First, tie off the current color by looping it around the new color and then pulling it tight. Then insert your needle into the next stitch with the new color and continue knitting as normal.
Step 6: Weave in Ends
As you’re knitting your tapestry, you’ll need to weave in the ends of each color when it’s time to change yarn. To do this, simply thread the end of the yarn through a tapestry needle and then weave it into the back of your work. This helps keep your project neat and tidy by hiding any loose ends.
Step 7: Bind off
When you’ve completed the desired pattern, it’s time to bind off. To do this, insert your needle through the last two stitches on your knitting needle and then pull the yarn through them. Tighten the loop around the needle with your finger and then cut off any excess yarn. But be careful not to cut the yarn too close, or your work could unravel!
Step 8: Block Your Tapestry
Now that you’ve finished knitting your tapestry, it’s time to block it. Blocking helps even out stitches and also shapes your project into its desired form. You can do this by wetting your project with lukewarm water and then pinning it to a foam mat or towel. Let it dry overnight and voila!
Step 9: Sew On Decorative Edging or Fringe
You can also take this opportunity to sew on decorative edging or fringe for an added touch of personality. This is completely optional, of course, but it’s a great way to make your tapestry even more unique! Grab some coordinating yarn and practice making knots or braids with your tapestry needle.
Step 10: Frame and Hang Your Tapestry
Once you’re finished with the last step, your tapestry is ready to hang! You can always frame it if you want, or just hang it as is. It’s up to you – the possibilities are endless! However you choose to display it, your handmade tapestry will be sure to bring a unique and personal touch to any room.

Step 11: Enjoy Your Creation and Get Inspired for Your Next Project
Finally, sit back and admire your masterpiece! Crafting a tapestry out of yarn is no easy feat, so be sure to take the time to appreciate your hard work. Who knows, maybe you’ll get inspired to try another project soon! Always remember that the key to successful tapestry knitting is patience and practice.
Now that you know how to knit a tapestry, it’s time for you hit the ground running and start creating your own unique works of art. Have fun knitting!
Following along with these steps should help guide you in creating your own tapestry, however, don’t be afraid to get creative! There are many variations of this craft including finger knitting, arm knitting and even loom weaving – the possibilities are endless. Experimenting with different patterns or techniques can take your project to the next level. Have fun and happy crafting!
Tips and Tricks for Tapestry Knitting Success
- Don’t Be Afraid to Experiment With Different Colors and Patterns.
- Take Your Time and Enjoy the Process – Tapestry Knitting Can Be Quite Relaxing!
- Always Keep Track of How Many Rows You’ve Completed, as It Will Help You Stay on Track With the Pattern.
- We Have Loose Ends as You Go to Help Keep Your Project Looking Neat and Tidy.
- When It’s Time to Bind Off, Make Sure You Do It Tightly So That Your Tapestry Won’t Come Undone.
- If You Need a Break From Knitting, Take One! It’s Important to Give Yourself Time to Rest and Recharge.
- Have Fun! Tapestry Knitting is a Great Way to Express Yourself Artistically and Create Something Unique and Beautiful. Enjoy the Process, No Matter How Long It Takes You.
Tapestry knitting can be an incredibly rewarding experience for anyone who enjoys crafting and creating handmade items. With just a few basic supplies and some practice, you can make your own unique tapestry of any size and with any pattern you can dream up. Get creative and have fun – it’s the best part! Happy knitting!

With these 11 steps, you’re now well on your way to becoming a tapestry knitting master. Just remember to take your time, practice patience, and enjoy the process. Whether
Frequently Asked Questions
Q: How Long Does It Take to Knit a Tapestry?
A: The amount of time it takes to knit a tapestry will depend on the size and complexity of your project, as well as your own skill level. However, most small projects should take about 3-4 hours to complete.
Q: What Type of Yarn Should I Use?
A: When it comes to tapestry knitting, wool and cotton yarns are the most popular choices. Both kinds are incredibly versatile and easy to work with, so it’s really up to personal preference which one you choose! Of course, you can always experiment with other types of yarns as well.
Q: How Do I Change Colors in a Knit Tapestry?
A: Whenever it’s time to change colors, simply tie off the current color by looping it around the new color and then pulling it tight. Then insert your needle into the next stitch with the new color and continue knitting as normal. Make sure to always weave in the ends of each color when it’s time to change yarn.
Q: What Other Accessories Do I Need?
A: In addition to your needles and yarn, you may also want to invest in a few other accessories for tapestry knitting. Stitch markers can help keep track of your row count, while a tapestry needle will make it easier to weave in ends and attach fringe or edging. Finally, you may also want to pick up some pins and foam mats for blocking your project when you’re finished.

Conclusion
To sum up, knitting a tapestry is an enjoyable and meaningful craft that can add personalized beauty to any room. You can create different knots, combine materials, and get creative with color to make something entirely unique.
Though it may seem daunting at first, once you understand the basics, knitting a tapestry can be accomplished in no time. It is important to use quality materials that will last throughout the years so your lovely homemade tapestry will look just as amazing many years down the line.
Above all else on how to knit a tapestry, give yourself permission to practice and experiment – this craft is all about your individual style and expression! So don’t be afraid of trying new techniques or making mistakes – they are part of the learning process! Knitting a tapestry is an easy way to bring art from your imagination into reality – enjoy it in its entirety!