
Seed stitch, or moss stitch, is a textured knitting pattern that produces a reversible fabric; it looks the same on both sides. It makes a great choice for scarves and blankets because of its texture and warmth. This versatile stitch can create all sorts of pieces—from garments to accessories. Plus, it’s an easy stitch to learn and works quickly.
The biggest advantage of seed stitch is that it’s a reversible pattern. That means the fabric will still look the same no matter which side you are looking at. It also creates a textured knitted fabric with lots of texture and warmth, which makes it a great choice for scarves and blankets.

The seed stitch pattern also helps to even out any inconsistencies in tension so your piece looks neat and even. In this blog post, You will learn how to knit seed stitch in detail.
Materials You Will Need
- Circular knitting needles
- Yarn in any color of your choice
- Scissors
- Tape measure or ruler
- Tapestry needle for weaving in ends
- Stitch markers (optional)
- Notebook and pen for tracking stitches (optional)
- Row counter (optional)
- Crochet hook (optional)
Step-by-step Instructions for How to Knit Seed Stitch
Step 1: Inspect Your Yarn
Before you start, inspect your yarn and look for any knots or tangles. Gently pull apart the fibers to untangle them if necessary. You are using the long-tail cast-on method, cast an even number of stitches onto your circular needles.
Step 2: Place Stitch Markers (optional)
If you are using stitch markers, place them on your needles at the beginning and end of the row. This will help you keep track of how many rows you have knitted and can be especially helpful if you’re doing a larger project.

Step 3: Knit the First Row
Knit the first row by alternating between knit and purl stitches. Start with a knit stitch (K) followed by a purl stitch (P). Continue this pattern until you get to the end of the row. For the second row, purl all knit stitches and knit all purl stitches. Continue this pattern until you reach the end of the row.
Step 4: Cast Off Your Stitches
Once you’ve reached your desired length, cast off all the stitches by knitting two stitches together, then slipping the stitch from your right needle to your left needle. Continue this pattern until only one stitch is left on your right needle.
Step 5: Weave in Ends
Using your tapestry needle, weave in any loose ends. This will help secure your stitches and keep them from unraveling. If desired, block your project to even out the stitch tension and give it a professional look. To do this, lay your project on a blocking board, pin it in place, and lightly dampen the fabric with a spray bottle.
Now that your project is finished, you can enjoy the fruits of your labor. Whether making a cozy scarf or an airy shawl, the seed stitch is perfect for adding texture and warmth to any project.
Tips and Troubleshooting for Knitting Seed Stitch
- Keep track of your stitch count, as you will need an even number of stitches at all times. If you have difficulty counting the number of stitches on your needles, try using a row counter or keeping track of the pattern in a notebook.
- If you find that your pattern is pulling too tightly, try using larger needles. This will help create more space for the stitches and make them easier to knit.
- If you have difficulty forming each stitch, use a crochet hook to pull the next stitch through the previous one before knitting it. This will make it much easier to keep your pattern consistent.
- Have fun with the color of your yarn! Seed stitch looks great in solids, but it can also be used to add splashes of color to any project. Try out different combinations for unique results.
- Use seed stitch in an intarsia or Fair Isle pattern if you’re looking for a more challenging project. This will add an extra layer of complexity and texture to your project.

More Advanced Knitting Techniques for Seed Stitch
Once you have mastered the basics of seed stitch, there are a few more advanced techniques you can explore. Try out these tips to add some flair to your next project:
- Create a gentle wave effect by increasing and decreasing the number of stitches on each row. This will make your project look more dynamic and visually interesting.
- For an added touch of texture, use a chunky or bulky yarn for your seed stitch projects. The extra bulkiness will add depth and dimension to your stitches.
- Try combining other stitch patterns with a seed stitch for a unique look. This can be done by alternating between rows of seed stitch and other patterns, such as ribbing or garter stitch.
- If you’re doing an oversized project, use a seed stitch to create cables or textures. This will give the fabric more structure and make it look more professional.
- Use seed stitch to add texture to accessories like hats and scarves. The thicker texture will keep you warm during the colder months and make for a stylish wardrobe addition.
Can You Make Any Modifications When Knitting Seed Stitch to Create a Different Pattern?
Yes, it is possible to make modifications when knitting seed stitches to create a different pattern. By increasing or decreasing the number of stitches on each row, you can create a variety of textures and patterns. You can also use different types of yarn and combine other stitch patterns with a seed stitch for even more unique results.

Not only is it possible to modify the pattern of seed stitch, but it’s also possible to customize the look of your fabric by using different types of yarn and needles. For example, use chunky yarn for added texture or larger needles for an airy look. You can also combine yarn colors to create a unique pattern or motif.
What is the Difference Between Knitting Seed Stitch in a Pattern and Plain Knitting?
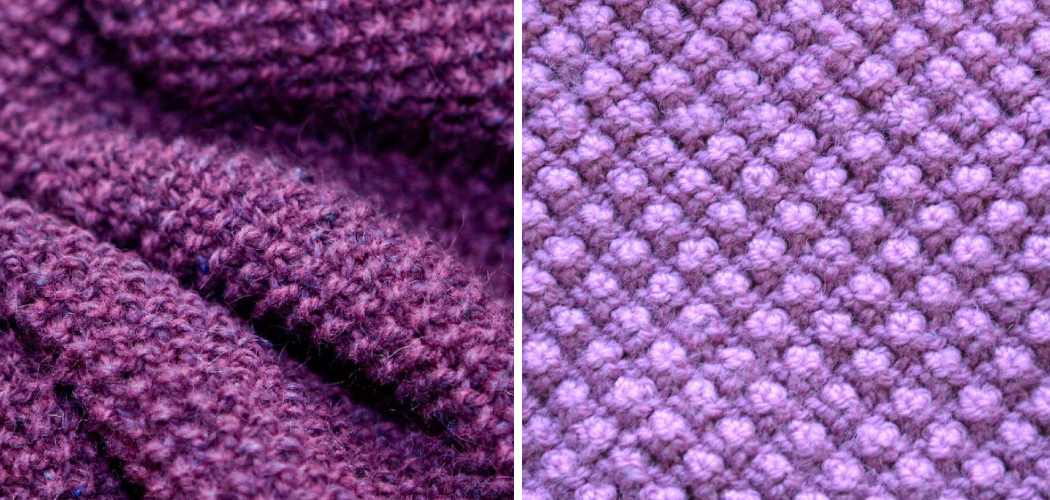
The texture is the main difference between knitting seed stitches in a pattern and plain knitting. Each row will have alternating knit and purl stitches following a seed stitch pattern. This creates a distinct texture that resembles small seeds or diamonds. Plain knitting, on the other hand, is simply making rows of knit stitches across the fabric, which produces a much smoother texture.
Another difference between knitting seed stitch and plain knitting is tension. Seed stitch requires more tension because of the alternating knit/purl pattern, whereas plain knitting is much looser since it only requires one type of stitch. This means that you may need to use slightly larger needles when working with seed stitches to keep your stitches from becoming too tight.
Are There Any Special Techniques You Need to Learn to Knit Seed Stitch Successfully?
Yes. Even though seed stitch is a relatively simple knitting pattern, there are still some special techniques that you’ll need to learn to knit the pattern correctly. The main technique that you will need to master is how to make sure your stitches are even throughout the entire piece of knitting. This involves ensuring that the number of knit and purl stitches on each row is the same and that each stitch has been worked to the correct height.

Another technique you’ll need to learn to knit seed stitch successfully is how to manage yarn tension. Keeping your yarn tension even throughout the knitting process is important to ensure that the fabric you produce is even and consistent. This means ensuring that your yarn strand is not too loose or tight while you are knitting, which can be done by keeping your tension on each stitch just right.
Conclusion
One of the biggest disadvantages of knitting seed stitch is that it can make for a slightly looser fabric, which could be better for some projects. Additionally, since seed stitch requires an even number of stitches to work properly, it may be difficult if you are trying to create an odd-numbered pattern with this technique.
In conclusion, knitting seed stitch is an easy way to add texture and style to any project. Whether you’re a beginner or an experienced knitter, learning how to knit this stitch can be beneficial.
Knowing the basics of seed stitching will make it easier for you to create various projects and patterns. Reading this post has helped you learn how to knit seed stitch. Make sure the safety precautions are carried out in the order listed.