
Are you looking for a new challenge to tackle in knitting and crochet? Do you want something intricate to show off your skills? If so, entrelac is just what you need! Entrelac knitting creates rabbit foot or basket weave patterns that look remarkably complex and professional. Although it may seem daunting at first glance, entrelac is relatively straightforward once you have mastered the basics.

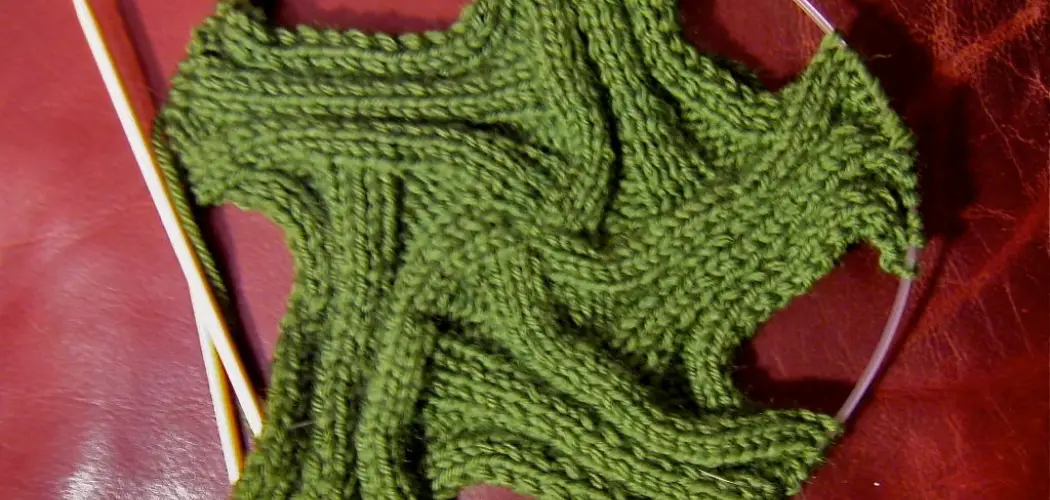
Entrelac knitting comprises smaller squares or diamonds that are joined together to create a larger, woven-looking piece. The results are visually stunning and can be incorporated into various projects such as scarves, blankets, and garments.
In this blog post, we will explore how to knit entrelac step by step, providing tips and tricks to help any knitter make an impressive finished product. So, let’s begin this beautiful journey into the amazing art of entrelac!
What Will You Need?
Before diving into the knitting process, let’s ensure you have all the necessary materials. To knit entrelac, you will need:
- Yarn of your choice in at least two different colors
- Knitting needles appropriate for your yarn weight
- A crochet hook (optional)
That’s it! You don’t need any special tools or equipment to start knitting entrelac.
10 Easy Steps on How to Knit Entrelac
Step 1: Cast On
To begin, cast on a multiple of ten stitches in your first color. For example, if you want to make a small practice swatch, you can cast on 20 stitches. If you want a larger project, you can cast on 50 or more stitches.
Step 2: Set Up Triangles
Start knitting the base triangles. This is done by incorporating the first stitch and then turning your workaround. On the second row, purl two stitches, then turn your work again.
Continue to knit one more stitch than the previous row and turn your work until you have knitted all ten stitches. Repeat this process for all the stitches cast on. At the end of this step, you should have a row of base triangles. Remember, these triangles form the foundation of your entrelac pattern.
Step 3: Right-Side Triangles
The next step in knitting entrelac is to create the right-side triangles. Start with your second color of yarn. Knit the first stitch, then lift the adjacent stitch from the base triangle with your right needle and knit it together with the first stitch. Turn your work and purl back across these two stitches.

In the next row, knit to the last stitch, lift the adjacent stitch from the base triangle, and knit it together with the previous stitch. Repeat this process, each time adding one more stitch from the base triangle until you have formed the right-side triangle. Repeat this process across the row until you have a row of right-side triangles. This completes the right-side triangle section of your entrelac pattern. In the next step, we will start forming the squares.
Step 4: Squares
With your first yarn color, we will now start forming the squares. Knit the first stitch from the previous right-side triangle. Then, lift the adjacent stitch from the base triangle and knit it together with the stitch you just knitted. Turn your work and purl across these two stitches, just like the previous step.
Continue the process, knitting one more stitch and then lifting and knitting the adjacent stitch from the base triangle. Repeat this until you have incorporated all stitches from the base triangle. You should now have a square! Continue this process across the row until you have a row of squares. This forms the mid-section of your entrelac pattern. Next, we will tackle the left-side triangles.
Step 5: Left-Side Triangles
Now, it’s time to create the left-side triangles. Start with your second color of yarn. First, knit the stitches from the previous square. Then, lift the adjacent stitch from the base triangle and knit it together with the last stitch from the square. Turn your work, and purl back across all the stitches you just worked.
In the next row, knit to the last stitch, lift the adjacent stitch from the base triangle, and knit it together with the last stitch. Repeat this process, knitting one more stitch from the base triangle until you have used all stitches from the base triangle. You should now have a left-side triangle!
Step 6: Repeat the Process
Repeat steps 3 through 5 (Right-Side Triangles, Squares, and Left-Side Triangles) until you’ve reached the desired length for your project. Remember always to start a new row with the Right-Side Triangles, follow with Squares, and finish with Left-Side Triangles. Ensure you are consistent with the color changes to maintain the entrelac pattern.
This repetition is what creates the beautiful, intricate looking entrelac pattern. Keep practicing, and soon, you’ll be knitting Entrelac like a pro.
Step 7: Finishing Up
As you reach the end of your project, you’ll need to close off the Entrelac pattern with a final row of triangles to match your base row. To do this, follow the exact instructions as for the left-side triangles in Step 5, but continue to decrease, rather than increase, the number of stitches in each triangle.

This will create a mirrored version of your base row, giving your Entrelac knitting project a neat, symmetrical finish. Keep knitting until all stitches from the base triangle are used up. You should finish with a row of triangles that mirrors the base triangles. Congratulations, you have just completed your first piece of entrelac knitting!
Step 8: Binding Off
The final step in your entrelac knitting project is to bind off. This is a crucial step as it secures the final row of stitches to prevent them from unraveling. To bind off, start on the right side of your work and knit two stitches together. Then, slip the first stitch over the second one. Repeat this process until only one stitch remains. Cut your yarn, leaving a tail. Pull the tail through the last stitch to secure it.
Step 9: Weaving in Ends
Now it’s time to tidy up any loose ends. With your crochet hook, weave all loose yarn ends into the corresponding color section. This step adds a professional finish to the piece and ensures your work won’t unravel.
Step 10: Final Touches
Lastly, wash and block your finished project to get the stitches laying perfectly and to give your project its final shape. Now, you have completed your entrelac knitting project! It’s time to show off your new skill and magnificent handiwork. Enjoy your beautiful, textural piece of art!
By following these simple steps, you can continue to create more complex and intricate entrelac patterns.
5 Additional Tips and Tricks
- Start Small: Before diving into a big project, consider starting with a small swatch to familiarize yourself with the Entrelac technique. It can be tricky at first, but practicing with a small piece will help you understand the process.
- Use Markers: Stitch markers can be a lifesaver when knitting entrelac. They can help you keep track of where each block begins and ends, which can be especially helpful for beginners.
- Choose the Right Yarn: Variegated yarns or those with long color runs work particularly well with Entrelac knitting, as they create a beautiful, multi-colored effect without the need for multiple skeins.
- Don’t Rush: Patience is key. Each block is worked individually so that the process can feel slow. But rest assured, the stunning results are well worth the effort!
- Use Online Resources: Plenty of video tutorials and step-by-step guides are available online. These can be very useful, especially when you’re just beginning to learn to knit entrelac.

With these additional tips and tricks, you’ll be well on your way to mastering the art of entrelac knitting.
5 Things You Should Avoid
- Avoid Rushing: Since entrelac knitting requires careful attention to each block, rushing through the process can lead to errors. Take your time to ensure each block is knitted correctly.
- Don’t Use Slippery Yarn: While some yarns may feel luxuriously smooth, they can be difficult to work with when knitting entrelac. Slippery yarn can easily slide off your needles, leading to dropped stitches.
- Avoid Ignoring Mistakes: If you notice a mistake, don’t ignore it, hoping it will not be noticeable in the finished piece. It’s better to correct errors as soon as you spot them.
- Avoid Multitasking: This is not a project to work on while watching TV or engaging in other distractions. Stay focused on your work to ensure the best results.
- Don’t Neglect Blocking: Upon completion, pay attention to the step of blocking your work. This process helps shape your knitting and can significantly improve the finished look of your Entrelac project.
You can create beautiful and flawless entrelac projects by avoiding these common mistakes.

Conclusion
To sum up, mastering the skill of entrelac knitting will add unique style and texture to any project. Taking a few extra moments to understand the technique and gather your supplies is well worth it for the fantastic results. As you practice this stitch, take notes or write down your best methods. Before you know it, you will create stunning designs like hexagons and diamond shapes!
Hopefully, the article on how to knit entrelac has helped demystify this knitting technique and provided you with the knowledge and tools to get started.
Don’t be afraid to try something new – express yourself through beautiful knotting, and never underestimate the power of a handmade creation. It’s time to don your crafting gloves and tackle Entrelac!