
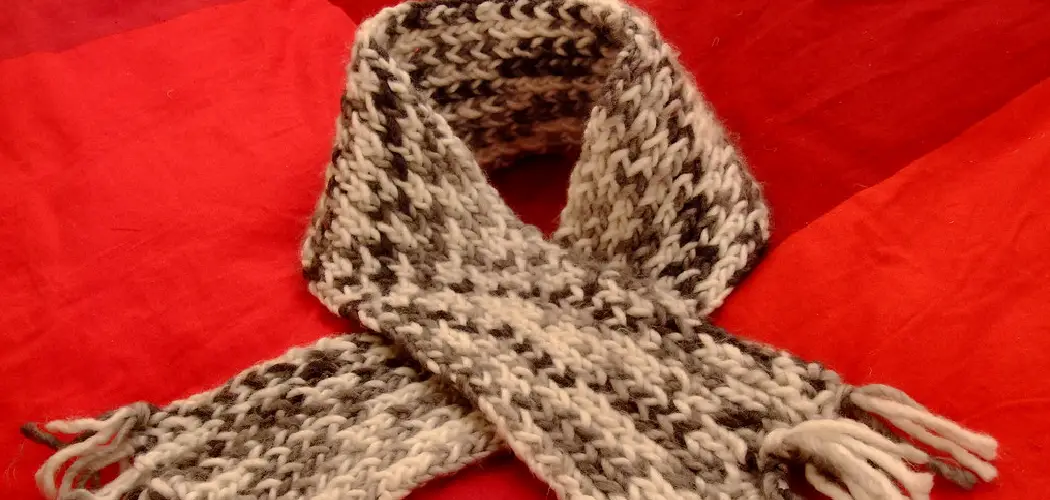
Knitting doesn’t have to be a complicated craft. Most of us can remember when we picked up some chunky yarn and giant needles, and our favorite grandparent taught us how to knit a chunky scarf for the first time. Carefully, you counted your stitches and tried to keep track of the patterns in the fabric, learning just how to make something beautiful with your own hand.
Though the challenge of creating something from scratch may seem daunting at first, with enough patience and guidance, all crafters can develop their knitting skills, whether they are an absolute beginners or looking for an advanced project. In this blog post, we’ll walk through the steps on how to knit a beautiful chunky scarf — perfect for snuggling up with during chilly winter days!
What is Chunky Yarn?
Before we dive into the knitting process, let’s first discuss what chunky yarn is. Chunky yarn refers to a thick and bulky type of yarn, typically made from soft wool or acrylic fibers. Unlike thinner types of yarn, chunky yarn is much thicker in diameter and can be easily identified by its large size.
When selecting your chunky yarn, consider the thickness, texture, and color. The thicker the yarn, the larger the stitches will be in your scarf. Similarly, a textured yarn can add depth and character to your project. And of course, choose a color that you love and will complement your winter wardrobe.
Why Knit a Chunky Scarf?
There are many reasons why knitting a chunky scarf is a great project for beginners and experienced knitters alike. Firstly, chunky yarn is much easier to work with compared to thinner yarns, making it perfect for those who are just starting out with knitting. Additionally, the larger stitches created by using chunky yarn means that your project will progress faster, giving you a sense of accomplishment and motivation to continue knitting.
Another benefit of knitting a chunky scarf is that it makes for a cozy and stylish accessory during the colder months. Chunky yarn is known for its warmth and thickness, making it perfect for bundling up and staying warm while also adding a touch of fashion to your outfit.
Essential Materials That You Will Need:
Bulky Yarn:
The first step in starting any knitting project is finding the right yarn. For a chunky scarf, opt for bulky yarn that will give you thicker stitches and make your finished product soft and cozy.
Large Needles:
Next, you’ll need some larger needles to match your bulky yarn. Size 11-15 (US), or 8-10 mm needles arrecommended for chunky yarn, but make sure to check your yarn label for the recommended needle size.
Scissors and Tapestry Needle:
You’ll need a sharp pair of scissors to cut your yarn and a tapestry needle to weave in the ends of your project. These items are essential for any knitting project, so make sure you have them on hand before getting started.
Stitch Markers:
Stitch markers are optional but can be helpful in keeping track of your stitches and patterns, especially for more advanced projects. You can use specialized stitch markers or improvise with safety pins or bobby pins.
12 Step-by-step Guideline on How to Knit a Chunky Scarf:
Step 1: Gather the Necessary Supplies
You will need a pair of size 10 circular knitting needles and three to four skeins of bulky yarn in a color or colors of your choice. Make sure to read the label on your yarn for its weight and needle size recommendations. It’s good to know the yardage of your yarn as well. You may also need a pair of scissors, a tapestry needle, and stitch markers. You can use any stitch markers you may have or improvise with safety pins or bobby pins. It’s also helpful to have a ruler or tape measure on hand.
Step 2: Cast On Your Foundation Stitches
Cast on 44 stitches with your needles. Make sure to leave a long tail of yarn that can be used for weaving in the ends. This tail should be at least 6′ long. Don’t be afraid to cast on more stitches if you want your scarf to be wider. You can also use a larger needle size for your cast-on row to create a looser stitch. If you need help with this part, check out some online tutorials or ask a friend who knows how to knit. There are many different techniques for casting, so find one that works best for you. You can also try the “long-tail cast-on” or the “knitted cast-on” method.
Step 3: Create the Garter Stitch Pattern
Knit all 44 stitches for the first row, then purl them for the second row. Continue to do this until you have 8 rows total. This creates what is known as a garter stitch pattern. You must knit and purl 2 rows each to complete the pattern. So, you will knit two rows and then purl two rows. It doesn’t matter which side of your scarf is up or down; the garter stitch is identical on both sides. But if you prefer one side over the other, make sure to keep track of which is which. You can mark the “right” side with a stitch marker if you want.
Step 4: Change to Stockinette Stitch Pattern
Next, knit all 44 of the stitches on both sides of the scarf throughout each row until you reach a length of approximately 50 inches (or whatever length you desire). This will create what is known as a stockinette stitch pattern. This pattern is made up of two rows, one where you knit all stitches and another where you purl all stitches. It creates a smooth, flat fabric with a “v” pattern on one side and horizontal ridges on the other. You can also switch back to the garter stitch pattern at any time if you prefer. Just remember to keep track of which side is which.
Step 5: Change Back to the Garter Stitch Pattern
Once you have reached the desired length, change back to the garter stitch pattern by knitting all of the stitches on both sides of the scarf for 8 rows. This will create a nice border along both sides of your scarf. It’s up to you how many rows of garter stitch you want to add, but 8 rows should be enough for a chunky scarf. The transition from stockinette stitch to garter stitch will add some variety and texture to your project. You can always experiment with different stitch patterns or add more rows of the stockinette stitch for a longer scarf. The possibilities are endless!
Step 6: Bind Off Your Scarf
When you finish your last row, and it looks like you want it to, bind off all 44 stitches. Cut the yarn so that you have a long tail for weaving in later. Though binding off can be tricky if you are a beginner, this tutorial provides a helpful guide to doing so. It is important to bind off correctly so that your scarf will look neat and professional. It should look like a stretchy edge. After you have bound off, use your tapestry needle to weave in the tails along the sides. If you added any extra stitches, make sure to weave those in as well.
Step 7: Weave In Any Remaining Loose Ends
Using a yarn needle, weave in any loose ends that you may have. Make sure to knot it securely so that the yarn won’t unravel. You can also trim the yarn after knotting it so that it doesn’t show. It is important to weave in all of the loose ends so that your scarf looks nice and neat. You don’t want any stray strings getting caught on anything or pulling your stitches out of place. But don’t worry, even if you make a mistake and need to fix it later, knitting is a forgiving craft and allows for adjustments along the way.
Step 8: Block Your Scarf
Once all of the loose ends have been woven in and knotted, it’s time to block your scarf. To do this, wet your scarf with some cool water and then gently shape it into a rectangle on a flat surface, such as an ironing board or towel. Leave it in place until it is completely dry. This will help even out your stitches and make the edges nice and straight. You can also use steam or a clothing steamer to block your scarf, but be careful not to burn yourself or damage your yarn.
Step 9: Sew on Any Decorative Elements
If desired, sew on any decorative elements, such as buttons or sequins, before wearing your new chunky scarf! You can also add a fringe at the end of your scarf if you’d like. This is a great way to add some extra texture and interest. So get creative and have fun! The beauty of knitting is that you can personalize your projects however you want. It’s a great way to express your style and individuality. You can even try out different types of stitches or use multiple colors for a more unique look.
Step 10: Wear It Proudly!
Now that your chunky scarf is complete slip it on and wear it proudly! You’ve just created a unique and stylish accessory that will keep you warm all winter long. You can also give it as a special gift to someone you love. They will appreciate the time and effort you put into making something just for them. And who knows, maybe knitting your own scarf will inspire you to tackle even more projects in the future! So enjoy your new chunky scarf and all of the warmth and coziness it brings. Happy knitting!
Step 11: Store Your Scarf Safely
Place your scarf somewhere dark and cool when you’re not wearing it. This will help preserve your yarn for years to come. You can also wrap it in tissue paper. Avoid storing it in plastic bags or containers, as this can trap moisture and cause damage to your yarn. It’s also a good idea to wash your scarves regularly to keep them clean and fresh. Following these simple steps will ensure that your scarf stays in good condition for many winters to come.
Step 12: Enjoy Doing More Knitted Projects!
Now that you know how to knit a chunky scarf, why not try making other items such as hats, sweaters, or even blankets? There are so many possibilities with knitting – enjoy exploring them all! You have the power to create beautiful and useful items with your newfound skill. Not only is knitting a fun and relaxing hobby, but it also provides numerous health benefits such as reducing stress, improving hand-eye coordination, and increasing creativity. So don’t be afraid to challenge yourself and try new things in your knitting journey! Who knows, maybe one day you’ll even become a master knitter.
Congratulations – you’ve just learned how to knit a chunky scarf! This is a great project for beginner knitters as it doesn’t require much-advanced knowledge of knitting techniques. With some patience and practice, you can be proud of the cozy scarf you have created. Now, get out there and show off.
Should I Use Professionals?
It’s not necessary to use professionals when learning how to knit a chunky scarf – with some patience and practice, you can confidently create your own cozy scarf if you are looking for guidance or advice on the knitting process.
However, there are many online tutorials and professional courses or classes where an instructor can help you learn. If you’re feeling stuck or need help with a particular part of the knitting process, consider reaching out to an expert.
How Much Will It Cost?
The cost of learning how to knit a chunky scarf really depends on the materials and tools you choose. For beginner projects, you don’t need expensive yarn or needles. In general, getting started should be relatively inexpensive – for example, one skein of bulky yarn may cost around $8-10. You can also find bundles with needles included that may be more economical if you want a complete set up at once.
Additionally, many online tutorials are free and provide detailed instructions so that you can confidently create your own scarf. When buying extra materials such as buttons or sequins for decorative elements, costs will depend on what type of embellishments you choose.
How Long Will It Take?
The time it takes to learn how to knit a chunky scarf will depend on your own learning pace and how often you practice. Generally, it’s a simple project that can be completed in a few hours or over a weekend. However, if you’re new to knitting, it may take longer as you get used to the techniques and stitches.
Don’t worry about rushing through the process – enjoy the journey and take your time to create something beautiful that you’ll be proud of. Remember, practice makes perfect! And once you have the basics down, you can experiment with different yarns and patterns to keep expanding your knitting skills.
Frequently Asked Questions:
Q: What Type of Yarn Should I Use to Knit a Chunky Scarf?
A: Choosing a super bulky-weight yarn for this project is best. This will ensure that your scarf has the soft, fluffy texture you want. Look for yarns labeled 5-6 stitches per 4 inches on the label.
Q: How Many Stitches Should I Cast On for a Chunky Scarf?
A: For a standard-sized scarf, cast on 44 stitches. This will create a width of approximately 8 inches when knitted in the garter stitch pattern. If you would like your scarf to be wider, you can cast on more stitches.
Q: How Can I Make My Scarf Look Neat?
A: To make your scarf look neat, it is important to bind it off correctly and weave in any loose ends. You can also block your scarf when it is finished, which will help to create an even shape. Finally, sewing on any decorative elements you choose will add the perfect finishing touch.
Q: How Long Does It Take to Knit a Chunky Scarf?
A: This depends on how fast you knit and the size of your scarf. Generally, an average person takes 2-4 hours to complete this project.
Conclusion:
After reading this article, you know everything about how to knit a chunky scarf. Knitting your own chunky scarf can be immensely satisfying and enjoyable. Whether you follow a pattern or create something unique from scratch, you’ll be left with a beautiful handmade garment that will last for years. Experiment with different colors, textures, and yarns to create something that is all your own.
Don’t forget the joy of gifting a knitted scarf—create something special for someone close to your heart and watch the smile spread across their face when the gift is unwrapped! So grab your needles and join the thousands of people who have made knitting a part of their lives—you’ll find it well worth the effort! So what are you waiting for? Start knitting your own chunky scarf today!