
Are you looking for tips on how to join knitting in the round without a gap? Well, look no further! This post will provide you with all the information you need to learn this essential technique.

Whether it’s your first foray into knitting or if you already consider yourself an experienced knitter, joining in the round can be tricky, but with these helpful steps and detailed illustrations, we’ll make sure there’s no gap left when joining new rounds of work. So read on and prepare to master this popular way of knitting!
Tools You Will Need
- Yarn (either the same yarn used in your project or a contrasting one)
- Circular knitting needles
- Crochet Hook
- Scissors
6 Steps Guide on How to Join Knitting in the Round Without a Gap
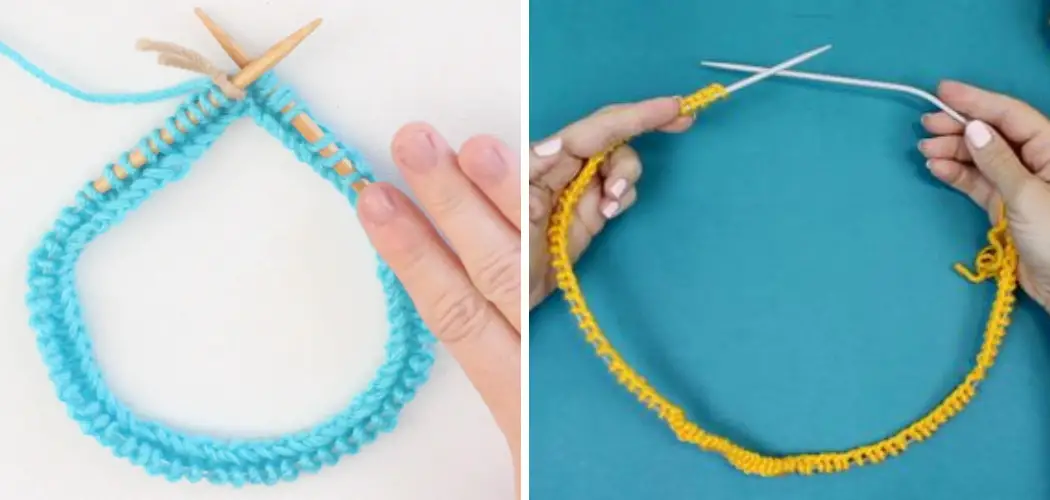
Step 1: Set Up Your Circular Knitting Needles
Starting a knitting project in the round is an easy process that requires patience and attention to detail. To get started you must select the right size of circular knitting needles for your project, chose the number of stitches needed to cast on, and pay close attention to ensure that you don’t twist any of the stitches in the cast-on row.
It’s easiest to knit from the center outwards, so it’s important to join your new stitches together at this point without leaving a large gap in your work. By connecting two ends of the first row with a slip stitch, you can be sure that your working yarn is positioned correctly for continuing the project in rounds.
Finally, use another needle to insert stitches properly on both sides before beginning to knit! With this simple yet effective technique, you will be well on your way to circularly starting your project.
Step 2: Join the Round
Joining knitting in the round without a gap is simple. Begin by carefully bringing your two ends together, holding them firmly so there’s no space between them. Take the yarn tail from your cast-on and make a slip knot securely around one of your needles.
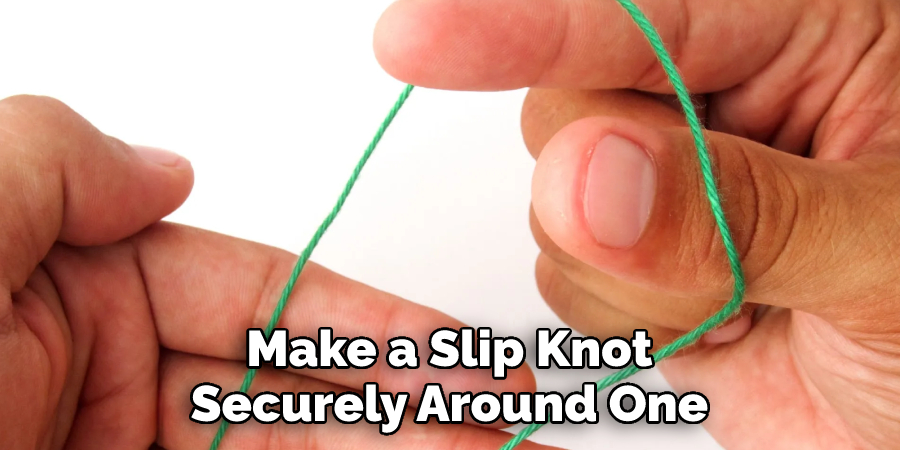
Once the knot is secure, you can start knitting in the round to begin working on your project! Be sure to continuously check that there is no visible gap between the stitches – if there is, simply turn back and pull up tighter. With these easy steps, joining knitting in the round without a gap is achievable for every knitter!
Step 3: Place This Slip Knot Onto the First Needle
To join knitting in the round without leaving a gap, it’s important to place a slip knot onto the first needle and knit it together with the last cast-on stitch. This will help create an uninterrupted circle and ensure that no stitches are missed. It is important to note that it doesn’t matter which direction you work when you make this connection.
The only thing that matters is that you securely attach the stitch to its neighbor and make sure there is no space between them for neat finishing. This can be done by using as few or as many stitches as necessary, ensuring an even tension around your needles so your knitting looks professional and exceeds expectations.
Step 4: Make a Chain Stitch
Joining knitting in the round without a gap is a simple process that requires a crochet hook and some patience. To begin, make a slip knot just as you would if starting on any knitted piece. Next, use your crochet hook to create a chain stitch over the slip knot. First, insert the crochet hook into the stitch on the left-hand needle and grip firmly enough to keep tension while still allowing yourself to pull the yarn through.
Draw the yarn tail through, creating a loop – this loop acts as an anchor for loops that will be created when knitting in rounds. With regular practice and attention to detail, you can easily master joining your knitting in the round without leaving gaps!
Step 5: Create a Chain Stitch
Now comes the critical step of starting your project in the round: using a crochet hook to create a chain stitch. With the crochet hook firmly placed into the new loop you created, pull it completely through.
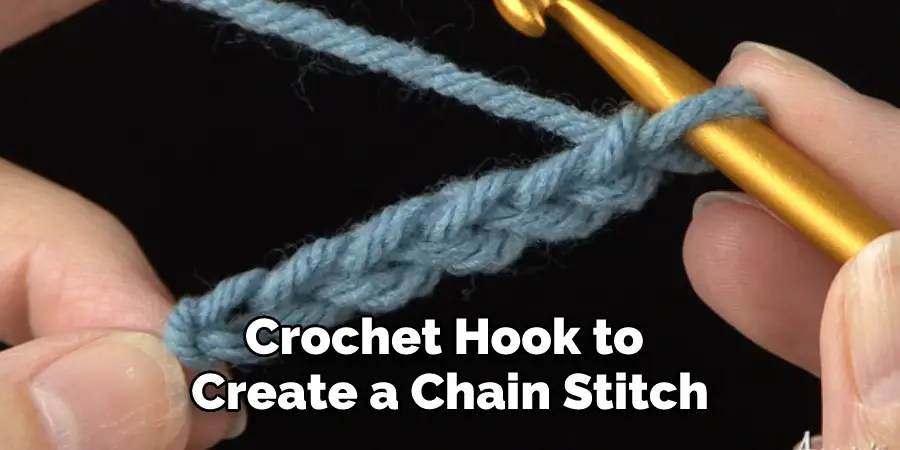
This simple chain stitch acts to secure the last cast-on stitch to the initial slip knot so there is no gap in your knitting when starting in the round. When practiced correctly, this joining method produces an exceptionally neat and strong join that results in beautiful knitwear.
Step 6: Cut Off Your Excess Yarn Tail
Joining knitting in the round without a gap can seem intimidating, but it doesn’t have to be. When you come to the end of your cast-on/slip knot stitches around your knitting needle, all you need to do is cut off any extra yarn tail, and then pull the ends of the round tight together.
With this simple step, knitting in the round is ready for you to begin stitching circularly. Keep these steps in mind and the process of joining stitches quickly becomes routine!
Tips to Join Knitting in the Round Without a Gap
- When joining knitting in the round, you want to make sure you’re using the right type of needles. Circular needles are the best option, as they’re specifically designed for knitting in the round. You can also use double-pointed needles, but they can be a bit more challenging to work with.
- The type of yarn you use can also affect whether or not you’ll have a gap in your knitting. If you’re using a slippery yarn, such as silk or bamboo, it’s more likely to slip off your needles, which can create a gap. Conversely, if you’re using a sticky yarn, such as wool, it’s less likely to slip and will help to keep your stitches in place.
- When joining knitting in the round, you want to make sure you have the correct number of stitches on your needles. If you have too few stitches, your knitting will be loose and may result in a gap. If you have too many stitches, your knitting will be tight and may also result in a gap. The best way to avoid this problem is to count your stitches before you start knitting and make sure you have the correct number.
- When joining your stitches together, you must do so carefully to avoid creating a gap. One way to do this is to use the knitted cast-on method, which is specifically designed for joining knitting in the round without a gap. Another option is to use a crochet hook to join your stitches together; just be sure that your hook is the same size as your needles so that your stitches are not too tight or too loose.
- When you’re knitting in the round, you must be careful when turning your work so that you don’t accidentally create a gap. One way to do this is to hold onto both ends of your circular needle so that it doesn’t move when you turn it. Another option is to use a stitch marker to mark the beginning of each row so that you know where to turn without having to look at your work constantly.
How to Achieve a Perfect Join When Knitting in the Round?
Achieving a perfect joint when knitting in the round may seem daunting, but it doesn’t have to be. It starts with selecting the right type of yarn for the project. Some types of yarn are easier to join than others.
For instance, lightweight wool is much less likely to snag or catch as you knit around. Second, make sure your stitches are even and consistent across the entire row – this will help ensure your join looks its best.
Third, secure your stitch properly by using a yarn needle or threading a long stitch through several stitches so that it ties off securely. Finally, fix any stubborn snags carefully, and don’t pull too hard since this can cause uneven tension and an imperfect knit.
With these simple tips in mind, you’ll be able to create that perfect joint whenever knitting in the round!
Know How To Cast On and Produce Neat Seams with Circular Knitting
Circular knitting is a great way to create flexible and seamless garments. It’s an easy technique once you get the hang of it, so mastering how to cast on and produce neat seams will give you a strong foundation for your core knitwear skills. To begin casting on, use the classic “long-tail cast-on” method.
With this method, you can make anywhere from 20 to 50 stitches quickly. After completing this process, arrange your stitches evenly along your circular needles. When creating neat seams with circular knitting, it’s important to pay close attention to tension and loop size as this will result in smoother seams when completing a garment.
It’s also helpful to practice different stitch patterns or explore other techniques like double-knitting for more advanced results!
Conclusion
Knitting in the round is a great way to create garments and accessories with no seams. You should carefully determine how to join knitting in the round without a gap.
It can seem daunting at first, but this tutorial will show you how to join your yarn so that there is no gap between your stitches. With a little practice, you’ll be cranking out seamless hats, cowls, and more in no time!
You Can Check It Out to Fix a Slipped Stitch in Knitting