
Do you love crafting with Perler Beads but can’t stand the hassle of using parchment paper when ironing your designs? If so, this blog post is perfect for you! You don’t need any special materials or equipment – just a few household items and some creativity.
Here we will cover step-by-step instructions on how to iron perler beads without parchment paper in no time. From learning about different types of irons as well as preparing the beads before ironing them together, this comprehensive guide provides everything you need to know for making beautiful creations with your beloved Perler Beads. So let’s get started and bring those perfect bead artworks to fruition!

Why May You Want to Iron Perler Beads Without Parchment Paper?
1 . To Save Money
Using parchment paper with Perler beads can get expensive, especially if you are someone who frequently enjoys making creations with them. Instead of constantly buying new sheets of parchment paper, try ironing your Perler beads without it. Not only will this save you money in the long run, but it is also a more environmentally friendly option.
2 . For a More Translucent Look
If you want your Perler bead creations to have a more translucent look, ironing without parchment paper is the way to go. The parchment paper creates a barrier between the heat and the beads, resulting in a flatter and more opaque appearance. Without it, the heat is able to directly reach the beads, creating a thinner and more see-through effect.
3 . To Create Unique Patterns
Ironing without parchment paper allows for more creativity and experimentation with your Perler bead designs. By placing the beads directly on a surface, you can create different patterns and textures that are not possible with the use of parchment paper. This opens up endless possibilities for unique and one-of-a-kind creations.

4 . For a Sturdier Finish
Parchment paper can sometimes create a glossy finish on Perler bead designs, which may not be desired for certain projects. Ironing without parchment paper results in a more matte and sturdy finish, making it perfect for creating keychains, magnets, or other items that will be handled frequently.
5 . To Avoid Parchment Paper Mishaps
We’ve all been there – you’ve spent hours creating a beautiful Perler bead design, only to accidentally knock over the parchment paper and ruin it. By ironing without parchment paper, you eliminate the risk of any mishaps or accidents that may occur during the ironing process.
6 . For a Faster Ironing Process
If you’re working on a large Perler bead project, using parchment paper can slow down the ironing process. With parchment paper, you have to wait for each section to cool down before moving on to the next, whereas, without it, you can continue ironing without any breaks in between.
7 . To Learn a New Technique
Ironing without parchment paper may seem daunting at first, but it is a great way to challenge yourself and learn a new technique. It allows you to experiment with different heat settings and ironing methods, ultimately resulting in unique and personalized Perler bead creations.

10 Ideas on How to Iron Perler Beads Without Parchment Paper
1 . Use a Silicone Mat
If you don’t have parchment paper, you can use a silicone mat instead. These mats are heat-resistant and non-stick, making them a perfect alternative to parchment paper when ironing Perler beads. Also, it is reusable and easy to clean, making it a convenient option for crafting projects.
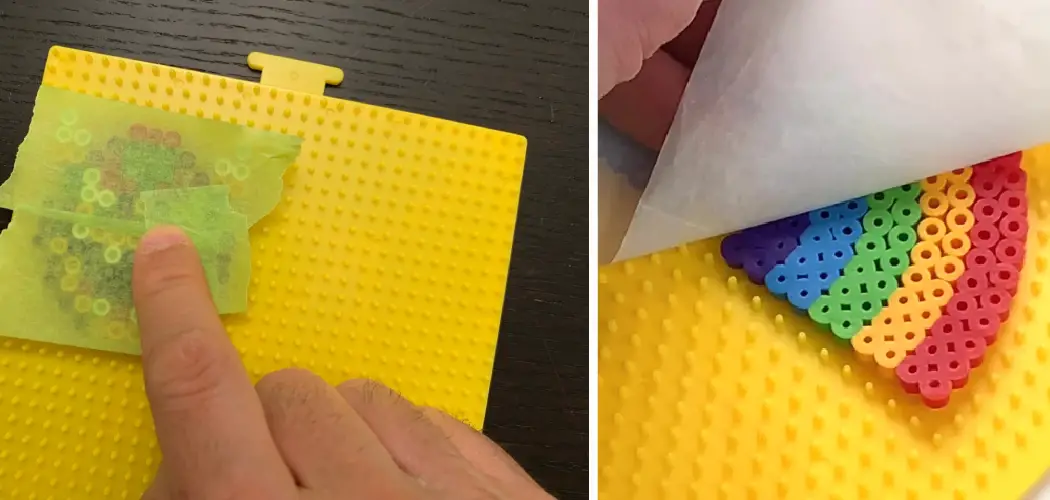
2. Use Freezer Paper
Freezer paper is another excellent alternative to parchment paper when ironing Perler beads. It has a shiny side that can be used as a protective layer between the iron and the beads. The best part is that it can be easily peeled off after ironing, leaving your beads perfectly fused together.
3. Use Wax Paper
Wax paper is another household item that can be used in place of parchment paper when ironing Perler beads. It works similarly to freezer paper, with the shiny side acting as a protective layer between the beads and the iron. However, it is not recommended for large projects as it can easily tear.
4. Use Tinfoil
If you have some tinfoil lying around, you can also use it as a substitute for parchment paper when ironing Perler beads. The shiny side of the foil acts as a protective layer, and it is thick enough to withstand the heat from the iron. However, like wax paper, it may not be suitable for larger projects.

5. Use a Tea Towel
If you don’t have any of the above alternatives, you can also use a tea towel or thin cloth as a protective layer between the iron and Perler beads. Just make sure that it is clean and doesn’t have any designs or patterns that may transfer onto your beads.
6. Use a Teflon Sheet
Teflon sheets are specifically designed for crafting and can be used as an alternative to parchment paper when ironing Perler beads. They are durable, heat-resistant, and non-stick, making them perfect for this task.
7. Use a Pizza Box
This may sound strange, but a pizza box can actually be used as a substitute for parchment paper when ironing Perler beads. The cardboard has a coated layer that can act as a protective barrier between the iron and the beads. It is also sturdy enough to handle the heat from the iron.
8. Use an Ironing Board Cover
If all else fails, you can use your ironing board cover as a temporary alternative to parchment paper. Just make sure to clean it beforehand and use the side with no patterns or designs for best results.
9. Use a Plastic Sheet
You can also use a plastic sheet, such as a page protector or a plastic folder, as a substitute for parchment paper when ironing Perler beads. However, be cautious as some plastics may melt under high heat.
10. Use a Light Bulb
If you’re really in a pinch and don’t have any of the above alternatives, you can also use a light bulb as a makeshift iron for Perler beads. Simply hold the beads over the light bulb until they fuse together. However, be careful not to burn yourself or your project with the heat from the bulb.

Frequently Asked Questions
What Precautions Should I Take When Ironing Perler Beads Without Parchment Paper?
Ironing perler beads without parchment paper can be a bit tricky, but with the right precautions, it can be done safely and effectively. Here are some tips to keep in mind: Always use a protective surface: Since you won’t be using parchment paper, make sure to iron your beads on a heat-resistant surface like a silicone mat or an old towel. This will protect your iron and your work surface from any potential damage. Use low heat setting:
When ironing without parchment paper, it’s important to use low heat to avoid melting the beads completely. Start off with a lower heat setting and gradually increase it if needed. Also, make sure to turn off the steam function on your iron to prevent any water droplets from getting onto your beads. Iron in a well-ventilated area: Melting perler beads can release fumes, so it’s important to iron in a well-ventilated area or near an open window. This will help prevent you from inhaling any harmful fumes.
How Do I Know When My Perler Beads Are Ready?
One way to tell if your Perler beads are ready is by gently lifting the iron and checking if the beads have fused together. If they easily stick together, then they are ready. Another method is to slightly press down on the beads with a wooden spoon or spatula. If they flatten easily, then they are done.
Can I Reuse My Iron After Ironing Perler Beads Without Parchment Paper?
It is not recommended to use your iron for any other purpose after using it to melt perler beads without parchment paper. The melted plastic from the beads can potentially damage your iron and transfer it onto any other fabric or material that you may iron in the future.
Conclusion
The ability to iron perler beads without parchment paper is a beneficial skill to learn, as it can save you time and money. With this tutorial in mind, nothing should stand in your way of creating amazing and intricate works of art with perler beads! Whether you’re making pixel art or using patterns from other artists, the possibilities are endless and can be achieved without parchment paper! So free up some drawer space and jump into your next project knowing that there is an alternative to using parchment paper.
Now you know how to iron perler beads without parchment paper! Remember to start at the lowest heat setting possible for your particular iron and take caution when lying down the beads so that they do not melt! With confidence and dedication, there is nothing stopping you from creating beautiful works of art with your very own hands. Time to get creative!