
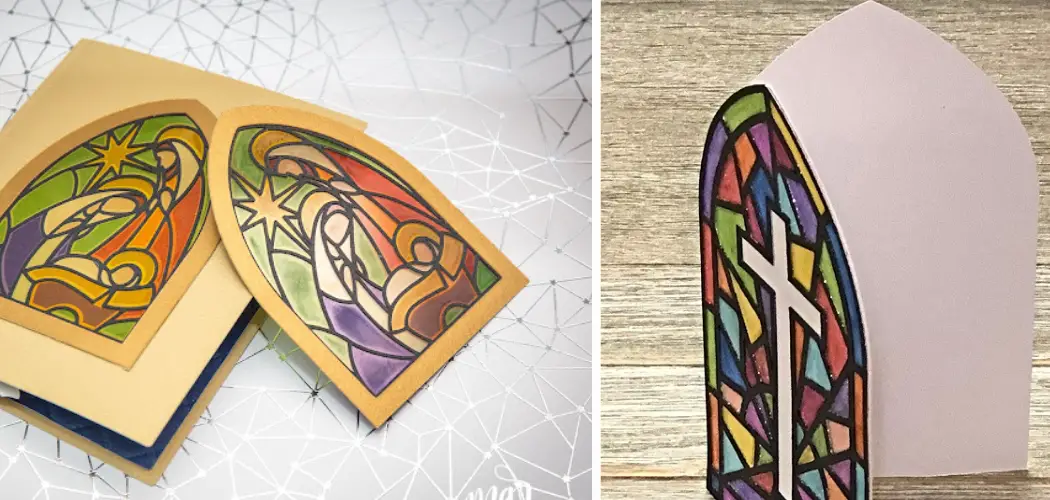
Are you looking for a way to make something special and unique for someone in your life? Do you want to surprise them with an original gift that captures your creativity and love? If so, try out the art of making stained glass cards with Cricut! Not only will these cards create an eye-catching display, but they are also surprisingly simple to make.
Learning how to make stained glass cards with cricut gives your gift the perfect personalized touch. With just some pre-made art files and adhesive vinyl in assorted colors, this is the perfect way to add sparkle and shine to any card! This easy tutorial will take you through everything step-by-step, so grab your materials, and let’s get started!

Why May You Want to Make Stained Glass Cards With Cricut?
1 . To Unleash Your Creativity
Cricut machines are known for their versatility and the ability to bring any crafting idea to life. By making stained glass cards with Cricut, you can explore different designs, colors, and patterns to create unique pieces of art. With endless options for customization and personalization, you can let your imagination run wild. The process of making stained glass cards with Cricut is also a great way to de-stress and relax, as it allows you to focus on creating something beautiful.
2 . To Create One-of-a-Kind Gifts
Stained glass cards made with Cricut are not just for personal use; they also make perfect gifts for your loved ones. You can design and create cards that are tailored to the recipient’s interests, whether it be their favorite color, hobby, or quote. This adds a personal touch to your gift and shows that you put thought and effort into making it.
3 . To Save Time and Effort
Making stained glass cards by hand can be time-consuming and requires precise cutting and measuring. Using a Cricut machine streamlines the process and saves you both time and effort. With its precise cutting capabilities, you can create intricate designs without having to worry about any mistakes or imperfections. This also allows you to make multiple cards in a shorter amount of time, making it perfect for those who need to make cards in bulk.
4 . To Try Something New
If you are a seasoned crafter, using Cricut to make stained glass cards can be a new and exciting technique to add to your repertoire. It challenges you to think outside the box and come up with unique designs that you may not have thought of before. With the variety of materials that can be used with Cricut machines, such as vinyl, paper, and cardstock, the possibilities are endless.

How to Make Stained Glass Cards With Cricut in 6 Easy Steps
Step 1: Gather Materials
To begin making stained glass cards with Cricut, you will need the following materials:
- A Cricut machine
- Cardstock or other sturdy paper in various colors
- Adhesive vinyl or window cling material
- Transfer tape (if using adhesive vinyl)
- Scissors or a paper trimmer
Step 2: Choose Your Design
Using Cricut Design Space, choose a design for your stained glass card. There are many pre-made designs available, or you can create your own using the various tools and shapes in the program.

Step 3: Prepare Your Materials
If using adhesive vinyl, cut a piece of transfer tape to the size of your design. Then, cut pieces of cardstock in the colors you will need for your design. If using window cling material, cut it to the size of your Cricut mat.
Step 4: Cut Out Your Design
Load your chosen cardstock or window cling material onto your Cricut mat and insert it into the machine. Follow the instructions on the screen to cut out your design. Also, cut out any small details or pieces in a contrasting color that will be used for the “leading” of your stained glass design.
Step 5: Assemble Your Stained Glass Card
Carefully remove your cut pieces from the Cricut mat and begin assembling them on a blank piece of cardstock. If using adhesive vinyl, use the transfer tape to carefully place the pieces onto the cardstock. If using window cling material, simply press the pieces onto the cardstock.
Step 6: Add Finishing Touches
Once your design is complete, you can add any additional details or embellishments to your stained glass card. This could include adding glitter or other decorations, as well as a personalized message on the inside of the card.
Some Extra Tips to Make Stained Glass Cards With Cricut
1 . Use Different Materials
Besides using paper, why not try making your stained glass cards with other materials such as vellum, acetate, or even fabric? These materials add a unique touch to your projects and can help you create stunning effects with the light shining through.

2. Experiment With Designs
Don’t be afraid to experiment with different designs when making stained glass cards with Cricut. You can use pre-made designs from the Design Space or create your own using various shapes and lines. Try out different combinations to see what works best for you.
3. Play With Color
Stained glass cards are known for their vibrant colors, so don’t be afraid to play around with different shades and hues. The Cricut machine allows you to cut out intricate designs, so take advantage of that and create a beautiful color palette for your cards.
4. Add Embellishments
To make your stained glass cards even more unique, consider adding some embellishments such as rhinestones, glitter, or ribbon. These little details can add an extra touch of elegance and make your cards stand out. Just be sure to use a strong adhesive when adding these decorations.
5. Personalize Your Cards
One of the best things about making your own stained glass cards with Cricut is that you can personalize them for any occasion or recipient. Add names, dates, or special messages using the machine’s writing feature, or even handwrite them yourself. This adds a personal touch that will surely be appreciated by the recipient.
6. Protect Your Cards
Since stained glass cards can be delicate, it’s important to protect them when sending or gifting them. Consider placing them in a clear plastic sleeve or using a padded envelope to keep them safe during transit. You can also use a clear sealant spray to help protect the card’s design and prevent any smudging or damage!

Frequently Asked Questions
What Precautions Should I Take While Making Stained Glass Cards With Cricut?
While the process of making stained glass cards with Cricut is generally safe, it’s always important to take precautions when working with any cutting machine. Make sure to follow all safety instructions and guidelines provided by the manufacturer.
Can I Use My Designs for Stained Glass Cards in Cricut?
Yes, you can definitely use your own designs for stained glass cards in Cricut. The machine allows you to upload and cut your own images for a completely personalized project.
How Do I Maintain My Cricut Machine?
To keep your Cricut machine in good working condition, it’s important to regularly clean the blade and cutting mat, as well as store it properly when not in use. Refer to the user manual for specific instructions on how to maintain your machine.
Can I Use Cricut Infusible Ink for Stained Glass Cards?
Cricut Infusible Ink is specifically designed for heat transfer projects and is not recommended for stained glass cards. It’s best to stick with materials that are suitable for paper crafting, such as cardstock or vellum.
Where Can I Find More Inspiration for Stained Glass Card Projects?
There are many online resources and communities dedicated to Cricut crafting that can provide you with endless inspiration for your stained glass cards. You can also check out Cricut’s design space for pre-made designs and ideas.
Can I Sell My Stained Glass Cards Made With Cricut?
As long as you are using the designs for personal use or have purchased a commercial license, you can sell your stained glass cards made with Cricut. Just be sure to follow any copyright guidelines when selling your creations. Overall, making stained glass cards with Cricut is a fun and creative way to add a personal touch to your cardmaking.
Conclusion
Making stained glass cards with Cricut is a fun, creative, and efficient way to create personalized gifts or add a unique touch to your own cardmaking projects. With its versatility and precision, a Cricut machine allows you to explore your creativity while saving time and effort. So go ahead and try making stained glass cards with Cricut – you may just discover a new favorite crafting technique.
So, “how to make stained glass cards with cricut?” is not just about following instructions, it’s also about unleashing your creativity and trying something new. Now that you know the benefits of making stained glass cards with Cricut, it’s time to grab