
Whether you’re looking to add a pop of color to your next embroidery project or you want to create something truly unique, dying your thread is a great way to achieve both. You must know how to dye embroidery thread.

With just a few simple supplies and some basic knowledge of how to dye thread, you can produce beautiful results that will make your embroidery stand out from the rest.
In this blog post, we’ll walk you through everything you need to know about dying embroidery thread, from choosing the right type of thread to get started to creating custom colors that will take your projects to the next level. So grab your supplies and let’s get started!
Tools You Will Need
- A jar or container to hold your thread and dye bath
- An acid dye (such as Procion MX)
- Isopropyl alcohol, vinegar, or soda ash for the fixer
- Hot water for the dye bath
- Rubber gloves and protective eyewear
- Stick or spoon for stirring
- Colander for straining and removing excess dye
6 Steps Guide on How to Dye Embroidery Thread
1. Choose the Right Type of Thread for Dying
Embroidery thread is typically made from rayon, polyester, or cotton. Rayon and polyester threads are both synthetic fibers that will accept dye very well, while cotton threads will require a mordant (a pre-dyeing treatment) before dying.
Dyeing your embroidery thread can be a fun way to add some unique colors to your projects. But before you start, it’s important to choose the right type of thread. Embroidery thread is typically made from rayon, polyester, or cotton.

Rayon and polyester threads are both synthetic fibers that will accept dye very well, while cotton threads will require a mordant (a pre-dyeing treatment) before dying. That’s because cotton is a natural fiber and needs a little help to absorb the dye. So if you’re planning on dying your thread, be sure to choose rayon or polyester for the best results.
2. Mix Your Dye Bath
In a container, mix hot water (ideally between 120-140 degrees Fahrenheit) and your chosen acid dye according to the manufacturer’s instructions. Stir the mixture until all of the powder or liquid has dissolved completely. Note that the temperature of your dye bath will affect how much dye is absorbed by the thread.
When it comes to dyeing embroidery thread, the most important step is mixing your dye bath. This mixture consists of hot water that should be within the range of 120-140 degrees Fahrenheit and an acid dye as directed by the manufacturer. Stirring the mixture until all powder or liquid has dissolved will ensure maximum absorption of the dye by the thread and will give you a consistent color throughout.
Getting the temperature of your dye bath just right is key; too cold, and not enough color will be absorbed and your results won’t be ideal, but too hot could leave you with an uneven-hued finished product.
3. Add the Thread to the Dye Bath and Stir
Adding thread to the dye bath is an important step when dyeing your embroidery threads. Make sure you submerge all of the threads in the mixture for adequate color saturation; stir the dye bath gently with a spoon or ladle, ensuring that all the threads are evenly colored. It’s best to leave the thread soaking for 30 minutes or longer to get a deep, vibrant color.
Ensure that you occasionally stir it during this time to keep it immersed and minimize some of the undyed spots. Be sure to wear appropriate safety gear when handling dyes and follow instructions on any warning labels before getting started.
4. Leave the Thread in the Dye Bath
When you want to dye embroidery thread that’s made of rayon or polyester, the key is leaving it in the dye bath for the right length of time. Even just 10 minutes can give great color, but it might not be as vivid and deep as you’d like. In this case, try leaving your thread in the dye bath for 30 minutes – not any longer though!
If your thread is made from cotton, however, then 45-60 minutes should do the trick; this amount of time should give you a vibrant and lasting hue. Whatever type of yarn you’re using and whatever color you have in mind, it pays to take the time to research beforehand for exact instructions and measurements.

5. Rinse the Thread
Dyeing your embroidery thread is a great way to get unique colors that you may not be able to find in stores. Plus, it’s a fun and easy project! To get started, you’ll need some embroidery thread, food coloring, and white vinegar. Begin by boiling a pot of water. While the water is boiling, add a few drops of food coloring to each skein of thread.
Once the water has come to a boil, add 1/4 cup of white vinegar for every quart of water. Carefully lower the thread into the dye bath and stir gently. You’ll need to let the thread soak for at least 30 minutes, but you can leave it in longer if you want a deeper color. Once your desired color is achieved, carefully remove the thread from the dye bath and rinse it in cold water until the water runs clear. Hang your threads to dry and then enjoy your beautiful handiwork!
6. Add a Fixer to Set the Color
Taking the time to dye your embroidery thread can be immensely satisfying, not to mention cost-effective. However, without taking the proper steps to set the color, your beautiful hue may not last as long as you’d like. Fortunately, there are various fixers you can use for setting the color in your thread.
Isopropyl alcohol and vinegar have been found very effective when used correctly, yet some individuals have even had success with gently stirring soda ash into their rinse water. Depending on your dye manufacturer’s instructions, the amount of the fixing agent needed will vary. Once applied, ensure to give further rinse in cold water and allow it to air dry for best results. With a few extra steps, you can enjoy a vibrant color for much longer!

There you have it! With these simple steps, you can easily dye your embroidery thread at home and create unique, beautiful pieces. So grab your supplies, get creative, and have fun!
Tips to Dye Embroidery Thread
- Before you start dying your thread, it is important to decide on the color scheme that you want to use. This will help to ensure that all of the colors complement each other and create the overall look that you are going for.
- Not all dyes are created equal, and it is important to choose a dye that is specifically designed for embroidery thread. These dyes will be less likely to damage the thread and will provide more vibrant colors.
- Once you have chosen your dye, it is time to prepare the dye bath. This involves mixing the dye with water according to the manufacturer’s instructions. It is important to make sure that the dye bath is not too concentrated, as this can damage the thread.
- Once the dye bath is prepared, it is time to soak the thread in it. It is important to make sure that all of the thread is submerged in the dye bath and that there are no air bubbles trapped in it. Allow the thread to soak for at least 30 minutes, or longer if you want a deeper color.

- After soaking, rinse the thread thoroughly with clean water until the water runs clear. This will help to remove any excess dye from the thread and prevent it from bleeding when you use it in your embroidery project.
- Once you have rinsed the thread, allow it to air dry completely before using it in your project. Do not put it in direct sunlight, as this can cause fading.
- Once your thread is dry, it is important to store it properly so that it does not become damaged or discolored over time. The best way to do this is to keep it in an airtight container in a cool, dark place.
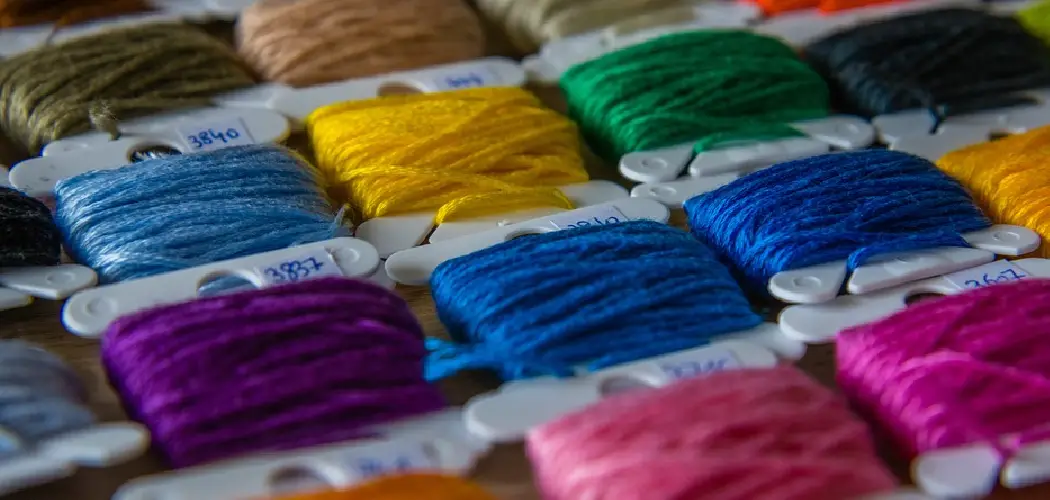
How to Create Vibrant Colours with Embroidery Thread?
If you want to take your embroidery to the next level, one way to accomplish this is by creating vibrant colors with thread. This can be achieved in a few different ways. Using multicolored floss and cotton for an overall blended effect will give your projects greater depth and drama.
You can also create your custom color palette by creating a gradient between two colors or by blending colors to create new shades and hues. Last, you can use variegated threads or hand-dyed threads, which come in unique and stunning combinations that no other fabric can replicate. By using these techniques, your embroidery projects will become beautiful pieces of art as each stitch becomes its work of art.
How To Make Sure Your Dyed Embroidery Thread Colour Lasts Longer?
Any embroidery fan needs to keep a few key tips in mind when trying to create items that will last. One of the main tips is to always make sure to use good quality fabric and, if using dyed thread, make sure it was designed specifically for the job.
There are several good-quality options available on the market, with dyes designed not to run or fade and will keep your projects looking fantastic for longer. For added protection, try using a dye fixative spray before starting your project – this can help extend the life even further of your beautiful embroidery creations!

Conclusion
Overall, dyeing embroidery thread is a great way to create new color combinations, textures, and patterns that you won’t find commercially. You should carefully determine how to dye embroidery thread. Whether you try out a store-bought dye or make your own, be sure to pay careful attention to the notes and steps mentioned above for a successful project.
With some creativity and care, the possibilities are endless. And regardless of the method you choose, it is always a satisfying process when you see the dyed thread ready to use in your next embroidery design. So grab your dye and thread, and have fun experimenting! Who knows what kind of artistry you can come up with when transforming threads of all kinds?
You Can Check It Out to Crochet a Tunisian Blanket