
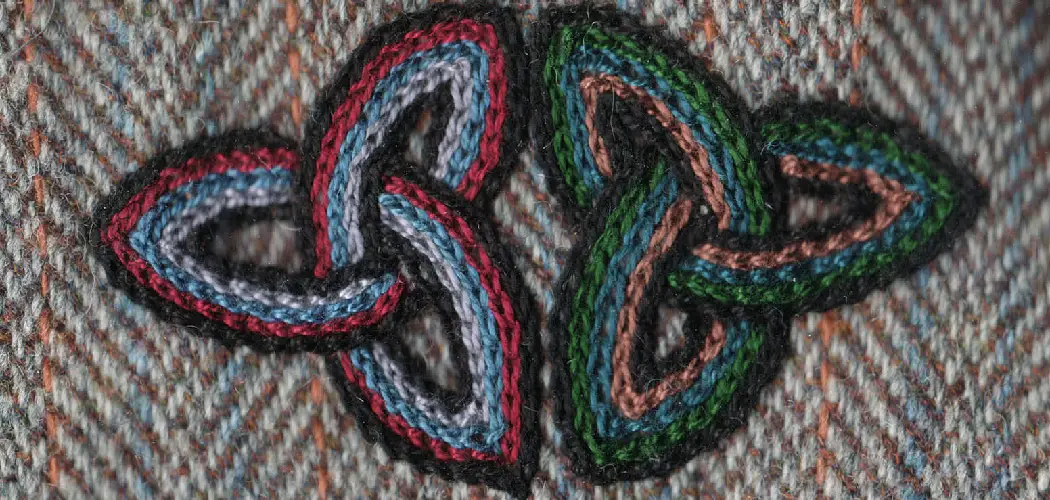
Do you long to learn the beautiful craft of chain stitching embroidery? Have your projects always left something desirable lacking or have you ever wanted to impress your friends with an impressive little display of sewing talent?

If so, then this blog post on how to do a chain stitch embroidery is for you! In it, I’ll cover everything from gathering the supplies necessary to mastering each step in creating gorgeous art that will surely become cherished keepsakes.
Whether you’re a total beginner or already familiar with a few basic embroidery stitches, after reading through this blog post, you’ll be an expert when comes to chain stitch embroidery!
Needed Materials
Before we dive into the steps of chain stitch embroidery, it’s important to gather all the necessary materials. Here’s what you’ll need:
Embroidery Hoop:
This is a round or oval-shaped frame used to hold your fabric taut and in place while stitching.
Fabric:
You can use any type of fabric for chain stitch embroidery, but it’s best to start with a plain weave fabric like cotton or linen.
Embroidery Needle:
A sharp and thin needle is ideal for embroidery as it can easily pierce through the fabric.
Embroidery Thread:
Embroidery thread comes in various colors and types. Ensure you choose one that is suitable for your project and is made specifically for embroidery.

Scissors:
To cut your thread, you’ll need a pair of sharp scissors.
11 Step-by-step Guidelines on How to Do a Chain Stitch Embroidery
Step 1: Preparing the Fabric
The first step in chain stitch embroidery is to prepare your fabric. Cut the fabric to your desired size and place it in the embroidery hoop, securing it tightly. It’s best to use a fabric that isn’t too thick, as it may become difficult to pull the needle through.
But don’t worry, with practice you’ll be able to work on a variety of fabrics! The fabric should be drum tight, but not stretched out of shape. You can use an iron to lightly press the fabric and remove any wrinkles before placing it in the hoop. It’s important to have a smooth surface to work on.
Step 2: Threading the Needle
Thread your embroidery needle with a single strand of embroidery thread. It’s important to use a single strand for chain stitch, as it creates a smooth and elegant look. If your thread is too long, it may become tangled or knotted while stitching. You can use a threader to help you thread the needle if needed.
This tool has a small wire loop that helps guide the thread through the eye of the needle. It’s especially helpful for those with poor eyesight or when using thicker threads.
Step 3: Creating a Knotted Tail
Leave a short tail of about 2-3 inches at the end of your thread and make a knot. This will prevent your thread from pulling through the fabric while stitching. You can also use a small piece of tape to secure the tail of the fabric. It’s best to have the tail on the backside of your fabric, so it doesn’t interfere with your stitching.

The knot will be hidden by your stitches. You can also use a waste knot, which is a temporary knot that will be snipped off later. It’s used when there isn’t enough fabric to make a regular knot.
Step 4: Starting the First Chain Stitch
Bring your needle from the back of the fabric to the front. You can start anywhere on your fabric, but it’s best to start near the edge for easier stitching. Hold onto the tail or secure it with your finger to keep it out of the way. Then, insert your needle back into the fabric close to where you came out, creating a small loop.
It’s important to keep your stitches close together for a smooth and uniform look. However, make sure you don’t pull your stitches too tight as it will cause puckering.
Step 5: Creating the Chain Stitch
Bring your needle up through the loop and pull gently until a small chain is formed. Then, insert your needle back through the same hole that you just came out of. This will create the first chain stitch! Make sure to keep the thread taut while pulling the needle through. Otherwise, your chain may become loose or uneven. Repeat this step to create more chain stitches.
Step 6: Creating the Next Chain Stitch
To create the next chain stitch, bring your needle up through the back of the fabric where you want your next stitch to start. Insert your needle back into the same hole as before and pull through to create another loop. Then, bring your needle up through the loop and pull to create a chain stitch.
It’s important to keep the same tension on your thread for each stitch. Repeat this step to create a row of chain stitches.
Step 7: Creating Multiple Chain Stitches
To create multiple chain stitches, repeat step 6 until you have the desired number of stitches. Remember to keep your stitches close together for a smooth look. You can also experiment with different lengths of chains to create interesting designs and patterns. The longer the chain, the more thread you will use.

You can also vary the angle at which you bring your needle up through the fabric to create unique effects. It’s all about experimenting and finding what works best for you!
Step 8: Finishing Off the Chain Stitch
To finish off your chain stitch, bring your needle up through the fabric at the end of your last stitch. Then, insert your needle back into the same hole and pull through to form a loop. Bring your needle up through the loop and gently pull it to create one final chain stitch.
This will secure your thread in place. It’s best to end your stitches on the backside of your fabric. You can make a knot or use the waste knot method to secure your thread.
Step 9: Changing Thread Colors
To change thread colors while working on a project, use the same method as step 8 to finish off one color. Then, start the next chain stitch with a new color by bringing your needle up through the fabric and creating a loop as usual. You can also overlap stitches from different colors to create a blended effect.
But make sure to secure the thread ends on the backside of your fabric. If you’re using a waste knot, snip off the excess thread once it’s secured.
Step 10: Practice Makes Perfect
As with any skill, practice makes perfect. Don’t be discouraged if your first chain stitch embroidery project doesn’t turn out perfectly. Keep practicing and experimenting with different techniques, thread colors, and fabric types.
With time, your stitches will become more consistent and even. It’s also helpful to watch tutorials and read guides for tips and tricks from experienced embroiderers. This will help you improve your skills and create more complex designs.
Step 11: Finishing Off Your Project
Once you have completed your chain stitch embroidery project, it’s time to finish it off. You can remove the fabric from the hoop and trim any excess thread. If you use a waste knot, you can carefully snip it off from the back. Then, you can frame your project or use it in other crafting projects such as pillows, bags, or clothing.

The possibilities are endless! Remember to always have fun and be creative with your chain stitch embroidery projects. So go ahead and try it out for yourself. Happy stitching!
Following these steps on how to do a chain stitch embroidery will help you create beautiful and intricate chain stitch embroidery designs. This versatile stitch can be used on a variety of fabrics and is perfect for adding a decorative touch to any project.
With practice, you’ll be able to create your own unique designs and master this classic embroidery technique. So why not give it a try and see what you can create with the chain stitch?
Do You Need to Hire Professionals?
While chain stitch embroidery is a relatively simple technique, it does require some practice and patience to perfect. If you’re new to embroidery or don’t have the time to practice, you may consider hiring professionals for your chain stitch embroidery projects.
Embroidery shops and online services offer a variety of options for custom chain stitch designs that can be applied to clothing, home decor, and more. They also have the expertise and equipment to ensure high-quality results that will last.
However, if you’re up for a challenge and want to add a personal touch to your projects, learning how to do chain stitch embroidery on your own can be a rewarding experience. So why not give it a try and see where your creativity takes you?

Frequently Asked Questions
Q: Can I Use Any Type of Thread for Chain Stitch Embroidery?
A: Yes, you can use a variety of threads such as cotton, silk, or wool. However, if you’re using a thicker thread, make sure to choose a needle that is suitable for it. It’s also important to consider the fabric you’re using and choose a thread that will complement it.
Q: Can I Use Chain Stitch Embroidery on Stretchy Fabrics?
A: Yes, you can use chain stitch embroidery on stretchy fabrics such as knits. However, make sure to use a stabilizer or interfacing to prevent puckering or distortion of the fabric.
Q: Can I Use the Chain Stitch for Lettering or Words?
A: Yes, chain stitch can be used to create beautiful lettering and words. Experiment with different fonts and thread colors to create unique designs. You can also use a backstitch or a stem stitch as an outline before filling it in with chain stitches for a more defined look.
Q: Is Chain Stitch Embroidery Different from Other Types of Embroidery?
A: Yes, chain stitch embroidery is a specific type of embroidery and differs from other techniques such as cross stitch or satin stitch. It involves creating loops with a single thread, while other stitches may use multiple threads to create different effects.
Each technique has its own unique style and can be combined for more intricate designs. So don’t be afraid to explore and experiment with different embroidery techniques!
Conclusion
Embroidery is an ancient art form that has gone through many iterations. To do a chain stitch embroidery involves carefully forming small loops with yarn or thread to create a unique and intricate piece of art. Practicing this stitch will help develop your skill over time and you can even use it to create custom t-shirts, pillow covers, wall hangings and other beautiful items.

So give it a try and let your creativity run wild! Start small, practice often, and we promise you will be creating masterpieces in no time! The sky’s the limit when it comes to chain stitch embroidery – feel free to imagine what could be created– so shoot for the stars and show off your own unique style! Thanks for reading this article on how to do a chain stitch embroidery.