
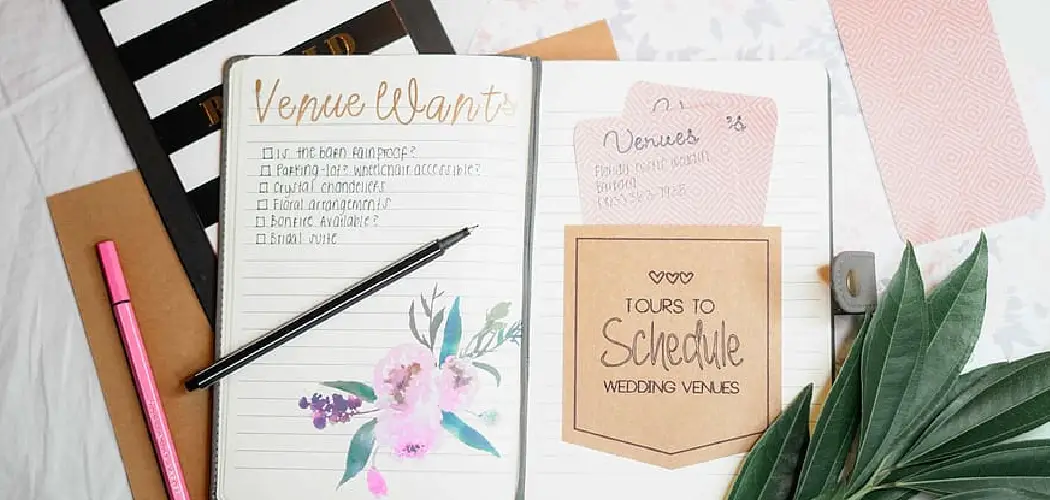
Planners and journals have become some of the most personalized items in our daily lives. While getting organized is the main purpose, decorating our planners also allows us to be creative and express our unique styles. I’ve always loved adding washi tapes, stickers, and illustrations to make my planner feel like an inspiring work of art every time I open it.

However, it can be tricky to decorate tastefully without making your planner feel cluttered or messy. Over the past year, I’ve been experimenting with different decoration techniques that balance functional organization with aesthetic beauty. In this post, I’ll share my top tips for how to decorate planner so you can enjoy your creativity with every page turn.
Supplies You Will Need to Decorate Planner
- Planner or journal
- Washi tapes in various patterns and colors
- Stickers, both functional and decorative
- Colored pens or markers
- Sticky notes
- Photos or illustrations
Step-by-step Guidelines on How to Decorate Planner
Step 1: Set a Theme
Just like decorating your home or a party, setting a theme for your planner will help you stay focused and create a cohesive look. It can be as simple as choosing a color palette to work with or a specific theme such as floral, travel, or food. Having a theme in mind will also make it easier for you to select supplies that fit into the overall aesthetic.

Step 2: Plan Ahead
Before diving into decorating, take a few minutes to plan out your week or month. This will give you an idea of how much space you have for decoration and what events or tasks you need to highlight. It’s also helpful to make a list of the supplies you want to use beforehand so that you don’t over-decorate or forget any elements you want to include.
Step 3: Start with Washi Tapes
Washi tapes are a fantastic tool for adding color and patterns to your planner without the mess of glue or paint. You can use them as borders, or dividers, or even create your own custom headers or tabs. It’s best to start with washi tapes as they are easy to remove and reposition if you change your mind. This is also a great way to add a pop of color or design without being overwhelming.
Step 4: Add Stickers
Stickers are another fun and easy way to decorate your planner while staying organized. Functional stickers such as labels, icons, and trackers can make your planning more efficient. Decorative stickers like illustrations, quotes, and lettering can add personality and charm to your pages. You can also use stickers to mark important dates or events, making them stand out on your planner.
Step 5: Incorporate Hand Lettering and Doodles
One of the most popular trends in planner decoration is incorporating hand lettering and doodles. You don’t have to be an artist to add these elements to your planner – a simple quote or border can make a big difference. There are many tutorials online to help you get started with hand lettering, and doodles are all about being creative and playful. These personal touches will make your planner truly unique.

Step 6: Use Sticky Notes
Sticky notes are perfect for adding temporary decoration or reminders to your planner. You can use them as flags or tabs for important pages, create a to-do list, or add a cute illustration. The best part is that you can easily remove them and change them without damaging your planner. Using sticky notes is also a great way to add layers and dimension to your planner.
Step 7: Add Photos or Illustrations
If you enjoy scrapbooking, adding photos or illustrations to your planner can be a meaningful way to decorate and document your memories. You can print out photos directly onto sticker paper or use small prints that can be taped or stapled into your planner. Illustrations can also be a great way to add some personality and creativity to your pages. This is also a great way to personalize your planner and make it truly your own.
Following these simple steps will help you create a beautifully decorated planner that is both functional and inspiring. Remember, the most important thing is to have fun and let your creativity shine through. Your planner should reflect your unique personality and style, so don’t be afraid to experiment and try new things. Happy decorating!
Additional Tips and Tricks to Decorate Planner
1. If you’re a visual person, try using stickers or washi tape to decorate your planner. This will add pops of color and make your planner more visually appealing.

2. Use motivational quotes or inspiring sayings throughout your planner. Not only will it brighten up the pages, but it can also serve as a daily reminder to stay positive and focused.
3. Incorporate different textures into your planner by using scrapbooking materials such as ribbons, fabric, or patterned paper. This will add dimension to your pages and make them more interesting to look at.
4. Don’t be afraid to use unconventional materials in your planner decoration. For example, you can cut out images from magazines or old greeting cards to create collages on your pages.
5. Use colored pens or markers to color-code your planner and make it more organized. This is especially useful for those who have a busy schedule and need to keep track of different tasks and events.
6. Don’t limit yourself to only decorating the monthly or weekly spreads in your planner. You can also add decorative elements to your daily pages, such as headers or borders, to make them more visually appealing.
7. Use washi tape to create tabs or dividers in your planner for easy navigation. This is especially useful if you have multiple sections in your planner, such as a section for notes, goals, or meal planning.
8. Consider adding pockets or envelopes to your planner to store small items like stickers, sticky notes, or receipts. This will not only add a practical aspect to your planner, but it can also serve as a decorative element.
9. Don’t be afraid to experiment and try new things when decorating your planner. There are no rules when it comes to personalizing your planner, so have fun and let your creativity shine.
10. Lastly, remember that the purpose of decorating your planner is to make it more enjoyable and functional for you. Don’t feel pressured to make it perfect or compare it to others’ planners.
Following these tips and tricks can help you create a planner that is not only aesthetically pleasing but also serves as a useful tool for staying organized and on top of your tasks. Have fun with it and make it your own! Remember, the key to successful planning is finding what works best for you, so don’t be afraid to experiment and find your unique style. Happy planning!

Frequently Asked Questions
Can I Decorate Any Type of Planner?
Yes, you can decorate any type of planner as long as the planner has enough space for decoration. Some planners may have smaller margins or fewer blank spaces, so you may need to adjust your decorations accordingly. However, with some creativity and ingenuity, you can decorate any planner to make it unique and personalized.
What Supplies Do I Need?
The supplies needed to decorate a planner will depend on your personal preference and the type of decorations you want. Some popular supplies include washi tape, stickers, stamps, colored pens and pencils, sticky notes, and paper clips. It’s always a good idea to have a variety of supplies on hand so you can mix and match different elements for your planner.
What Themes Can I Use?
The possibilities for themes are endless when it comes to decorating your planner. You can choose a specific color scheme, such as pastel or neon colors, or go with a seasonal theme like winter wonderland or spring flowers. Some other popular themes include animals, travel, food, and inspirational quotes. You can also create your unique theme by combining different elements that you love.
How Do I Start Decorating?
There is no right or wrong way to start decorating your planner. Some people prefer to decorate each page as they go, while others like to plan out the entire month in advance and then decorate accordingly. You can also choose to decorate your planner week by week or even day by day. The most important thing is to have fun and let your creativity flow.
Can I Decorate Digitally?
Yes, you can also decorate planners digitally using various apps and software programs. This option allows for more flexibility in terms of design and layout, as well as the ability to easily make changes and corrections. Digital decoration also eliminates the need for physical supplies, making it a more eco-friendly option. However, some people may prefer the tactile experience of decorating with physical supplies.
Conclusion
All in all, knowing how to decorate planner is a fun and creative way to make your planner truly unique and personalized. With some basic supplies and a little inspiration, you can transform any planner into a functional work of art. Remember to have fun, experiment with different techniques, and don’t be afraid to think outside the box. Happy decorating!
You canc check it out Make a Yard Sign at Home