
Do you want to get creative with your crafting projects? Are you a fan of all things pink and red this time of year? If so, then cutting out multiple hearts is the perfect way to spruce up whatever project you’re working on – whether it be scrapbooking or creating custom Valentine’s Day decorations.
In this blog post, we’ll help guide you through the simple steps of how to cut out multiple hearts in no time! So if you’re ready to take your creativity up a notch and add some flair to your next craft-making venture, grab that pair of scissors and let’s get started!

How Do You Cut a Heart Out of Fabric?
The first step to cutting out multiple hearts is deciding on the fabric that you’ll use. There are lots of options available, from lightweight cotton to heavy-duty canvas, but for this project, we suggest using felt as it’s easy to cut and perfect for crafting.
Once you have your fabric chosen, measure out the size of the heart that you’d like to create and then use a pencil or fabric marker to trace the outline on your fabric. Once it’s traced, cut out the shape with a pair of sharp scissors – this will help ensure clean, smooth edges. Additionally, if you’re cutting out smaller hearts, you can use a paper punch to get the desired shape.
10 Methods on How to Cut Out Multiple Hearts
1. Use a Sharp Knife.
Make sure your knife is sharp before you start cutting. A dull knife will make it more difficult to cut through the paper and may cause you to accidentally cut yourself. If you don’t have a sharp knife, take the time to sharpen it before you begin. Though it may take a bit of extra time, it will be worth it in the end. Make sure to use a knife that is designated for kitchen use only and not used to cut other materials.
2. Make a Small Incision.
Start by making a small incision in the center of the heart. You can then use this incision as a guide for the rest of your cuts. Make sure to use a scalpel with a sharp blade for this step.
Be careful not to cause any undue damage to the heart as you make your incision. If you do cause any damage, it can be repaired later; however, it is best to avoid this scenario as much as possible. Though this step may take time, be sure to take it slow and steady for the best results.
3. Cut along the Outer Edge of the Heart.

Next, cut along the outer edge of the heart, following the natural curve of the organ. Make sure to make a clean, straight cut along the entire edge of the heart. Be careful not to let any of your cuts go too deep, as this could damage the heart.
It’s better to make shallow cuts and then go back to adjust them if need be. Once you’ve cut along the entire outer edge of the heart, you should have a neat, clean shape. However, if there are any irregularities, you can always go back and adjust them.
4. Cut along the Inner Edge of the Heart.
After you have cut along the outer edge of the heart, turn your knife and cut along the inner edge of the organ. Make sure to cut along the crease of the heart, not through it. This will help you get a clean and even inner edge of your heart. Once you have cut along the inner edge of your heart, you can move on to the next step. If you need help, you can watch a tutorial on YouTube or consult an expert. Make sure to be careful and precise when cutting along the inner edge.
5. Remove Any Excess Paper.
Once you have made all of your cuts, remove any excess paper from around the edges of the hearts using a pair of scissors. While you are doing this, take care not to cut into the muscle paper of the heart. Once you have removed all of the excess paper, it is time to move on to the next step. Then, rinse the hearts with cold water to get rid of any excess blood. Make sure to pat the hearts dry with a paper towel to remove any excess moisture.
6. Unfold the Paper Strip.
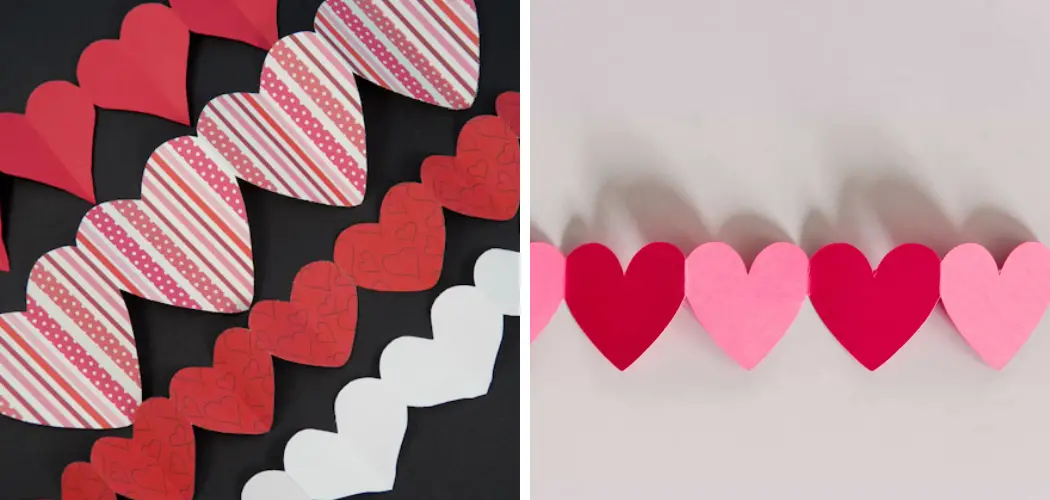
Once you have cut out one heart, you will need to unfold the paper strip and repeat steps 4-5 until you have cut out all of the hearts you need. Depending on the size of your hearts, you may be able to fit more than one on each strip of paper. If this is the case, be sure to make sure that each heart is spaced evenly apart so that they all have plenty of room. Once you are done cutting out your hearts, you can use them to decorate cards, make a garland, or whatever else you can come up with!
7. Trim Any Excess Paper from around Each Heart Shape if Necessary.
Once all of your hearts have been cut out, you may need to trim any excess paper from around each heart shape if necessary. This step is not required but can help to ensure that your hearts are all uniform in size and shape. A pair of sharp scissors or craft knife can easily be used to trim the paper. When finished, your hearts should all match and look perfect!
8. Use a Hole Punch to Create a Hole.

If you want to be able to hang your hearts from string or ribbon, then you will need to use a hole punch to create a hole at the top of each heart shape before moving on. Although this isn’t a necessary step, it will make your heart decorations more attractive and can be easily done with the help of a hole punch or small pair of scissors. Make sure to place the hole punch or scissors in the center of the top part of each heart shape and press down firmly until the shapes have been pierced through.
9. Transfer the Hearts onto Your Desired Supporting Material.
Once all of your hearts have been cut out, you can transfer them onto your desired supporting material. This could be cardstock, felt, or any other type of material that you desire.
Take care to place the hearts where you want them to stay for the duration of their use so that they don’t move around too much. Once you have placed your hearts onto the material, use glue or tape to hold them in place.
10. Finally, Decorate Your Hearts as Desired.
Once all of your hearts are firmly secured to their supporting material, it is time for the fun part: decoration! You can choose to decorate your hearts with paint, glitter, fabric markers, stickers, or any other type of craft material that you wish. Once you have finished decorating your hearts, you can hang them up as decorations or use them as gifts. Enjoy!

Things to Consider When Cutting Out Multiple Hearts
1. Choose the Right Tools:
Good quality scissors make cutting easier and more precise. Invest in a pair of high-quality craft scissors that are specifically designed for paper cutting. A craft knife can also come in handy, especially for intricate cuts.
2. Use a Template:
Using a template is the easiest way to get perfect heart shapes each time. You can either draw the templates yourself or print them from the internet and use them as a guide when cutting out your hearts.
3. Trace with a Pencil:
Once you have printed or drawn your templates, trace over them lightly with a pencil before you start cutting. This will help you keep track of where you need to cut and make sure that all of your hearts match up perfectly.
4. Cut Carefully:

Take your time and pay attention while you are cutting. Make sure to follow the lines, and do not rush or try to cut in one go. Take multiple, gentle cuts instead, and you will end up with much cleaner results.
You Can Check It Out to Fix a Slipped Stitch in Knitting
Conclusion
Cutting out multiple hearts can be a challenging task, but with the proper tools and techniques, it can be done quickly and easily. Although it may seem daunting, cutting out multiple hearts is actually quite easy! With a little practice, you’ll be able to cut out perfect hearts every time. So get practicing and enjoy making all sorts of crafts with your lovely heart shapes!
We hope this guide on how to cut out multiple hearts was helpful. Please share it with your friends on social media if you find it useful. And be sure to check back here soon for more informative guides like this one.