
Are you looking to try a new stitch in your crochet projects? Are you interested in learning the art of crochet? Do you want to give a new and stunning look to old garments? If so, the moss stitch has become one of the most popular in recent years! It’s an incredibly versatile and fairly easy-to-learn technique that can be used for anything from blankets and scarves to cushion covers or even clothing.

Plus, it adds texture and visual interest to whatever project you’re working on. Read on to find out how to crochet moss stitch, as well as some helpful tips for creating beautiful pieces with this fun crochet technique! With the right techniques, you can create beautiful projects that are sure to get lots of compliments. Get ready as we guide your journey through this practical but lovely way of making amazing designs with yarn.
What is Moss Stitch?
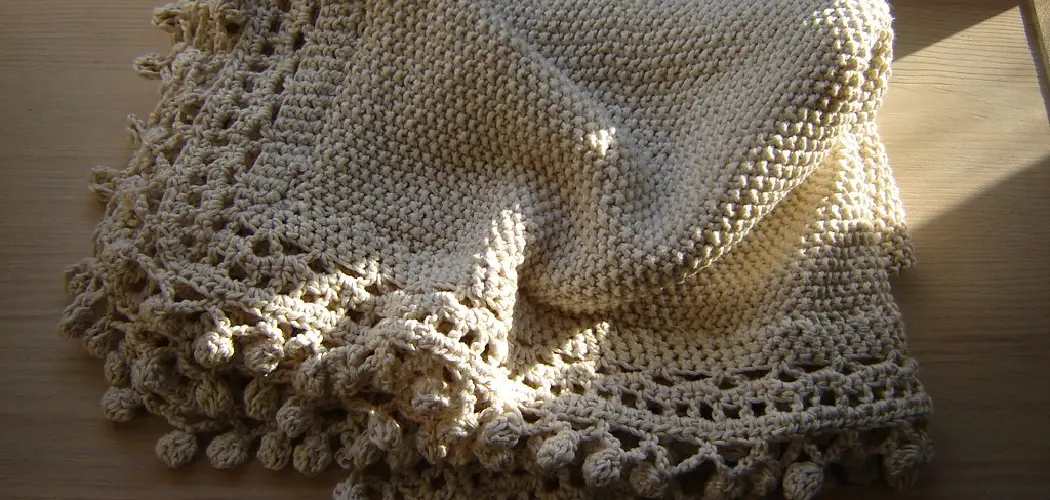
Moss stitch is a simple and classic crochet technique that creates a unique, textured look. It’s known by many names, such as linen stitch, woven stitch, or granite stitch. The pattern looks like small squares or lines of moss when finished – hence the name!
It’s often used in garments and accessories such as shawls, scarves, sweaters, and more. The moss stitch is an excellent way to add texture and visual interest to your crochet projects.
Things to Keep in Mind When Making Moss Stitch
1. Same Size Hook
Make sure to use the same size crochet hook for your entire project. If you don’t, the stitches may not be even, and your project won’t look as polished.
2. Stick to a Pattern
The moss stitch is easy enough to learn that you don’t need a pattern, but it can help if you’re just starting out. Patterns are also helpful for more complex projects such as sweaters or blankets – they provide guidelines on how many stitches and rows you should use, as well as specific instructions on how to make the stitch.

3. Learn Different Stitches
The moss stitch is made up of two basic crochet stitches – the single crochet (sc) and double crochet (dc). One way to make it easier is to learn both these stitches first before trying your hand at the moss stitch.
Required Items
- Yarn
- Crochet hook
- Scissors
- Tapestry needle for weaving in ends
How to Crochet Moss Stitch in 10 Steps
Step 1: Chain a Foundation Row
Start by chaining the desired number of stitches in multiples of two. For instance, if you want to make a scarf, chain 50 stitches. This will be your foundation row, and it’s important that this first row is even.
Step 2: Single Crochet
Next, single crochet (sc) into the second chain from your hook. When doing this, make sure to insert the hook into the back loop of each chain. Also, keep in mind that the chain count should stay even.
Step 3: Double Crochet
Then, double crochet (dc) into the next stitch. This time, though, make sure to insert your hook into both loops of each stitch as you go along. Keep repeating this step until you come to the end of the row.
Step 4: Chain One
At the end of the first row, chain one stitch. This is just a turning stitch and helps create an even look throughout your project. Chaining one at the end of each row is important for the moss stitch.

Step 5: Single Crochet
Single crochet into the same stitch as your chain one. Like before, make sure to insert your hook into the back loops of each stitch. Keep repeating this step until you reach the end of the row.
Step 6: Double Crochet
Double crochet into the next stitch. As before, make sure to insert your hook into both loops of each stitch as you go along. Keep repeating until you reach the end of the row. Double-crochet the last stitch, thus completing your second row.
Step 7: Repeat Steps 4-6
For each subsequent row, repeat steps four through six until you reach your desired length or number of rows. Make sure to chain one at the end of every single crochet row and vice versa. Remember to keep your stitches even throughout the project!
Step 8: Cast Off
When you’re finished, it’s time to cast off. To do this, cut your yarn and pull the loop through the last stitch. Pull tight so that it doesn’t unravel. Casting off your project is important for securing the stitches and is necessary if you plan to use it.
Step 9: Weave in Ends
Now that your project is complete, it’s time to weave in ends. To do this, thread a tapestry needle with the yarn tail and insert it into the back of the stitch. Make sure not to pull too tight, though – you want your project to have a neat and even look.
Step 10: Enjoy Your Project!
Now that you’ve mastered the moss stitch, it’s time to enjoy your project! Whether it’s a scarf, blanket, or shawl, it will be sure to impress. With this crochet technique, you can create eye-catching designs and textures that are sure to draw compliments. Have fun crocheting!
Following these steps, you should have no problem mastering the moss stitch and creating beautiful pieces that you can be proud of. Not only is this stitch an excellent way to add texture and visual interest to your projects, but it’s also a great way to sharpen your crochet skills.
8 Common Mistakes to Avoid
It is easy to make mistakes when you are learning how to crochet moss stitch, but there are certain errors that can be avoided with a bit of care and practice. Here’s what to watch out for:

- Not using the right hook size. Check your pattern before starting, as this will determine the correct hook size. Also, consider the yarn you are using to ensure the hook size is compatible.
- Not counting stitches. This can quickly lead to mistakes as it’s easy to miss one or two stitches if you don’t keep track of them while crocheting. Keep in mind that each stitch must be the same size.
- Not paying attention to direction. Make sure you are working from left to right on odd rows and right to left on even rows so the moss stitch looks uniform across your project.
- Working too tightly or loosely. This will affect the look of your finished piece, so ensure you use the same tension throughout.
- Not following a pattern exactly. If you are using a written pattern, make sure to read and follow it carefully — any deviations may affect how your project looks in the end. If you fail to follow the pattern, your project might look nothing like it was meant to!
- Using too many colors. Too much color can make a crocheted piece look cluttered and unappealing. Stick with just one or two colors for a neat result. Also, make sure to carry your yarn along the side of the work.
- Not using a stitch marker or row counter. This is important for keeping track of your progress and will help you avoid making mistakes as you work through the pattern. The pattern will indicate when to use a marker or counter.
- Not being patient. Crochet can be tricky, and it takes time to get the hang of it. Don’t give up — practice makes perfect! After some time, you’ll be able to crochet beautiful pieces with ease.
It may seem intimidating at first, but with the right technique and tools, you can easily learn how to crochet moss stitch. Just remember to keep these common mistakes in mind and you’ll be on your way to creating beautiful pieces!
3 Tips for Increasing Your Crochet Moss Stitch Skills
Once you’re comfortable with the basics of crocheting moss stitch, it can be helpful to try out some more advanced techniques. Here are three tips to help you increase your skills and create more intricate pieces:

- Use different yarn weights. Try out various types of yarn for a unique look, such as worsted weight chunky yarn for larger stitches, or lace weight or fingering yarns for smaller stitches.
- Experiment with colorwork. Mix and match colors to create interesting designs and patterns. This will add visual appeal to your project and give it a unique twist.
- Incorporate other stitches into your work. Adding different stitches, such as chain stitch or single crochet, can help create a variety of effects that make the piece more intricate and eye-catching.
Conclusion
All in all, the moss stitch is a beautiful and challenging technique to learn. Even with the tricky nuances of its pattern, it produces a gorgeous texture that any creator can use to enhance their work. Crochet moss stitch creates an intricate appearance encompassing both symmetry and harmony.
As you master the basics of crocheting, from stitch variations to controlling your yarn tension, you can experiment with this incredible crochet stitch. With some practice, creativity, and patience, you’ll soon be adding an extra layer of beauty to your projects with ease! No matter what journey you take in the craft of crocheting, learning how to crochet moss stitch will surely take your skillset to a whole new level.