
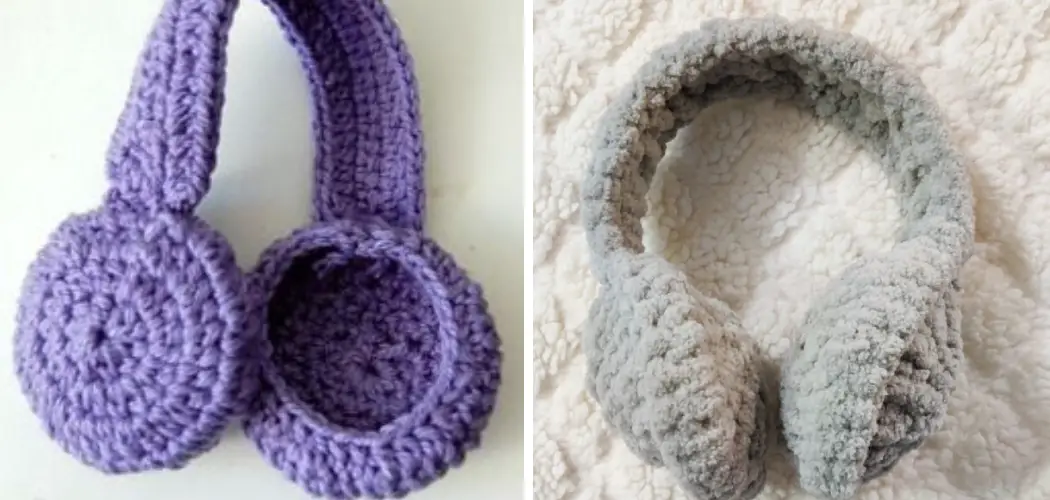
Are you looking for a great winter accessory to keep your ears nice and cozy while keeping with the cold weather fashion? Crafts are a great way to pass the time and create something special, unique, and useful. Plus, it’s an especially cozy way to get through those colder seasons that come with winter! If you’re looking for ideas on how to make some fashionable accessories for yourself or a friend, why not learn how to crochet ear muffs?

They’re easy, fun homemade gifts that can keep your friends cozy all winter long – plus they look absolutely adorable, too! In this blog post, you’ll find step-by-step tips and helpful hints for crafting the perfect pair of crocheted ear muffs. Let’s start stitching together today so you can have custom-made accessories before the snow starts falling!
What to Remember While Crochet Ear Muffs?
When you are crafting your ear muffs, it’s important to keep a few things in mind:
- Choose proper materials. To craft your crocheted ear muffs correctly, you’ll need some yarn and an appropriate crochet hook. Fuzzy or woolen yarns work best for this project since they’re softer against the skin and will keep your ears warmer in the cold weather.
- Go for an easy pattern. Don’t worry if you don’t have a lot of crochet experience, there are plenty of cute and simple patterns online that even beginners can follow! It only takes about two to three hours to make a pair of crocheted earmuffs, so you can easily make these for a quick winter gift.
- Add embellishments. To make your ear muffs look extra special, you can add decorative elements like pom-poms, bows, or buttons. You can even embroider a design or name into the fabric to give it a personal touch!
Required Items
To start your ear muff project, here is a list of items that you’ll need:
- Crochet hook. (Suggested size: 4mm or 5mm)
- Yarn. (Choose a soft yarn for the best results)
- Scissors
- Embellishments of choice (optional)
- Tape measure
10 Steps on How to Crochet Ear Muffs
Now that you’ve gathered all the necessary materials, it’s time to begin crafting your own pair of crocheted ear muffs. Follow these steps, and you’ll have a comfy accessory before you know it!
Step 1: Measurement
Measure your head. Before starting the project, you’ll need to know the width of your head. This will help you determine how many stitches and chains to make for the ear muffs. Also, measure around your ears to determine the width that needs to be covered.

Step 2: Create a Foundation Chain
Make a chain with about the same number of stitches as the circumference you measured for your head. Make sure it’s not too tight or too loose – you should be able to slide two fingers between each stitch.
Step 3: Single Crochet Row
Once you have created your foundation chain, single crochet in each stitch for the entirety of the chain; this will create a band that will fit around your head comfortably. Single crocheting will also make the ear muffs thicker, which is better for insulation and warmth.
Step 4: Create Second Row
Create a second row by working in the back loop of each stitch from the previous round. This will give the band a ribbed texture that looks great and provides extra grip to help keep your ears warm.
Step 5: Increase the Width
To increase the width of your ear muffs, you will need to add extra stitches in each row. This can be done by creating a chain stitch at the start and end of each row. Counting your stitches as you go is important to make sure that each row has been increased evenly.
Step 6: Crochet in Rounds
Once you’ve reached the desired width, it’s time to begin crocheting in rounds. Start by doing two single crochet stitches in each stitch for the first row and increase as needed from there. Keep crocheting until the ear muffs reach your desired length.

Step 7: Make a Single Crochet Decrease
When you have reached the desired length, it’s time to do a single crochet decrease. This will close off the end of your ear muffs and create an even edge. To do this, slip stitch twice in each stitch until you reach the end.
Step 8: Create a Top Border
Once you have finished crocheting the decrease, it’s time to create a top border. To do this, simply single crochet around the entire edge of your ear muffs. This will give them a more polished look and help keep everything together.
Step 9: Add Embellishments
Now is the time to add any embellishments to your ear muffs. You can add buttons, bows, or pom-poms – whatever you think will look the best. Alternatively, if you have a bit of embroidery experience, you can also embroider a name or design into the fabric for a personalized touch!
Step 10: Weave in Ends and Enjoy
Once you have finished adding your embellishments, it’s time to weave in any loose ends and snip off any extra yarn. Now all that’s left to do is enjoy your cozy new winter accessory! Wear them everywhere and stay warm this season.
Now that you know how to crochet ear muffs, it’s time to start crafting! Get creative with colors and patterns, use different materials to create unique textures, or even add some sparkle with sequins. With a bit of practice, you can make yourself a fashionable winter accessory that will keep your ears warm all season long.
8 Common Mistakes to Avoid
Whether you’re a beginner or a seasoned crocheter, there are some common mistakes that can easily be made while creating ear muffs. To ensure that your project turns out perfectly, here are 8 tips to help you avoid the most common errors:

- Not Choosing the Right Yarn Weight is a common mistake. When it comes to crocheting ear muffs, you want to use a medium-weight yarn. Anything heavier will make the muffs too bulky, and anything lighter will be too flimsy.
- Not Measuring your Work is another common mistake. Before starting each round, measure your work – this will help you adjust if necessary and ensure that your project turns out evenly sized.
- Using the Wrong Hook Size can also be a problem. The correct hook size for ear muffs is typically a G/7 or 4mm crochet hook – any other size may cause issues with your project’s fit and stiffness.
- Not Joining each Row Properly will hinder the progress of your project. To ensure an even stitch and a seamless look, be sure to join each row by slipping a stitch at the end of your work.
- Not Counting your Stitches is also essential for an even result. Keep track of your stitches as you go – this will ensure that you don’t have any extra or missing stitches in the end.
- Skipping Required Seams is another issue. When crocheting ear muffs, it’s important to make sure that you are creating the correct number of seams in each round – this will ensure your project fits snugly around your head.
- Not Knowing How to Make a Chain is an easy mistake to make when starting out with crochet projects. To begin, you will need to know how to make a chain – start with a slip knot, then yarn over and draw the hook through the loop.
- Not Being Patient is one of the most important tips. Crocheting ear muffs can be tricky and time consuming, so it’s important to be patient in order to produce a beautiful finished product. With time and practice, you’ll be able to make perfect ear muffs in no time.
By following these tips on how to crochet ear muffs, you will be well on your way to making the perfect pair of crocheted ear muffs! If you need extra help along the way, don’t forget to consult online tutorials or join a local crochet group for additional support and guidance.
6 Tips to Master Crocheting Ear Muffs

- Choose the right yarn. Make sure you choose a thick, warm yarn to crochet ear muffs. Some great options are chunky chenille or super bulky wool blends. You’ll need 2-4 skeins depending on how long you want your ear muffs to be and what size hook you use.
- Select the right size crochet hook. The most common size for crocheting ear muffs is an N (9mm) or Q (15mm) crochet hook. If you’re using a thicker yarn, then use the larger hook to make sure your stitches are loose enough.
- Learn the basic stitches. For crochet ear muffs, you only need to know a few basic stitches: half double crochet (HDC), single crochet (SC), and doubles (DC). Once you’ve mastered these, your ear muffs will look great.
- Make sure to measure. Measure the circumference of your head before you start crocheting in order to make sure you get the perfect fit for your ear muffs. You can also measure the length of your ear muffs from the top of your head to below your ears.
- Use stitch markers. Stitch markers are essential for crocheting ear muffs as they help you keep track of where you need to increase or decrease stitches so that the edges don’t get too lumpy or uneven.
- Make sure your edges are even. After you’ve finished crocheting, check that the edges of your ear muffs are even. If they aren’t, you can try to use a tapestry needle to fix them.

Conclusion
Congratulations, you’ve just learned how to crochet ear muffs! You now know all the tips and tricks to creating something fashionable and useful. Not only will your ear muffs look great, but they can also keep your ears warm during the winter months. Whether you’re a novice or a pro at crocheting, the steps in this blog post should be easy for you to follow.
So why not show off your new skills? Pick out some bright colors and start making those earmuffs today! With practice, who knows what other accessories you can make using these same skills? So get creative and have fun!