
Are you a beginner knitter wanting to take your projects to the next level? Have you heard of stitch markers, but still feel confused about how to use them? Look no further! In this blog post, we’ll go through everything you need to know about using stitch markers in knitting.

Whether it’s learning what kinds of materials can be used as stitch markers, where and when they should be placed on the needles, or even discovering creative alternatives for traditional makers —by the end of this article on how to use stitch markers in knitting, you will have all the information and confidence necessary to transform your work and reap a whole new set of rewards. So grab your coat and some yarn – let’s dive in!
11 Step-by-step Instructions on How to Use Stitch Markers in Knitting
Step 1: Gather Your Materials
Make sure to have these items handy before you begin:
- Knitting Needles
- Yarn
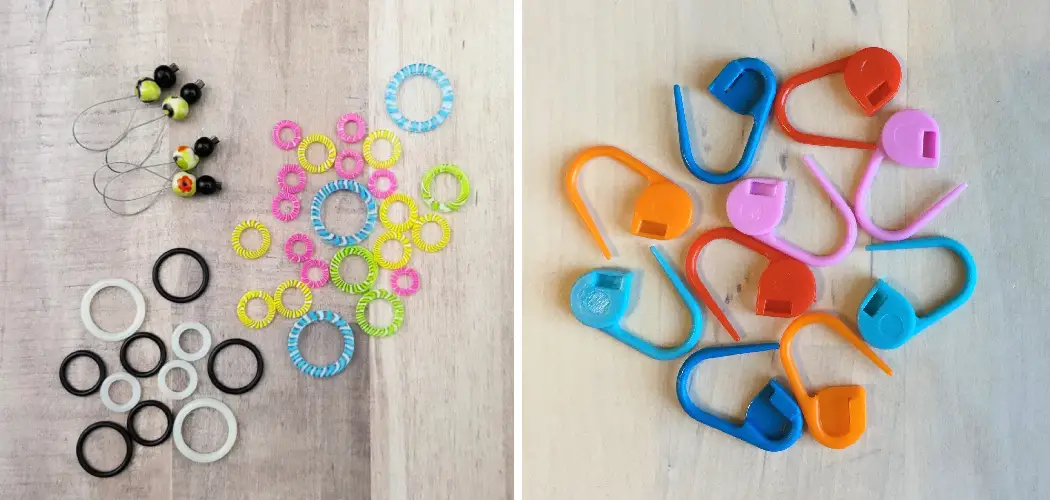
- Stitch Markers (or Alternative)
- Scissors
Step 2: Choose Your Stitch Markers
You can buy ready-made stitch markers at craft stores or online, but you can also make them from any number of materials lying around the house – paper clips, safety pins, buttons, etc.
For more advanced projects where markers will be placed in multiple places and need to stay on the needles securely, metal stitch markers are a great choice. But for more basic projects like scarves and hats, you can get away with just about anything!
Step 3: Attach the Stitch Markers to the Needles
Slide the stitch marker onto your left needle before you start knitting. This will help to keep track of the row you are on. When you reach the stitch marker, slip it onto your right needle and continue knitting until you reach the end of your row.

You can also use multiple stitch markers for more intricate patterns or projects to mark specific locations like increases, decreases or even a pattern repeat.
Step 4: Keep Counting Your Rows
Once you’ve placed the stitch marker on your left needle, begin counting your rows from there. This will make it easier to keep track of how many rows you have knitted and when it is time to move on to the next step in the pattern.
If you’ve used multiple stitch markers, be sure to count the rows between them as well. But if you’ve just used one stitch marker, count from the beginning of your project. This is a great way to make sure you don’t lose your place in the pattern.
Step 5: Place Stitch Markers at Key Locations
If you’re working on a larger project like a sweater, be sure to place stitch markers at key locations. This will help keep track of increases, decreases, and pattern repeats. After placing the stitch marker, just keep knitting until you reach it again! If you’re using multiple stitch markers, use a different color to mark each section.
This will help avoid confusion and make it easier to keep track of your progress. It may also help to mark the center of your project with a different colored stitch marker. This will make it easier to tell when you have reached the halfway point.
Step 6: Move Stitch Markers Up with Each Row
As you knit each row of your project, make sure to move the stitch markers up each time. This will keep track of your progress and ensure that the markers stay in the correct position for tracking increases, decreases, or pattern repeats. This is especially important when you’re working on larger projects.
If you find that the markers are slipping off the needles, try using stitch holders instead. This will help to keep the markers secure and in the correct place.
Step 7: Take Note of Stitches Count
As you move the stitch markers up with each row, take note of how many stitches are between each marker. This can be helpful for tracking increases, decreases, or pattern repeats. It can also help to keep track of how many rows you have knitted in total.

But be sure to mark down each stitch count on a piece of paper or in the pattern instructions! You don’t want to have to count and recount the stitches every time you move the stitch markers up.
Step 8: Check Your Work Regularly
To make sure that your stitch markers are in the right place and that you haven’t made any mistakes while counting rows and stitches, periodically check your work against the pattern instructions.
You can also double-check by counting the number of stitches between each marker and comparing it to what is indicated in the pattern. This will help ensure that your project is progressing as it should! It’s also a great way to catch any mistakes before they become too big of an issue.
Step 9: Take Breaks When Necessary
If you’ve been knitting for a while and begin to feel overwhelmed, take breaks! This will help ensure that you don’t make any mistakes while keeping track of your stitches. But when you’re ready to get back to work, make sure to double-check your stitch markers and count the stitches between them.
Step 10: Removing Stitch Markers
When it is time to remove the stitch markers, simply slip them off the needles. If you’re using metal ones, they can be reused for future projects. You can also store them in a container or bag for easy access. It can also be helpful to label them if you’re using multiple colors for different sections or stitch locations. This will help you stay organized and make it easier to find the right marker for each project.
Step 11: Enjoy the Results of Your Work!
Congratulations on completing your project and mastering how to use stitch markers in knitting! Now it’s time to sit back and admire your beautiful work with confidence that you have mastered a new skill. It’s time to show off your finished piece and enjoy the rewards of all your hard work! Always remember to keep practicing and honing your knitting skills – you never know what you might make next!

Following these steps will ensure that you will have an easier time tracking your stitches and progress on any knitting project. With a little patience and practice, soon enough you’ll be able to use stitch markers like a pro!
Bonus Tips
- If You’re Using a Circular Needle, Make Sure to Slip the Stitch Markers Onto the Cable Portion of the Needle So They Don’t Get in the Way.
- Don’t Be Afraid to Experiment With Different Materials for Your Stitch Markers! Even Something as Simple as a Paperclip Can Do the Job Just Fine.
- Remember That It’s Always Better to Err on the Side of Caution and Place More Markers Than Fewer – It Will Make Your Life a Lot Easier in the Long Run.
- It’s Always Helpful to Write Down the Number of Stitches Between Each Stitch Marker as You Work, Just in Case Something Happens and You Need to Start Over!
Now that you know all there is to know about using stitch markers in knitting, get out there and start your project! With the help of stitch markers, you can create beautiful items like never before. Good luck and happy knitting!
Frequently Asked Questions
Q: What Kinds of Materials Can Be Used as Stitch Markers?
A: You can use just about anything – paper clips, safety pins, buttons, or even small pieces of yarn. For more advanced projects, metal stitch markers are a great choice.
Q: When and Where Should I Place Stitch Markers?
A: You should place the stitch marker onto your left needle before you start knitting. This will help to keep track of which row you are on. Additionally, it is important to use stitch markers for more intricate patterns or projects to mark specific locations like increases, decreases, or a pattern repeat.
Q: How Do I Keep Track of My Progress?
A: Make sure to move the stitch markers up with each row and take note of how many stitches are between each marker. This can be helpful for tracking increases, decreases, or pattern repeats. You should also periodically check your work against the pattern instructions to make sure that you haven’t made any mistakes while counting rows and stitches.

Q: Do I Have To Use Stitch Markers?
A: While it is not necessary to use stitch markers in knitting, they can be very helpful for keeping track of your progress and making sure that you don’t make any mistakes. If you choose to use them, following the steps outlined in this guide will ensure that you get the most out of your project!
Good luck with your next knitting project and happy stitching!
Conclusion
Knitting with stitch markers can make knitting projects a breeze. With all of the available options for shapes, sizes and materials, it’s never been easier to find the perfect marker for whatever type of project you have in mind.
Whether you’re making something small and delicate or complex and intricate, having stitch markers on hand can make pieces both beautiful and easy to complete. If you take good care of them, they can even last through multiple projects, making them an even more cost-effective option.
As with any knitting tool, a little practice goes a long way; however, with the right stitch marker in place, your weaving work will be as smooth as possible! Thanks for reading this article on how to use stitch markers in knitting.