
As the holiday season approaches, adorning a Christmas tree is a cherished tradition that fills our homes with warmth and festive spirit. If you’re looking to infuse your tree with shimmer and glimmer, tinseling is the way to go.

Tinsel adds a touch of old-world glamour and a magical sparkle to your evergreen centerpiece. In this guide, we’ll explore the art of tinseling a Christmas tree, from selecting the right tinsel to mastering the techniques that make your tree truly stand out.We’ll delve into various tinsel types, demonstrate step-by-step application methods, and offer creative ideas for achieving a stunning and personalized holiday display.
Whether you’re a seasoned decorator or a novice in the realm of holiday trimmings, learning how to tinsel a Christmas tree will undoubtedly elevate your festive décor, bringing the joy of the season to life in your living room.
The Importance of Proper Tinseling for a Festive Holiday Atmosphere
The Christmas tree has been a staple in holiday celebrations for centuries. It is a symbol of joy, giving, and togetherness during the most wonderful time of the year. Decorating the tree is one of the most cherished traditions during Christmas, and tinseling plays an essential role in creating a festive atmosphere.
Tinsel was first invented in Germany in the early 17th century using pure silver. Its popularity spread quickly throughout Europe and eventually to America. In its early days, tinsel was considered a luxury item due to its expensive production process. But with technological advancements, it became more affordable and readily available to households around the world.
Today, we can find tinsel made from various materials such as plastic, foil, and even recycled materials. It comes in different colors, shapes, and sizes, making it a versatile decoration for Christmas trees. However, its purpose remains the same – to add sparkle and shine to the tree.
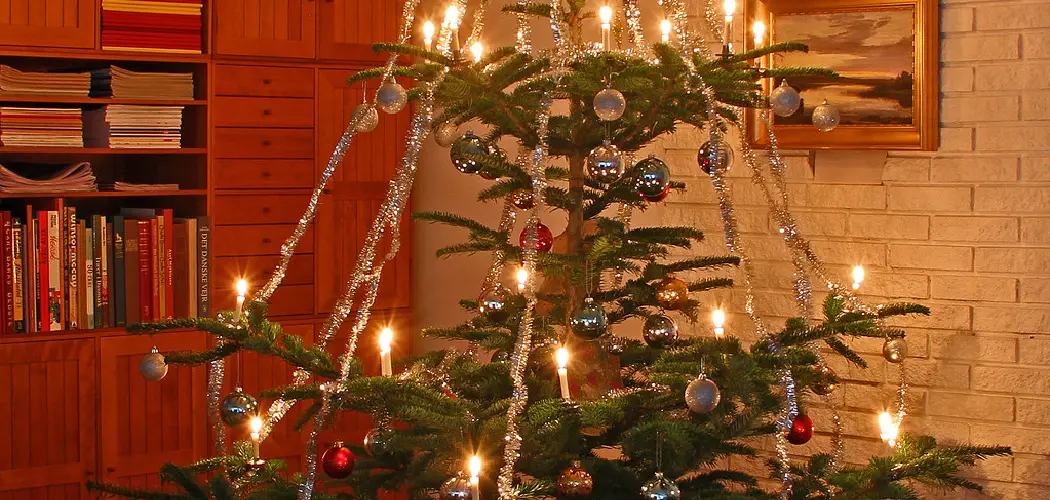
10 Methods How to Tinsel a Christmas Tree
1. Start With the Lights
The first step to tinseling a Christmas tree is to start with the lights. This will ensure that your tree is lit up and ready for decoration. Begin by wrapping the string of lights around the trunk of the tree, starting at the bottom and working your way up to the top. Make sure to leave some slack in between each loop so that you can move them around if necessary. Once you reach the top, plug in your lights and make sure they are all working properly.

2. Add Garland
Once you have your lights in place, it’s time to add some garland. You can use a variety of different types of garland such as tinsel, ribbon or even artificial ivy to give your tree a festive look. Start at the bottom of the tree and work your way up, making sure to evenly distribute the garland around the entire tree.
3. Hang Ornaments
Now it’s time for the fun part – hanging ornaments! Start by selecting a few larger ornaments that will be placed near the bottom of your tree and then work your way up with smaller ones as you go higher on the branches. Make sure to hang them from their hooks so they don’t fall off when touched or bumped into later on!
4. Place Bows
Bows are another great way to dress up a Christmas tree and add an extra touch of holiday cheer! You can either purchase pre-made bows or make them yourself using ribbon or fabric scraps that you have lying around at home. Place these bows throughout your tree for added color and texture – just make sure not to put too many as this may take away from other decorations!

5. Add Tinsel
When it comes time to add tinsel, start by draping it over any exposed branches near the top of your tree first before moving down towards lower branches as needed. Make sure not to overdo it with too much tinsel as this could weigh down some branches and cause them to droop over time! Once you’re finished adding tinsel, stand back and admire how beautiful your Christmas Tree looks!
6. Top It Off With a Star or Angel
To complete your Christmas Tree decoration process, top it off with either a star or an angel at its peak point! This is usually done after all other decorations have been added so that it stand out prominently against everything else on display – making for an eye-catching centerpiece during holiday gatherings! If desired, you can even light up this final piece with LED lights for extra sparkle & shine!
7. Put Gifts Underneath
Now that everything has been added to the top of your tree, don’t forget about what goes underneath: gifts! Arrange packages neatly under their boughs so that they are easy to access when opening presents come Christmas morning – making everyone’s day extra special & memorable!
8. Accentuate With Accessories
To really bring out all of those decorations while also adding more festive flair, consider accentuating with accessories like stockings hung from fireplace mantles & walls; wreaths hung from doors; figurines placed atop tables & shelves; poinsettias placed along windowsills; etc.. All these little details help create an overall inviting atmosphere during this special season – perfect for family gatherings & entertaining guests alike!
9. Use Ribbon For Extra Flair
Ribbon is another great accessory used when decorating trees because it adds an extra bit of texture & color without taking away from any existing decorations – plus, there are endless possibilities when creating patterns & designs with ribbon loops & bows, which makes every project unique & exciting each year!
So get creative when tying ribbons onto branches in order to really bring out those colors this holiday season…and don’t forget about adding one big bow on top for an extra bit of pizzazz.

10. Enjoy Your Handiwork
Finally, once all steps have been completed above (including putting gifts underneath), sit back and enjoy all of the hard work spent decorating this year’s Christmas Tree – because now it’s officially ready for admiring by friends & family alike…and most importantly: celebrating Christmas Day together in style! With all of these tips in mind, you’ll be a pro at tinseling a Christmas Tree in no time! Happy decorating and happy holidays to you and your loved ones.
Things to Consider When Tinsel a Christmas Tree
Christmas is known for its festive decorations and one of the most iconic decorations associated with this holiday is tinsel. If you’re planning on decorating your Christmas tree with tinsel, there are a few things you should consider to ensure that your tree looks its best. In this guide, we’ll discuss some important factors to keep in mind when tinseling your Christmas tree.
Tinsel Placement
The first thing to consider when tinseling a Christmas tree is where exactly you want to place the tinsel. Traditionally, tinsel was placed on the outer branches of the tree, creating a sparkling effect as it caught the light. However, you may also choose to weave tinsel throughout the entire tree for a more uniformed look. Whichever placement you decide on, make sure that it is evenly distributed and not clumped up in one area.
Color Coordination
Another important factor to consider when decorating your Christmas tree with tinsel is color coordination. If you have a specific color scheme for your tree, make sure that the tinsel complements it. You can either match the tinsel to your ornaments or use a different color altogether for contrast. Additionally, try to avoid using too many colors as this can create an overwhelming and cluttered appearance.

Type of Tinsel
Tinsel comes in various shapes and sizes, from thin strands to thick ribbons. The type of tinsel you choose can greatly affect the overall look of your tree. Thin tinsel works best for a subtle touch of sparkle, while thicker tinsel can create a more dramatic effect. You may also opt for holographic or glittery tinsel to add an extra festive touch. Consider the overall theme and style of your tree when selecting the type of tinsel to use.
Common Mistakes to Avoid When Tinseling a Christmas Tree
Tinsel is an essential part of decorating Christmas trees that can really make them stand out. However, it’s easy to get carried away and end up with a messy tree instead of a beautifully tinseled one. To help you achieve the perfect look for your Christmas tree, here are some common mistakes to avoid when tinseling:
- Using too much tinsel: It can be tempting to cover your entire tree in tinsel, but this will only result in a cluttered and overwhelming look. Instead, use tinsel sparingly and strategically. A good rule of thumb is to have no more than five strands of tinsel per branch.
- Hanging the tinsel vertically: Tinsel should be hung horizontally to create a cascading effect. Hanging it vertically will only make your tree look tacky and unbalanced.
- Not fluffing the tinsel: Before hanging your tinsel, take some time to separate and fluff out each strand. This will give your tree a fuller and more dimensional look.
- Using too many colors: While it may seem fun to have a variety of colored tinsel on your tree, using too many colors can result in a chaotic and mismatched appearance. Stick to one or two complementary colors for a cohesive look.
- Forgetting about the back of the tree: It’s important to remember to place tinsel on the back of the tree as well. Neglecting this area will leave your tree looking unfinished and unbalanced.
- Not securing the tinsel: Tinsel can easily fall off and create a mess if not properly secured to the branches of your tree. Make sure to wrap it around the branch or use ornament hooks to keep it in place.
Conclusion
Decorating your Christmas tree with tinsel is an enjoyable and festive activity that your whole family can enjoy together. Be sure to have plenty of extra tinsel handy in case any falls off during the process so you don’t have bald spots. It might be a good idea to have a helper or two nearby to keep things organized and lend a hand should it be necessary.

Have fun choosing colors, mixing patterns, and adding accents that reflect your style and taste. And most importantly, cherish the memories you make while crafting your beautiful holiday masterpiece for years to come! Don’t forget – now you know how to tinsel a christmas tree!