
Are you looking to take your crochet skills to the next level? Crocheting is a pastime that many people have taken up to find solace and relaxation in their lives. Whether you’re looking for something fun to do on the weekends or just want to try something new, learning how to crochet has its own set of benefits.

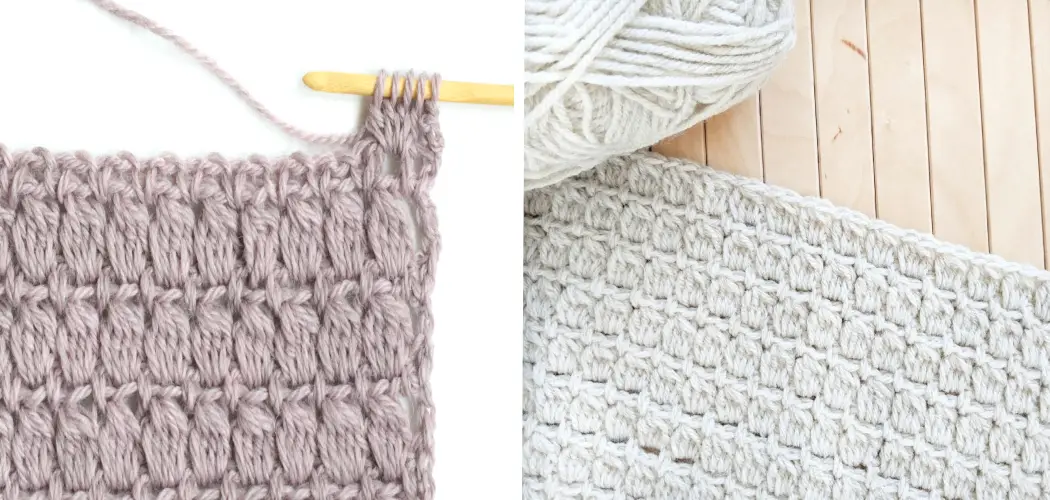
One of the beautiful stitches you can make with your hook and yarn is Cluster Stitch, which creates a unique texture and gives any project intricate detailing. Mastering this stitch requires patience—but with our step-by-step instructions on how to crochet cluster stitch, you will soon be crocheting like a pro!
Read on as we guide you through everything there is to know about Crochet Cluster Stitch; from preparation tips to helpful tricks while stitching away. With just a few simple steps, we’ll show you how to work the cluster stitch like a pro.
What is Cluster Stitch?
Cluster Stitch is a type of crochet stitch that creates a unique texture and gives projects intricate detailing. It’s made up of several stitches linked together to form clusters, which are then worked into the next row or round of crocheting. This stitch can be used for various types of projects, such as blankets, sweaters, afghans, scarves, and more.
Things to Keep in Mind When Crocheting Cluster Stitch
1. Right Yarn and Hook
Make sure you have the right yarn and hook for your project. Choose a yarn that is compatible with the size of the hook you’ll be using, as well as one that has enough give when crocheting. A good rule of thumb is to always use the same hook size when working with a particular yarn weight.
2. Read Patterns Carefully
Cluster stitches can be worked up in various ways, so it’s important to read patterns carefully before starting your project. Pay attention to how the clusters are formed and worked into each row or round. It’s also helpful to count the number of stitches used in a cluster so you know how many stitches to work in the following row or round.

3. Practice Makes Perfect
It may take some time and practice before you get comfortable with this stitch, but that’s the beauty of crocheting! The more you crochet, the better your techniques become. As with any stitch, keep practicing to build up your skills, and soon enough, you’ll be crocheting cluster stitch like a pro.
Preparation
Before you start the cluster stitch for your project, make sure to have the following supplies on hand:
- Crochet hook (size depends on the type of yarn and desired effect)
- Yarn (any type will do)
- Scissors or snips (for cutting yarn ends)
- Tapestry needle (for weaving in ends)
How to Crochet Cluster Stitch in 10 Ways
Once you have your supplies ready, it’s time to start crocheting! Here are the steps you need to follow:
1. Create Foundation
Begin by creating a foundation chain of the desired length. While doing this, make sure the tension is not too tight nor too loose. Also, be sure to count the foundation stitches so that you can work them into the following rows.
2. Chain 3 Stitches
Chain three stitches for each cluster stitch in the row. Make sure to keep the chains loose and even throughout your row. This will give a nice look when crocheting each cluster stitch.

3. Yarn Over
Now, yarn over the hook and draw your loop through the three chains. You now have a cluster stitch of four loops on your hook. Yarning over means wrapping the yarn around the hook from back to front.
4. Yarn Over Again
Yarn over again and draw through two loops on your hook. You should now have three loops remaining on your hook. Also, make sure the yarn is not twisted when making each stitch.
5. Repeat Step 4
Repeat step four until you have only one loop remaining on your hook. You should also count the number of loops as you are crocheting to ensure that you have a total of four loops at the end.
6. Slip Stitch into the Next Chain
When you have one loop left on your hook, slip-stitch it into the next chain of the foundation row. Make sure to keep the tension even when doing this. Slipping stitch means putting the hook through the next chain and then yarn over, drawing your loop through both loops on your hook.
7. Repeat Steps 2-6
Repeat steps two to six for each cluster stitch in the row. Make sure to count as you go so that you don’t miss any stitches. It’s also important to check if the tension is even throughout your row.
8. Pull Up Yarn Loop
Once you have finished crocheting the cluster stitch, pull up a yarn loop from the top of the last cluster stitch and cut the yarn. This will provide a nice finishing touch for your work.
9. Weave in Ends
Finally, use a tapestry needle to weave in the ends. This will help secure the stitches and give your project a neat look. Weaves in ends means threading the needle through the back loops of the stitches and then pulling it over to the front.

10. Flatten Your Work
Once you have finished weaving in the ends, flatten your work by pushing any stray loops together. This will help make sure that all of your clusters are even and uniform throughout your project.
Following these ten steps, you’ll be able to crochet cluster stitch like a pro! Now that you know how to make this beautiful stitch, you can use it in any project and add an extra touch of elegance.
8 Common Mistakes to Avoid
Crocheting a cluster stitch can be tricky, but with the right techniques and tips, you can master this skill. However, if done incorrectly, it can result in an unsatisfactory end product. To ensure you get the most out of your cluster stitch projects, here are 8 common mistakes to avoid:
- Not counting stitches. One of the most important things to remember when crocheting a cluster stitch is to count your stitches. If you miss out on counting a stitch, the entire project may be ruined. Double-check each row and make sure that all of the stitches are accounted for.
- Wrong tension. When starting off with a cluster stitch, it’s important to maintain an even tension throughout the entire project. If the tension is too tight, it can make the stitch look too bulky and misshapen. On the other hand, if the tension is too loose, it will cause your stitches to be inconsistent in size.
- Not using a stitch marker. When working with cluster stitches, it’s always helpful to use a stitch marker to keep track of where you started the project. This helps create a smooth transition between rows and can also help you identify which row you are on in case you get lost during the process.
- Not taking breaks. When crocheting cluster stitches, it’s always important to take regular breaks to rest your hands and eyes. This will allow your muscles to relax and prevent them from tensing up or cramping.
- Not using the right hook size. Using a hook that is too small or large can cause your stitches to be uneven and misshapen. It’s important to use a crochet hook that is the right size for the type of yarn you are using so that your project comes out looking its best!
- Not following the pattern. Every cluster stitch project has a specific pattern that needs to be followed in order to create the correct end product. If you don’t follow the instructions closely, it can really mess up your project and cause it to look sloppy.
- Not using high-quality yarn. When choosing yarn for your cluster stitch projects, it’s important to use high-quality yarn that is soft and durable. Low-quality yarns can be hard to work with and won’t create the same level of detail as higher-quality ones.
- Not paying attention to gauge. Gauge plays a huge role in determining how your project will look, so it’s important to pay close attention to it when crocheting a cluster stitch. Taking the time to measure your gauge will result in a much better-finished product.

By following these tips, you can ensure that your cluster stitch projects come out looking great! With practice and patience, you’ll be able to master this skill in no time!
Conclusion
After learning how to crochet cluster stitch, you should be feeling more comfortable with your crochet project. With practice and patience, you will be able to master this complex and beautiful stitch. The cluster stitch can be used for individual items or large projects such a blankets or shawls. Not only is it visually appealing, but it also adds texture to garments that could otherwise feel flat and dull.
As you continue creating with yarn and hook, don’t forget the importance of adding variety in color, texture, and style. Endeavor to look back on each project with a newfound appreciation for the diverse capability of the craft of crochet. So grab some yarn and dig out an old hook – let’s get started on making something fabulous!