
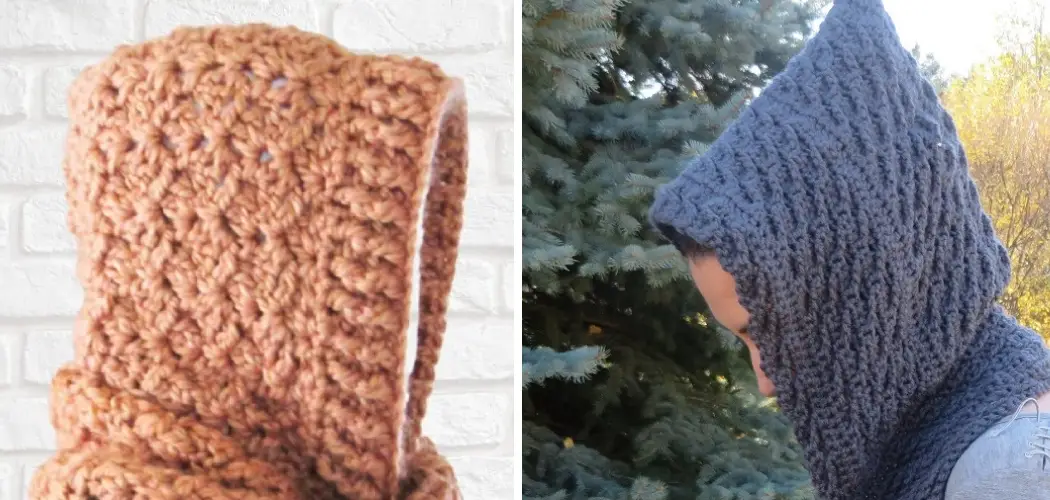
Are you looking for a great project that marries your love of fashion and creativity, all while giving back to society? If so, then crocheting a hooded scarf could be the perfect pick-me-up! This type of scarf adds an extra layer of warmth during winter months, but also looks amazing as part of any outfit.
Plus, it’s relatively easy to make; with the right tools and a few steps on how to crochet a hooded scarf, anyone can create this stylish accessory for themselves or friends. Get ready to find out how — below are all the details needed for making your own hooded scarf!

Why Do You Need to Rochet a Hooded Scarf?
A hooded scarf is a great way to stay warm during colder months. It’s an extra layer of protection from the chilly wind and can be made in various colors and styles. Plus, you don’t have to worry about having a matching outfit; no matter what, your scarf will always look nice.
But it doesn’t just provide warmth; it’s also incredibly stylish. It adds a fun and unique layer to any outfit, while still keeping you cozy. Plus, hooded scarves can be made in any color or pattern that your heart desires — think of the possibilities!
Needed Materials
- Yarn (Choose Any Weight and Color You Like)
- Crochet Hook
- Tape Measure or Ruler
- Scissors
- Needle
- Optional: Buttons or Other Decorative Accents
11 Step-by-step Guidelines on How to Crochet a Hooded Scarf
Step 1: Measure Out the Yarn
You’ll need 100 yards (or more, depending on how long and wide you want your scarf to be) of any weight and color that you like. It’s best to use a solid color, but don’t be afraid to get creative with the yarn you choose!
But first, measure out the yarn and make sure to have at least 100 yards before beginning. If you don’t have enough, grab more and start over. It’s also a good idea to use a tape measure for accuracy. But if you don’t have one, a regular ruler will work.

Step 2: Choose Your Crochet Hook
Once you’ve gathered your supplies, it’s time to select a crochet hook. This will depend on the type of yarn you purchased; check the label for the suggested hook size. It’s always best to use the size indicated, as it will create an even stitch and prevent your scarf from having any unsightly bumps.
You can also look up the hook size online if you’re not sure. It’s usually best to use one that is two or three sizes smaller than the yarn label suggests. You can always adjust the hook size based on your preference and comfort.
Step 3: Make a Chain
Now that you have all your materials ready, begin by making a chain with your crochet hook and yarn. Start by making a slip knot, then chain the desired number of stitches for your scarf. Refer to a crochet diagram or instructions if you need help with this step.
It’s important to make sure that your chain is loose and even. This will ensure that your scarf looks neat and not too bulky. Make sure to leave enough space between each stitch — about one-third of an inch should do the trick.
Step 4: Single Crochet
Once you’ve created the chain, start single crocheting across. This will be done by inserting your hook into each stitch and pulling up a loop. Make sure to keep your stitches even as you single crochet across the chain. Otherwise, you’ll have an uneven scarf.
It’s important to keep each stitch straight as you make your way across. This will ensure that your scarf looks neat and professional. It’s also a good idea to count your stitches as you go, as it will help keep track of where you are.
Step 5: Continue Single Crocheting
Continue single crocheting until you reach the desired length of your scarf. Depending on how wide and long you want it, this could take anywhere from 20-60 rows or more. Keep measuring periodically to ensure your scarf is the size you want.

This will also help to prevent any unexpected issues from happening. It’s always best to be prepared and double-check your measurements. It’s important to note that the width of your scarf will depend on how many stitches you make. This is why it’s important to keep track of your stitch count as you go.
Step 6: Make the Hood
Once your scarf has reached the desired length, it’s time to create the hood. To do this, begin single crocheting in one corner of the scarf and keep going until you reach the opposite side (or however large you want the hood to be). Make sure to keep your stitches even.
This is important as it will help to create a neat and even hood for your scarf. It’s also best to measure periodically, just in case. But once you’ve single-crocheted your way across, it’s time to move on.
Step 7: Single Crochet the Sides
Once you’ve reached the desired size for the hood, it’s time to single-crochet each side of the hood together. Begin by folding the scarf in half so that both sides are touching and start single crocheting until you reach the end. Make sure to keep your stitches even throughout this step. You should now have a hooded scarf with two sides that are connected. It’s now time to finish off the edges.
Step 8: Finish Up the Hood
Once you’ve single-crocheted both sides of the hood together, it’s time to finish up. To do this, simply fasten off your yarn and weave in any loose ends that might have been left. You can also use a needle to help secure the edges if needed. You should now have a neat and even hood for your scarf.
It’s time to start on the neckline! If you’re adding any decorative accents (like buttons), now is the time to do it. It’s also a great way to personalize your scarf.
Step 9: Add Buttons or Other Decorative Accents
This step is completely optional, but it’s a great way to add your own personal touch and make the scarf more unique. You can choose to add buttons, patches, or any other type of decorative accent that you like.

It’s best to sew these accents onto the scarf instead of gluing them, as this will ensure they stay on for a longer period of time. Buttons are usually used for the neckline, but you can get creative and add whatever accents you like.
Step 10: Take Measurements
Before you’re finished, it’s important to take measurements of your scarf. This will ensure that the hood is the right size and shape for your needs. You can either use a measuring tape or ruler for this step, but make sure to measure all sides of the scarf in order to get accurate results. It’s also a good idea to measure the neckline and make sure that it is the right size for your head.
Step 11: Enjoy!
Now that you’ve finished crocheting your hooded scarf, it’s time to enjoy the fruits of your labor. Whether you want to wear it yourself or give it as a gift, this stylish accessory will not only keep you warm but make sure you look good while doing so! Always make sure to wear it with pride!
Now, you can curl up with a good book and stay cozy this winter season. Happy crocheting! It’s time to show off your masterpiece!
Following these 11 steps on how to crochet a hooded scarf and having the proper tools will make sure that your hooded scarf looks amazing. But most importantly, it’s a fun and rewarding project to work on — so why not give it a go today? With some patience and creativity, you can create the perfect accessory for yourself or someone else!
Ideas on How to Style Your Hooded Scarf
One of the great things about a hooded scarf is that it can be worn in many different ways. Here are a few ideas on how you can style your new accessory:
- Pair Your Hooded Scarf With a Jean Jacket and Boots for an Outdoor Adventure or Autumn Stroll.
- Layer It Over a Turtleneck Sweater and Leggings for a Cozy Yet Stylish Winter Look.
- Wear It Over a Simple Dress or Skirt for an Elegant Evening Out.
- Stay Warm While Studying by Wearing Your Hooded Scarf With a Blazer and Jeans.

Whether you’re planning on going outside in the snow or just want to add a fashionable touch to your outfit, a hooded scarf is the perfect accessory for any occasion. So take some time to create one that will have you feeling like the trendiest person around!
Frequently Asked Questions
Q: How Long Does It Take to Crochet a Hooded Scarf?
A: It depends on how big and complex you make it. Generally, it should take anywhere from an hour to several hours — depending on your level of skill and experience. It’s also helpful to refer to diagrams and instructions in order to get the most accurate results.
Q: What Other Materials Do I Need?
A: You will need yarn, a crochet hook, scissors, a tape measure or ruler, and a needle. Optional materials include buttons or other decorative accents to make the scarf even more unique and stylish.
Q: Where Can I Find Instructions on How to Crochet a Hooded Scarf?
A: You can find instructions on how to crochet the hooded scarf online, from books, or by asking friends and family who might know how. You can also look up tutorials and diagrams that will help you along the way. With some practice and patience, you’ll be crocheting a beautiful hooded scarf in no time!

Conclusion
Crafting your own hooded scarf with the steps in this blog post on how to crochet a hooded scarf can be a great way to experiment with this fun and creative craft. It’s also an ideal gift for someone you love or even a spoil-yourself item!
Not only will you have a finished product that has been handmade by you, but the time investment into making it will show how much effort has gone into creating something unique.
With practice, you may even end up crocheting enough hooded scarves to open your own storefront! So step out of your comfort zone and try to crochet a hooded scarf today and make sure to take photos as you go along so we can admire all your hard work and creativity!