

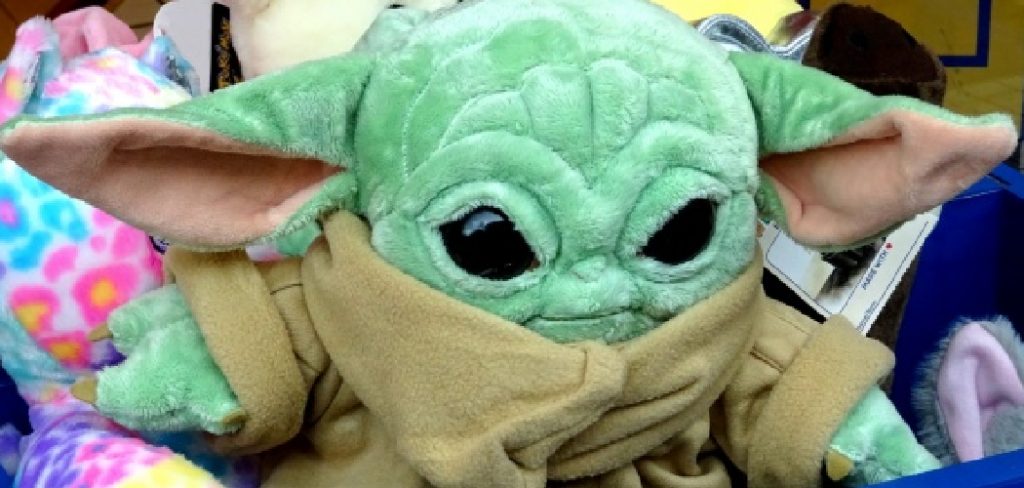
Crocheting baby Yoda eyes is a fun and accessible craft project to do at home with the help of a few tools, some basic crochet materials, and your own creativity. Not only will you be able to add an adorable touch of Baby Yoda flair to whatever projects you’re working on (think hats, scarves, or even stuffed animals!).
But you’ll also learn something new about the world of crochet in the process! Let’s take a look at what supplies we need, how to crochet baby yoda eyes, and then explore some ways that these handmade creations can be integrated into various crocheting projects.
What Color Yarn for Baby Yoda?
When crocheting Baby Yoda’s eyes, you will need to select the right yarn colors. The most popular colors to use are black or grey for the iris, white or off-white for the sclera (the whites of the eyes), and either yellow or light green for the pupil. If you want a more realistic look, you can even mix different shades of these colors together!
For example, choose a darker shade of black for the iris, an off-white color for the sclera, and a bright yellow-green for the pupil. It’s also possible to crochet Baby Yoda eyes in any other color combination you’d like – be creative with your choices! Just remember that whatever colors you choose should be compatible with each other and look good together.
When choosing yarn for Baby Yoda’s eyes, it’s best to use a lightweight acrylic or cotton blend yarn. This will give you a nice stitch definition and create the most realistic-looking finished product. If you’re using a wool or alpaca blend, be sure to check your gauge as these fibers tend to produce larger stitches.
So if you’re ready to crochet some adorable Baby Yoda eyes, grab your favorite colors of lightweight yarn and get started! With a little patience and practice, you’ll have an incredibly cute character in no time.
10 Methods How to Crochet Baby Yoda Eyes
1. Gather Your Materials:
Before you begin crocheting your Baby Yoda eyes, make sure to have gathered all of the necessary materials. You’ll need a crochet hook and yarn in colors that best suit the design you want to create.

If you’d like to make a more detailed eye, it may be helpful to use materials such as stuffing, felt, and buttons. However, these materials are not necessary if you’re looking for a more simplistic design. Make sure to have scissors, a tapestry needle, and stitch markers ready for use.
2. Design Your Eyes:
Before starting on your actual project, use paper to plan out how your eye design should look. This will act as an outline for how the finished product should look. Decide the size of the eyes and eye shape, as well as placement on the project. Use a pencil to draw out your design before starting to crochet. However, feel free to make small changes as you work if they are needed. Make sure to keep your pattern consistent across both eyes to ensure they look the same.
3. Start With a Magic Ring:
Once you’ve got your materials and design nailed down, start off by making a magic ring with six single crochets (SC). Pull the ring tight after completing this step in order to secure it shut. If you’re unsure how to make a magic ring, there are lots of tutorials online that can help you. Although this is the most preferred starting point, you can also begin with a traditional slip knot of six SC in a circle if needed.
4. Single Crochet 6 Stitches:
Next, single crochet 6 stitches into the magic ring. To do this, insert the hook into the ring and yarn over (YO). Pull up a loop of yarn with your crochet hook and YO again. Pull the yarn through both loops to complete a single crochet stitch. Repeat this 5 more times until there are a total of 6 single crochet stitches in the ring. With your hook still in the last stitch you made, pull up a loop and chain 1. This is your first round complete!

5. Increase Crochet Rounds:
Now, increase your crochet rounds by crocheting two single crochets in each stitch from the previous round. This will give the eyes of Baby Yoda a more animated look. To keep this effect, make sure to increase the number of stitches by crocheting two single crochet in each stitch from round to round. If you want to make the eyes bigger, simply increase the number of rounds.
6. Create the Eye Socket:
After completing this step, you’ll create the eye socket of your Baby Yoda eyes by creating a decreased crochet round with one single crochet in every other stitch. After completing this round, continue to create a single crochet in every stitch to get the eye socket shape. If you want to make the eyes more realistic, you can add some stuffing inside of the socket for a full effect. Once you’ve finished the eye socket, you can fasten off and weave in all ends. It’s time to complete your Baby Yoda eyes!
7. Crochet Around The Eye Socket:
Move on to crocheting around the eye socket by doing 7 single crochets and 1 chain in each stitch from the previous round. At this point, don’t close off your project so that it can be stuffed later on. Now you should have 20 stitches, and it’s time to start making the eye shape. If you’d like, you can use a stitch marker to mark the center of the eye. However, for this project, it’s not necessary. However, it may be helpful when you’re first starting out.
8. Create The Eyelid:
Next, make the eyelid of your Baby Yoda eyes by crocheting around the eye socket with 7 single crochets and 1 chain in each stitch from the previous round. When you finish the round, pull up a loop and slip stitch to join. If you want the eyelid to be slightly raised, you can work a few extra single crochets at the end of the round. Though this part is optional, it can add a lot of character to your piece. Make sure to fasten off the yarn after you finish this round.
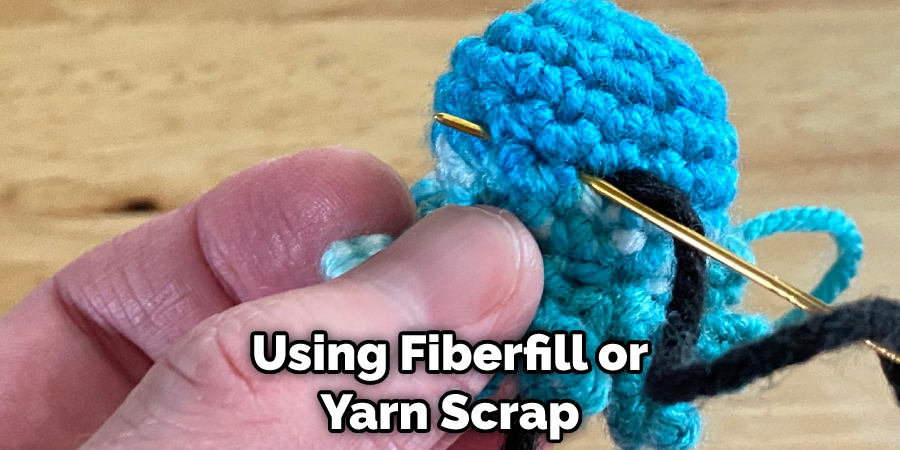
9. Stuff Your Eyes:
Now, stuff your Baby Yoda eyes using fiberfill or yarn scraps. Make sure to stuff them well in order to ensure they’re nice and firm. If you’d like, you can also sew the eyes onto a beanie or hat to make an adorable Baby Yoda crocheted hat. However, this step is completely optional. With the eyes securely stuffed, you’ve officially completed your Baby Yoda crochet eyes!
10. Complete The Eyes:
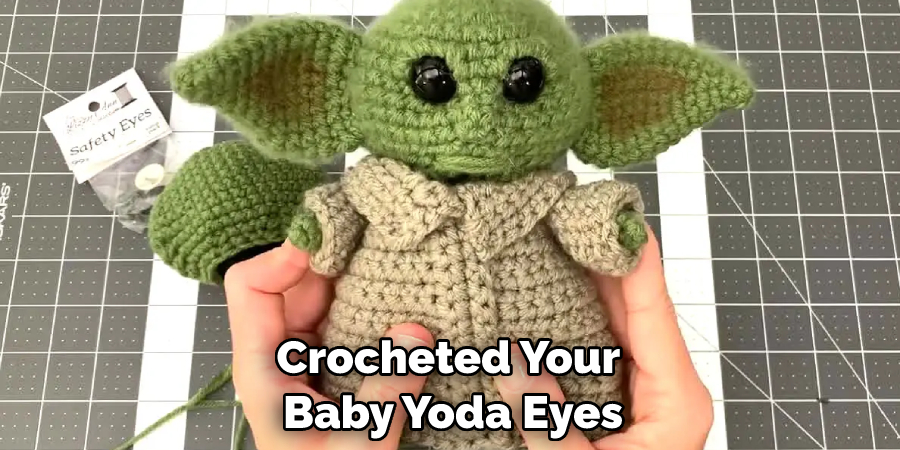
Finally, complete your eyes by closing off the project with a slip stitch and weaving in the ends of the yarn. You can also use safety eyes for an extra eye-catching look! Now you have a pair of Baby Yoda eyes that will make your projects even more adorable.
With just a few simple steps, you can bring any project to life with these fun and creative eyes. So get your hooks ready and show off your finished Baby Yoda eyes!
Now that you know how to crochet Baby Yoda eyes, you can start doing projects for friends and family. From hats to blankets and stuffed animals – these eyes are sure to be a hit! Try using different colors of yarn or using the same color with varying sizes of hooks. Whichever way you choose, your creations will be sure to add a fun and unique touch to any project. So go ahead and start crocheting those Baby Yoda eyes!
Things to Consider When Crochet Baby Yoda Eyes
1. Choose Your Yarn and Hook Size:
Select a lightweight worsted weight yarn in either black or brown for the eyes. A 4mm hook will work best with the chosen yarn.
2. Follow the Pattern:
The pattern for Baby Yoda eyes can be found in a variety of places, including online or craft store pattern books. Be sure to follow the instructions carefully and make any necessary adjustments based on your own skill level.
3. Make Sure You Have Enough Yarn:
Crocheting Baby Yoda eyes requires only a small amount of yarn, so it is important to have at least one full skein before beginning. If you run out of yarn during your project, it may affect the finished product’s look and feel, resulting in an uneven appearance or too much slippage when attached to other pieces.
4. Consider Sewing on the Eyes:
Once you have crocheted your Baby Yoda eyes, consider sewing them onto the project with a yarn needle. This will ensure that everything stays in place and provides an extra layer of security for when you attach it to other pieces or garments.
Conclusion
Crafting Baby Yoda eyes doesn’t have to be a difficult task if you follow the instructions we’ve outlined in this blog post about how to crochet baby yoda eyes. Plus, it’s a fun way to show your creativity and unique skills. It’s surprisingly easy to craft these little eyes with the right combination of colors, yarn types and crochet stitches.
Not only can you create one for yourself, but you can also create them as gifts for special friends and family members who may enjoy this kind of craft project.