
Crocheting isn’t just for making sweaters and hats, it can also be used to make unique handcrafted items like a tooth! You may be wondering why one would go so far as to crochet something as small and seemingly insignificant as a tooth. Whether you’re an aspiring artist looking to create your own dental-themed paintings or an experienced crocheter who simply wants to give their craft an interesting challenge, learning how to crochet a tooth is sure to spice up any collection of handmade creations.

With the right pattern, some yarn, and patience, crafting your very own tiny human teeth out of yarn has never been easier. In this article, we’ll cover all the details you need on materials needed and instructions on how to exactly take those strands of thread and make them into realistic replicas of actual teeth. So let’s get started with learning how to make a crochet tooth!
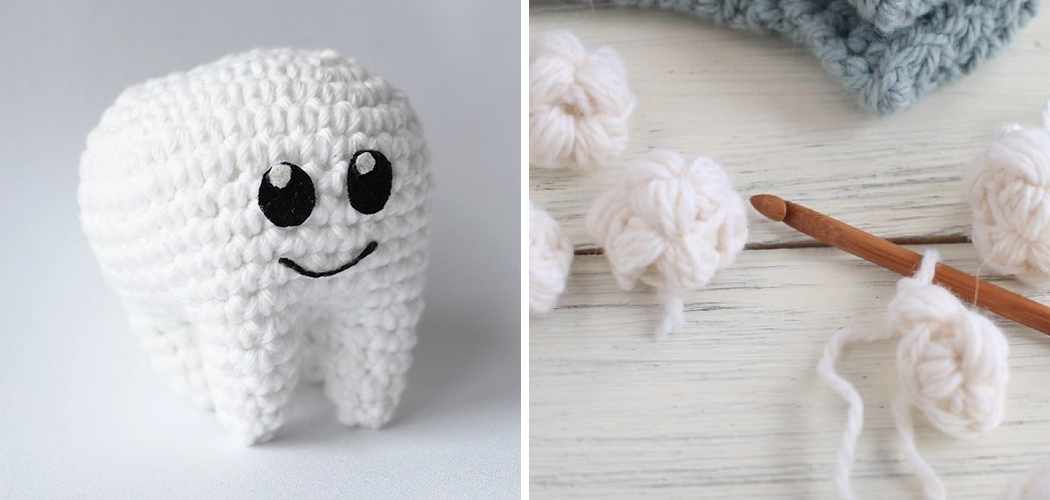
Materials That Will Be Required
- Crochet hook of your choice
- Worsted weight yarn in flesh tones
- Tapestry needle to weave in ends.
Basic Instructions for How to Crochet a Tooth
1. Making a Magic Ring:
Begin by making a magic ring with the worsted weight yarn – this is how you will start all of the crochet stitches for the tooth and will be your base. Don’t skip this step as it will help ensure your tooth has a strong foundation.
2. Single Crochet Stitches
Now that you have your magic ring, work in a single crochet stitch all the way around the circle. When finished, join with a slip stitch to complete one round of stitches. Then, continue to increase your number of stitches in each round, making sure to join with a slip stitch at the end of the round.
3. Decreasing Stitches
Once you reach the desired size of your tooth, it’s time to decrease the number of stitches by working two single crochet stitches together in each stitch around until you reach six total stitches. This will make the pointed tip of your tooth.
When you are trying on how to crochet a tooth, you need to begin by making a magic ring with the worst weight yarn. Then, work in single crochet stitches all the way around and join each round with a slip stitch. Finally, decrease the number of stitches by working two single crochet stitches together until there are only six total stitches left.

5 Most Popular Crocheting Tooth
1. Crochet Vampire Tooth
This is the perfect way to add a spooky touch to any costume! It requires minimal supplies, such as black yarn and a crochet hook, plus a few basic stitches. To create your own vampire-inspired tooth, start by making a single chain stitch. Then make several more chains until you have a long string.
You must need to be aware when crocheting the tooth so that it has sharp, beveled edges. To get the desired effect, use a smaller crochet hook and make tighter stitches. After you have created your vampire tooth, sew it onto a piece of cloth for extra security.
2. Crochet Monster Tooth
This fun and playful tooth is perfect for completing a monster costume or adding a few extra pearly whites to your smile! To make it, start with two foundation single crochets before gradually increasing the height of your stitches. You can also add extra rows to create a larger tooth and customize it with colorful yarns.
If you want to make your monster tooth even more unique, you can embroider on details such as fangs or little dots using a yarn needle.
3. Crochet Shark Tooth
How about adding a fierce touch to your costume? This tooth is similar to the vampire tooth but with a more menacing look. Make sure to start with a long chain stitch and increase the stitches gradually until it resembles a shark’s sharp tooth. To finish off, add some felt or fabric underneath for extra strength.
Don’t leave out the details! You can use yarn to embroider on some teeth marks or even a few drops of blood for an extra gory effect.
4. Crochet Tusk Tooth
If you’re looking for something a bit more playful and creative, why not try making a tusk-inspired tooth? Start by creating a long chain stitch and gradually increase the height of your stitches. Once you’re happy with the size, use a yarn needle to add some decorative details such as stars or stripes.

You can also make this tooth in a variety of colors for an even more unique look. Just remember to sew it onto fabric or felt for extra security!
5. Crochet Crown Tooth
This one is sure to make you feel like royalty! Start by making a single chain stitch and gradually increase the height of your stitches. You can also use two or three colors of yarn for an even more impressive look. When you’re happy with the size, sew it onto fabric or felt before adding decorative pieces such as pearls or jewels.
This tooth is perfect for those looking to add a bit of sparkle and shine to their costume. Be careful when crocheting the tooth so that it has sharp, beveled edges for an accurate crown-like shape.
2 Types of Pattern You Can Crochet
1. Fairy Crochet Pattern
This pattern creates a whimsical tooth with wings on either side. Start by crocheting a large oval shape in white yarn. Then, crochet two small wings on each side of the oval and add facial details like eyes, nose and mouth. When you are finished, attach it to the back of a toothbrush holder or frame for a beautiful display.
Now it’s time to give your tooth a magical touch. You can do this by attaching some colorful yarn or thread around the edges of the oval shape. This will make it look like a fairy is fluttering around it.
Pros of This Pattern:
- Easy to make.
- Results in a unique, whimsical look.
- Can be used in various ways, such as on a toothbrush holder or frame.
- Can be customized with different colors of thread or yarn.
- Can be adapted to create other characters.
- Great for beginners and experienced crocheters alike.
- Makes a fun and unique gift.
2. Amigurumi Pattern
This pattern is great for those who want to make a tooth with some personality. Begin by crocheting a small oval shape in light yellow yarn. Then, crochet two arms and legs on either side of the oval and add facial details like eyes, nose and mouth. When you are finished, attach it to the back of a toothbrush holder or frame for a unique display.

Now it’s time to give your tooth some amigurumi flair. You can do this by attaching some colorful yarn or thread around the edges of the oval shape. This will make it look like an adorable amigurumi character is peeking out from behind it.
Pros of This Pattern:
- The amigurumi pattern is great for those who want to make a tooth with some personality.
- It is also very easy and can be completed quickly.
Cons of This Pattern:
- The amigurumi pattern can be time-consuming if you are not familiar with the technique.
- It may require more skill to complete if you are a complete beginner.
Helpful Tips for Crocheting Tooth
- Always use a sharp crochet hook and high-quality yarn for best results.
- Make sure to work in tight, even stitches for the most realistic tooth look.
- Start with a simple pattern such as a single chain stitch before progressing to more difficult patterns like tusk or crown teeth.
- Take your time when crocheting each stitch. This will help you achieve the desired look.
- Always use a yarn needle to sew on any decorative pieces such as pearls or jewels.
- Take extra care when attaching your crochet work to fabric or felt for added security.
- At the end, always check your work for any loose ends or missed stitches.
- Feel free to experiment with different colors and threads to create unique tooth designs!
- Have fun and don’t be afraid to try new things!
Crocheting a tooth may take some time and effort, but the results will be worth it! It’s a great way to add fun and character to your costume, toothbrush holder or frame. With these tips and patterns, you’ll be crocheting tooth in no time.
Which Crochet Pattern Will Be the Best Choice?
When beginning a project to crochet a tooth, it is important to choose the right pattern for this unique creation. There are several different patterns available ranging from simple designs to more complex shapes. If you’re just getting started on your first crochet tooth, consider starting with a basic single crochet stitch.

This stitch is easy to learn and great for beginners. For a more complex look, try using a combination of other stitches including single crochet and half-double crochet or double crochet. Advanced crocheters may also want to experiment with more intricate shapes such as adding spikes or curves for realism. Whichever pattern you choose, be sure that it is suitable for your skill level so that you can complete the project successfully.
Conclusion
Overall, crocheting a tooth is an easy and relatively quick process. Even if you have never picked up a crochet hook before, if you carefully follow the directions, you can easily make your very own sweet tooth. It can be used as a decoration for any room or as the final touch to a costume for Halloween or other occasions. In just a few short steps, you can create something special that will stand out in any set up.
Who knew making a tooth could be so fun? If you ever find yourself needing to crochet your own tooth in the future, don’t forget that with these tips and techniques it is quick and easy to do! So what are you waiting for? Grab your crochet hook and get started on crafting your very own way on how to crochet a tooth today!