
Delve into the world of whimsy and creativity by embarking on the charming adventure of crocheting a snail. Crocheting is a versatile craft that allows you to transform simple yarn into intricate and delightful creations, and crafting a crocheted snail is no exception.

The process of crocheting this small creature is a delightful mix of artistry and technique, enabling you to sculpt the unique spiral shell and delicate body with your own hands.
Whether you’re an experienced crocheter or a novice looking for a delightful project, crocheting a snail offers a chance to explore new stitches, experiment with colors, and cultivate your crafting skills.
In this article, we’ll take you through the captivating journey of how to crochet a snail, guiding you step by step to create a miniature masterpiece that’s sure to bring a smile to your face and showcase your crochet expertise. So, gather your yarn and hooks, and let’s unravel the magic of crafting an adorable crocheted snail.
The Snail Crochet Project and Its Whimsical Appeal
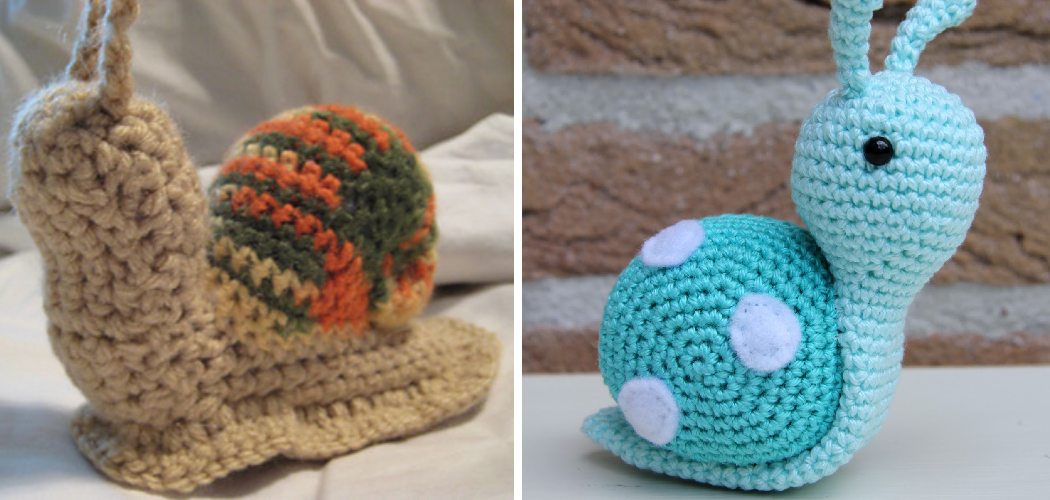
Are you ready to dive into the world of crocheting? Then you’ve come to the right place! This tutorial will show you how to crochet a snail – sure to be an adorable addition to your home decor or handmade gifts. With just some basic supplies and instructions, this project can be completed in no time.
For starters, gather the necessary supplies:
- Crochet hook size 5mm
- Worsted weight yarn (any color of your choice)
- Tapestry needle
- Polyester fiberfill stuffing
- Safety eyes (optional, size 12mm – 15mm)
- Sewing thread and a needle for attaching safety eyes.
Once you have the supplies at hand, it’s time to begin! To start, make a magic ring using the 5mm crochet hook and yarn. Then chain 3 and double crochet 11 stitches into the center of the ring. Pull the tail end of yarn to close the circle and slip stitch.
Continue working in rounds by increasing every other round until you reach a total of 19 stitches. Next, crochet two single crochets into each stitch for the next three rounds. Begin working in rows by chain 1 and double crochet one stitch into each of the previous two stitches around. Chain 1 and turn your work at the end of each row until you reach a total of 13 rows.
Importance of Material Selection for Creating a Soft and Cute Snail
When it comes to crocheting a snail, the material you choose plays an important role in determining the final look and feel of your project. To create a soft and cute snail, select materials that are lightweight and soft. Cotton yarn is an excellent choice for this type of crochet toy as it gives a nice texture while still being lightweight.

Alternatively, bulky wool yarn can also be used to create a more plush and snuggly snail. When choosing colours, opt for bright, cheerful tones to bring your snail’s personality to life.
Once you have all of the materials gathered, it is time to start crocheting! Start by chaining 15 stitches and then single crocheting into the second stitch from the hook. The following row will be worked in a spiral pattern, so keep track of your stitches with stitch markers or safety pins. When you reach the end of the row, repeat this pattern for five to seven rows to create the body of your snail.
Next, it is time to attach the head and arms. Slip stitch into the last row to secure the body. Then, chain three stitches and single crochet around the side of the row to form two arms for your snail. Sew on small pieces of felt or fabric to make eyes and any other facial features you’d like. Once both arms are attached, slip stitch into the last stitch and fasten off with a knot.
11 Steps How to Crochet a Snail
Step 1: Gather Your Materials and Tools
Before you begin your enchanting snail crochet journey, ensure you have all the necessary materials and tools ready:
Yarn: Choose yarn colors that suit your snail’s shell and body. Light and dark shades work well to create the spiral effect.
Crochet Hooks: Pick crochet hooks appropriate for your yarn’s thickness. A smaller hook might be needed for detailed work.
Stuffing: Get soft stuffing material to give your snail body volume and shape.
Yarn Needle: A yarn needle is essential for weaving in loose ends and sewing parts together.
Scissors: Reliable scissors are necessary for cutting yarn and trimming excess material.

Step 2: Begin with the Shell
The shell is the defining feature of a snail, and crafting it involves creating a captivating spiral pattern. Start with a magic ring or a chain ring as the foundation for the shell. Work single crochet stitches in the round, gradually increasing the stitch count as you progress. This initial circle forms the base of the shell.
Step 3: Shape the Shell
As you continue to crochet the shell, consider introducing color changes to achieve the spiral effect. To create the spiral, begin gradually decreasing the stitch count after a few rounds of increasing. This decrease will result in the shell taking on a conical shape, imitating the spiral pattern found in real snail shells.
Step 4: Crochet the Body
With the shell’s spiral complete, shift your focus to crocheting the snail’s body. Choose a color that complements the shell’s hue. Begin with a chain that forms the foundation of the body, and work single crochet stitches in the round, steadily increasing the stitch count to create a rounded shape. The size of the body should be proportional to the shell’s opening.
Step 5: Attach the Shell and Body
Position the body inside the shell and secure them together by crocheting the body to the outer edge of the shell. Use slip stitches or single crochet stitches to attach the two parts, ensuring a secure connection that prevents unraveling.

Step 6: Create the Antennas
The snail’s antennas are a charming addition that adds character to the finished creation. Using a contrasting color, crochet two thin chains or single crochets that form the antennas’ spiral shape. Attach the antennas to the snail’s head by sewing them securely in place.
Step 7: Add Eyes and Facial Features
To give your crocheted snail an endearing expression, attach small pieces of black yarn or use safety eyes for the eyes. If desired, you can embroider additional facial features like a smile or rosy cheeks using embroidery thread or yarn.
Step 8: Craft the Tentacles
Crochet the snail’s tentacles using a color that complements the body. These slender appendages can be created using simple single crochets or chains. Attach the tentacles to the head, positioning them just below the antennas for a lifelike appearance.
Step 9: Embellish the Shell
Add depth and texture to the shell by incorporating various crochet stitches to create lines or patterns. Slip stitches or surface crochet can be used to achieve this effect. Experiment with different techniques to embellish the shell and make it even more visually intriguing.

Step 10: Finishing Touches and Blocking
As you near the completion of your crocheted snail, take the time to inspect for any loose ends. Use a yarn needle to weave in these ends securely, ensuring a polished finish. If desired, consider lightly blocking your snail by shaping it and allowing it to dry. Blocking can help even out stitches and ensure that your snail is perfectly shaped and ready for display.
Step 11: Experiment with Variations
While you’ve followed the steps to create a classic crocheted snail, don’t hesitate to unleash your creativity. Experiment with different colors, sizes, and patterns to craft snails that are uniquely yours. Perhaps you’d like to make a snail family with varying sizes, or introduce new stitch patterns to the shell for added texture. The possibilities are endless!
Checking for Consistency and Symmetry
Once you’ve finished crocheting your snail, it’s time to check that the stitch consistency and symmetry are accurate. This is an important step in ensuring that your snail looks its best! Check all of your stitches on both sides of the work, making sure they are even and consistent.
It’s also a good idea to take a moment to check the overall shape of your snail. Depending on what type of yarn and hook you used, it might have become slightly distorted while crocheting. Don’t worry if this happens – it can usually be adjusted by gently squeezing or reshaping the body while supporting the legs from underneath.
Finally, take a few moments to admire your work! You worked hard to create this adorable and unique creature, and you should be proud of your achievement. Now that you’ve learned the basics of crocheting a snail, why not try some more advanced techniques such as creating multiple colors or adding small details like eyes? There are endless possibilities – so get creative!

Things to Avoid When Crocheting a Snail
Crocheting a snail may seem like an easy task, but it’s important to remember that there are certain things you should avoid doing in order to achieve success. Here are some of the key points to keep in mind when crocheting a snail:
- Avoid Using Yarns that Are Too Thick – thinner yarns will ensure your project looks neat and creates a more realistic snail shape.
- Avoid Doing Too Many Stitches – when crocheting, do not try to cram in too many stitches, as this will create a bulky look for your project. Doing fewer stitches will help maintain the shape of the snail.
- Avoid Overstuffing with Fiberfill – while it may be tempting to stuff the crochet snail with a lot of fiberfill, it’s important to not overstuff and instead add just enough for the desired shape.
- Avoid Crocheting Too Tightly – crocheting too tightly will result in an overly stiff and rigid piece that won’t look realistic. Make sure to loosen your stitches slightly while crocheting so you can achieve the desired shape.
By following these tips, you can ensure that your crocheted snail will look great! Now you’re ready to start creating your own snails and amaze your friends with this unique craft!
Safety Precautions for Crocheting a Snail
Crocheting a snail may seem like an easy task, but it’s important to take the necessary safety precautions before beginning. Always use sharp scissors when cutting yarn and be sure to keep them away from small children. You should also make sure that you are using a crochet hook with the correct size for the project at hand, as using one that is too large can cause the stitches to unravel.
Additionally, when crocheting with crochet thread, be sure to keep it away from open flames and hot surfaces as it is highly flammable. Finally, when storing yarn and other materials, make sure they are kept away from direct sunlight or moisture which can cause them to degrade over time. By taking these safety precautions you will ensure that your projects are completed properly and safely.
Once you have the necessary supplies, you can start crocheting your snail! Begin by creating a magic circle with 6 single crochet stitches. Then, slip stitch into the first stitch of the circle to join it together.

Next, chain 3 and double crochet 2 times into the same stitch. Follow this up by chaining 1 and double crocheting into the next stitch 3 times. Repeat this pattern all the way around the circle, ending with slip stitching to complete the first round.
Conclusion
Although crocheting a snail may seem difficult, by following these detailed steps you can easily create an adorable piece of art. Have fun with colors and shapes to really make your snail look unique. For more advanced crafters, challenge yourself to create more than one snail that is different from any others out there!
Take the time to craft something special that you can cherish for years to come. If you get stuck along the way don’t be afraid to contact fellow crafters for tips and advice on how to crochet a snail. Get creative and use the materials you have available to make something truly unique.