
Crocheting is an enjoyable and relaxing hobby, but it can also be used to create beautiful decorations, such as a shamrock. Shamrocks are symbols of luck in Ireland and many other places worldwide, so learning to crochet a shamrock for beginners can be a great way to show your Irish pride or add some whimsical charm to your home.

One of the major advantages of learning to crochet a shamrock for beginners is that it is an easy and affordable way to add a unique decorative touch to your home. Crocheting has become increasingly popular in recent years, particularly among younger generations, because it provides an opportunity for creative expression. In this blog post, You will learn in detail how to crochet a shamrock for beginners.
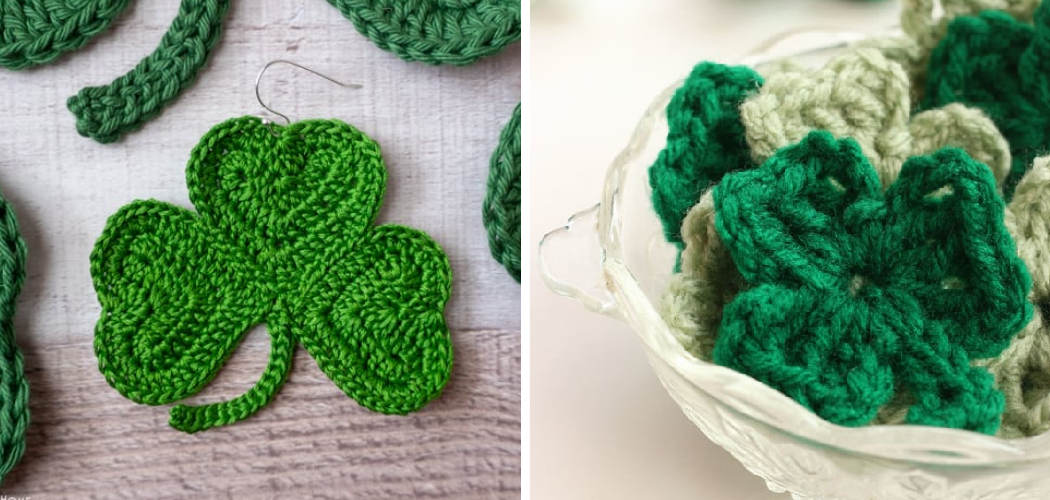
Step-by-step Instructions for How to Crochet a Shamrock for Beginners
Step 1: Inspect Your Materials
You’ll need a hook and yarn to crochet a shamrock for beginners. Choose the color of your yarn to match the holiday or create a unique look with two colors. Begin by making a chain of four stitches, then work one single crochet in each stitch across until you have five.
Step 2: Make a Shamrock Leaf
Now that you have the base done, it’s time to create the shamrock leaf. Work two single crochet stitches in each stitch from the previous row until you have ten stitches total in the row. Then chain one and turn your work so that the wrong side of the shamrock is facing you.
Step 3: Create a Shamrock Center V
Work one single crochet stitch in each of the first two stitches, followed by three double crochets in the next stitch. Then chain one and skip two stitches before creating a single crochet in the last stitch of the row. This will create the center V shape in the middle of your shamrock.
Work two single crochet stitches in each stitch across until you have ten stitches total. Chain one, then turn your work so that the shamrock’s wrong side is facing you again.

Step 4: Make a Shamrock’s Third Leaf
Work one single crochet stitch in each of the first two stitches, followed by three double crochets in the next stitch. Then chain one and skip two stitches before creating a single crochet in the last stitch of the row. This will create the third leaf of the shamrock.
Step 5: Make Finishing Touches
Work two single crochet stitches in each stitch across until you have ten stitches total. Chain one and turn your work so that the shamrock’s wrong side is facing you again. Work one single crochet stitch in each of the first two stitches, followed by three double crochets in the next stitch.
Step 6: Sew Your Shamrock Together
Now it’s time to sew your shamrock together. Starting at the center V of your first row, thread a length of yarn through a tapestry needle. Make sure to leave enough room for adding stuffing after sewing your shamrock together if you want it to be 3D. Then begin sewing around the edges of the leaves and up through the middle V. Make sure to keep your stitches nice and tight so that the edges of your shamrock stay firm.
Step 7: Stuff Your Shamrock (Optional)
Once you have sewn all of the leaves together, it’s time to stuff your shamrock if desired. Using a stuffing material of your choice, begin filling the spaces between the stitches with small pieces of stuffing. Make sure to stuff evenly and fill all the edges for a firmer shamrock shape.
Once your shamrock is stuffed, it’s time to finish up by closing any remaining gaps. Thread your tapestry needle through the next stitch and pull tight to close. Repeat this until all openings are closed, then weave in any remaining loose ends with your needle, trim them off, and you’re done.
By following these steps, you will have a beautiful shamrock that is sure to bring good luck. With practice and patience, you’ll be able to crochet a variety of shapes like hearts, stars, and more.
Tips for How to Crochet a Shamrock for Beginners
- Always be sure to read the pattern instructions carefully before starting a project. This ensures that you understand the stitches and abbreviations and have all the materials necessary for success.
- Check your tension often, as this can affect how large or small the shamrock will turn out. If unsure of tension, use a larger crochet hook than recommended in the pattern.
- When crocheting with multiple colors, remember to keep them organized, as this will make it easier to stitch and prevent tangles or knots from occurring.
- Keep all yarns away from small children and pets who may accidentally get tangled up in them.
- Take frequent breaks during your work to avoid overworking your hands, arms, and eyes.
- When finished, always block or steam the shamrock to ensure that it lies flat and looks neat.
Following these tips will help make crocheting a shamrock for beginners an enjoyable experience,
Are There Any Other Tricks That Could Help You While Crocheting a Shamrock?
Crocheting a shamrock can be tricky, especially if you’re a beginner. Here are some tips to help make the process easier:
- Start With a Simple Pattern: If you’re just getting started, look for a basic pattern that is easy to understand and follow. This will help ensure that you don’t get overwhelmed or frustrated during the process.
- Use Different Colors: Using multiple colors when crocheting a shamrock can make it look more intricate and impressive. Try using green, white, and even yellow to add flair to your shamrock!
- Take Your Time: Don’t rush the process or try to move too quickly. Crocheting a shamrock is an art, so take your time and enjoy it!
- Use Stitch Markers: Stitch markers help keep track of where you’ve been and where you need to go next in the pattern. This will make it much easier to follow the pattern without constantly referring back to it.
- Practice, Practice, Practice: The more you practice crocheting a shamrock, the better you’ll become. Don’t be afraid to try out new patterns and techniques until you find what works best for you.

By following these tips, you’ll be well on your way to becoming a pro at crocheting a shamrock.
How Can You Troubleshoot Any Mistakes While Creating the Shamrock?
If you’re making a crochet shamrock for the first time, chances are that you may make some mistakes. But don’t worry – there are certain steps you can take to troubleshoot any issue and get back on track. Here are some tips to help you:
- Double-check Your Stitches: Mistakes often occur when you lose track of your stitches. Make sure to double-check every stitch you make to ensure accuracy.
- Keep Count: Counting the number of stitches you’ve made is a great way to avoid mistakes. You can even use a stitch marker or something else similar as a guide for keeping track of your stitches.
- Check Your Tension: Incorrect tension is one of the most common mistakes made while crocheting. You can check to ensure your tension is correct by counting the number of loops on each side of a stitch.
- Go Slow: Take your time, and don’t rush through any steps during the process. This will give you more time to check for mistakes and ensure your crocheted shamrock looks perfect.
By following these tips, you can easily troubleshoot any mishaps that come up while creating a crochet shamrock.
How Should You Care for Your Finished Crochet Shamrock to Make Sure It Lasts Long-term?
Once you’ve completed your crochet shamrock, make sure to give it the care it needs in order to last for years. The best way to preserve your finished shamrock is by storing it in a cool and dry place. If possible, store it in an air-tight container or box that will protect it from dust accumulation.

If you plan to display your shamrock, make sure to place it in a spot where it won’t be exposed to direct sunlight or too much humidity. Too much humidity can cause the threads of your shamrock to stretch and warp, while too much sun can cause fading. You should also take some time to spot-clean your shamrock every few months. Dust and dirt can accumulate on the project, so make sure to use a soft cloth or brush to wipe it down gently.
Additionally, you may want to steam-press your shamrock with an iron if you notice any wrinkles appearing.
Conclusion
In conclusion, Crocheting a Shamrock for Beginners is quite an easy project that will bring you lots of joy and happiness. With the right materials and guidance, anyone can learn how to crochet a shamrock to add decoration or use as a gift. It is also possible to make variations such as small or large sizes and add different colors. Your shamrock will turn out great if you have the correct crochet hook, yarn, and pattern.
I hope this article has been beneficial for learning how to crochet a shamrock for beginners. Make Sure the precautionary measures are followed chronologically.