
Crocheting is such a fun and creative way to express yourself, and it can open up your world of crafting possibilities. With the holiday season upon us, why not learn how to crochet lovely holly leaves? This post will examine how to crochet holly leaves using basic techniques.

Whether you’re an experienced crocheter or just starting out in the world of yarn work, this tutorial will help you make delightful decorations that are sure to spice up any room in your house during Christmas time! Read on as we explore easy strategies that professionals use when crocheting lovely holly leaves!
Can You Crochet Holly Leaves?
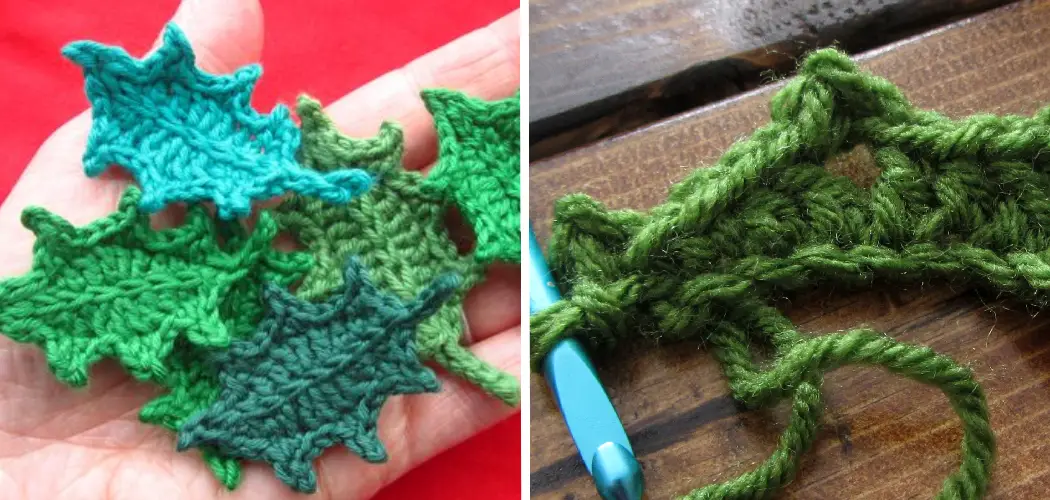
Crafting with crochet isn’t just limited to simple shapes like squres and circles – you can also make intricate holly leaves with just yarn and a hook for adding festive décor around the house! Start by chaining four stitches, joining them together in a round. Use the front loop only in each stitch to create the points of your leaves.
When it comes time to connect the rounds, be careful to keep track of how many times your hook crosses over in each stitch. This will help you to keep the shape consistent. With a little practice and patience, you’ll soon be making delicate handmade holly leaves.
Why Should You Crochet Holly Leaves?
Crocheting holly leaves can be a fun and satisfying craft project that will leave you with beautiful holiday decorations. Whether you’re looking for a way to add a unique touch to your holiday décor or making something special for a loved one, crocheting holly leaves could be the perfect festive activity for you.
In addition to being visually appealing, crocheting also has a number of health benefits such as lowering stress, relieving depression and promoting cognitive development. So don’t forget to crochet some holly leaves this holiday season – not only will it brighten up your home but it may improve your wellbeing too!

7 Steps to Follow on How to Crochet Holly Leaves
Step 1: Gather Your Supplies
Before you begin crocheting your holly leaves, ensure you have all the right supplies. You will need a skein of green yarn (or several skeins if you are working with multiple colors), a crochet hook, scissors, and an optional tapestry needle (for weaving in ends). Once you have all your materials ready to go, it’s time to start crocheting!
Step 2: Creating the Leaf
The most important aspect of creating a holly leaf is getting the shape right. Start by making a chain stitch that is about 7 inches long. Next, make two single crochet stitches into each chain across until you reach the end. Then, turn your work and chain two stitches before making two single crochet stitches into each stitch across again.
This creates the main shape of your leaf. To give it more dimension and realism, increase your single-crochet stitches at either side of the leaf—this will create curved edges that look like real holly leaves. Once this is complete, bind off and weave in any loose ends using your tapestry needle (if using).
Step 3: Adding Details
Now that you have finished crocheting your basic holly leaf shape, it’s time to add some details! Many people opt to use red yarn to add small “berries” to their leaves—simply tie off sections of red yarn along one side of the leaf for a realistic effect. If desired, you can also use embroidery floss or felt circles instead of yarn. Don’t be afraid to get creative when adding details to your leaves!

You can also add veins by stitching lines through and around them with white thread or colored embroidery floss, as well as other embellishments like sequins or beads for added sparkle and shine.
Step 4: Attaching Leaves
Once you have finished making your leaves and adding all the desired details, it’s time to attach them to a project. If you are making a holly-themed garland or wall decoration, this is simple—just use a tapestry needle and a piece of yarn to attach your leaves along the length of your project. If you are making something more complex, like an ornament or stocking cap, you may need to get a bit creative with how you attach your leaves.
Step 5: Finishing Touches
Now that your holly leaves are securely attached, you can add a few finishing touches to really make them stand out. A great way to give your leaves a bit of pop is to use contrasting colors of embroidery floss or felt circles for the berries, as well as adding glitter glue around any other details for an extra sparkle.
Step 6: Make More Holly Leaves
Once you have mastered how to make one holly leaf, go ahead and make more! You can vary the size of your leaves by adjusting how many stitches you use or how long your chains are. You can also experiment with different colors and details to really customize them for whatever project you’re making.
Step 7: Enjoy Your Handiwork
Last but not least, take some time to admire your handiwork and enjoy how beautiful your holly leaves look. Whether you’re using them to decorate a wall or package up as a gift, these crochet holly leaves are sure to make any project look extra special.
That’s it! You’ve now learned how to crochet holly leaves. With a bit of practice and creativity, you’ll be able to make your own unique creations in no time!
Things You Need to Know Before Crocheting Holly Leaves
Before attempting to crochet holly leaves, there are a few things to consider. It can be helpful to select yarn colors that complement each other yet still stand out. For instance, if you are going for the traditional red and green colors of holly leaves, try to find shades that offer contrast but aren’t overly bright or too dark.

Additionally, many patterns require some knowledge of basic stitches such as chain stitch and double crochet; having at least a general understanding of these techniques is essential for creating your own holly leaf project with accuracy and finesse. To increase the difficulty level, there are also special stitches and techniques used for crocheting complex holly leaf shapes.
No matter your skill level or technique preferences, it’s important to plan ahead before diving into the exciting world of crocheting holly leaves!
Benefits of Crocheting Holly Leaves
One of the most delightful ways to decorate for the holidays is crocheting holly leaves which can be made in any number of colors and styles. This type of home decor has multiple benefits — they are both reusable and cost effective, making them very attractive to many people. Moreover, once you learn how to crochet a holly leaf, it becomes a project you can quickly replicate making it well worth the minimal effort it takes.
Crochet holly leaves add a special touch of warmth and elegance to any holiday gathering or display. Plus, since they’re handmade with love, you’ll get unending joy from giving these crocheted items as gifts. All in all, crocheting holly leaves can certainly liven up your holiday season!
6 Common Mistakes People Make When Trying to Crochet Holly Leaves
1. Not Using the Correct Yarn Weight
One of the most common mistakes people make when trying to crochet holly leaves is not using the correct yarn weight. The best yarn to use for holly leaves is a light worsted weight yarn, such as Lion Brand Pound of Love. This type of yarn is lightweight but still has some body to it, which will help your holly leaves keep their shape.

2. Not Using the Correct Hook Size
Another common mistake people make when crocheting holly leaves is not using the correct hook size. The best hook size to use for holly leaves is a size G/6 (4.0 mm) hook. This size hook will create a tight stitch that will help your holly leaves keep their shape.
3. Not Crocheting Tightly Enough
A lot of people make the mistake of not crocheting tightly enough when they are making holly leaves. This can cause your leaves to be misshapen and can also make them more difficult to work with. When you are crocheting your holly leaves, be sure to crochet tightly so that they hold their shape.
4. Not Working in The Round
Another common mistake people make when crocheting holly leaves is not working in the round. When you are crocheting your holly leaves, you will want to work in a continuous spiral without joining each round with a slip stitch. This will help your holly leaves keep their shape and will also make them easier to work with.
5. Not Using the Correct Stitch
The final common mistake people make when crocheting holly leaves is not using the correct stitch. The best stitch to use for holly leaves is a single crochet stitch. This stitch will create a tight fabric that will help your holly leaves keep their shape.

6. Not Cutting the Yarn Correctly
One last mistake people often make when crocheting holly leaves is not cutting the yarn correctly. When you are finished crocheting your holly leaf, you will want to cut the yarn leaving a long tail. This long tail will be used later to sew your holly leaf onto whatever project you are working on. Be sure to leave enough of a tail so that you can sew it securely in place.
Following these tips will help ensure that your holly leaves turn out perfect every time! With a little practice and patience, you’ll be crocheting beautiful holly leaves in no time.
What Types of Stitches Are Used to Make Crochet Holly Leaves?
Crochet Holly Leaves are a great way to add a festive touch to any project! The type of stitch used in creating them will depend on the look and texture you’d like the leaves to have. Generally, crochet versions of holly leaves use single crochet stitches, which can help build the typical holly leaf shape.
You could even try using half double or double crochet for a bigger leaf; with just a few minor changes, you can add some extra depth and texture to your project. Experimenting with various yarns and stitch combinations can create visually stunning leaves that are sure to bring any project – especially holiday decorations–to life!
How Do I Increase the Size of My Crochet Holly Leaves?
When creating crochet holly leaves, the overall size of the finished product may not be what you initially anticipated it to be. Thankfully, there are various methods that can increase the size of your crochet holly leaves. One method is yarn substitution; with a larger yarn than what is typically used for the project, you can effortlessly see your leaf size begin to increase.
Another helpful tip would be to upgrade from a smaller hook on your original pattern to a bigger one; you will notice a difference in sizing and an improvement in overall texture and stitching appearance. Lastly, another way to improve leaf size may involve manipulating the multiple rounds that make up a single leaf depending on how one space out each stitch within them.
With a little bit of creativity and experimentation, you should be able to find the right combination and achieve the desired result!

Can I Use Different Colors for Each Leaf when Crocheting Them Together in A Wreath Design?
Creating a beautiful, intricate wreath design in crochet can be an engaging project that is visually appealing and fun. Using different colors in the leaves of a wreath design can bring life to the pattern, making it look absolutely stunning. If you’re looking for an interesting twist on the traditional all-green leaf motif commonly seen with wreaths, experimenting with different colors for each leaf is definitely worth considering!
With just a few different shades and tones, you’re sure to come up with something incredibly unique, whether it’s bold autumnal tones for the fall season or pastel pinks for springtime.
Conclusion
Crocheting festive holly leaves is an enjoyable wintertime project that adds some extra holiday cheer to any room. With just some basic supplies and simple instructions, anyone can make these beautiful crochet holly leaves—and they make great gifts too! So gather up all those green and red yarns in your stash and prepare to spread Christmas joy with these handmade decorations today! Thanks for reading our post about how to crochet holly leaves.