
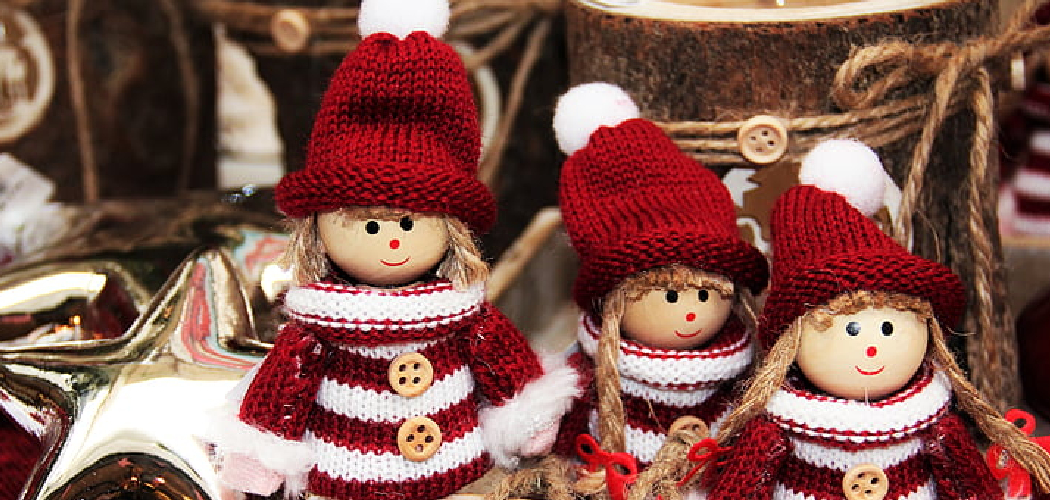
Santa hats – one of the most iconic holiday decorations! Add a magical touch to your Christmas decor by learning how to crochet your own this season. Whether you are looking for an adorable accessory for yourself or wanting to create handmade gifts, creating a festive santa hat is fun and easy with some simple techniques and materials.

In this blog post, we will walk you through all the steps on how to crochet a santa hat that is perfect for wearing at home or giving as a gift. Let’s get started!
Can You Crochet a Santa Hat?
For many people, the holiday season is the perfect time to show off their crochet skills. People may be inspired to make swatches of snowflake ornaments, Christmas tree skirts, or Santa hats. It’s easy for a novice crocheter to make a festive Santa hat for themselves or as a thoughtful gift for someone else! The process requires some basic supplies such as yarn and crochet hooks, which are readily available from most craft stores.
Making a Santa hat also only requires knowing some simple stitches such as the chain stitch, slip stitch, and single crochet stitch. With these basics in mind and practice, one can create a wonderful handmade Santa hat in no time at all!
Why Should You Crochet a Santa Hat?
Crocheting a Santa hat is one of the most fun and festive activities that you can do around the holidays. It’s an enjoyable craft project that has the potential to become your favorite memory from Christmas time. Not only that, but you’ll feel incredibly proud when you finish it and show it off to friends and family.
It’s an amazing feeling to be able to make something with your own hands and surprising yourself at just how good you can make it look! As an added bonus, crocheting a Santa hat can also be quite therapeutic, giving you a productive use of your time during this joyous season and improving your dexterity as well. So start crocheting: make your own special version of a Christmas classic today!
7 Steps to Follow on How to Crochet a Santa Hat
Step 1: Gather Your Supplies
First of all, you’ll need to gather your supplies. You will need a medium weight yarn (such as worsted weight), a size H crochet hook, scissors, and a tapestry needle. Additionally, if you want to add any extra details such as pom-poms or ribbons, now is the time to get them collected.

Step 2: Start Crocheting the Hat
Once you have all of your supplies together, it’s time to start crocheting! Start by making an adjustable ring using your size H crochet hook. Then single crochet 11 stitches into the ring and pull it tight. Next, increase your stitches by one stitch each round until you reach 20 stitches total (including the original 11). Once you reach 20 stitches, keep working rounds without increasing until the hat measures 5 inches from the top of the adjustable ring to where you are currently crocheting.
From there, start decreasing each round until only 4 stitches remain. Cut your yarn with about 8 inches left over and use the tapestry needle to sew it through each of those final four stitches before pulling it tight and weaving in any extra ends.
Step 3: Add Details
Now that your base hat is complete, it’s time for some festive details! If desired, add decorations such as pom-poms or ribbons that can be easily attached using a basic slip stitch or regular sewing thread. Additionally, if desired you can add an optional brim onto the bottom of the hat—simply chain 10 or so stitches onto your original adjustable ring before closing it off and continuing with step 2 above.
Step 4: Make the Ties
To finish off your Santa hat, you will need to make the ties that hang down from each side. To do this, chain 20 stitches onto your size H crochet hook and then use a slip stitch to attach it to the bottom of one of your hat’s sides. Repeat this step to make another tie for the other side and you’re all set!

Step 5: Attach the Fur Trim
If desired, you can add a festive fur trim to the bottom of your Santa hat. To do this, simply attach some faux fur fabric around the bottom edge of the hat using either regular sewing thread or a crochet slip stitch. Make sure to leave about an inch of overlap on each side for a more finished look.
Step 6: Add a Pom-Pom to the Top(Optional)
To give your Santa hat a more complete look, you can add a pom-pom to the top of it. To make this fun detail, simply wrap some yarn around two fingers about 50 times and then tie it off in the middle with another piece of yarn. Cut the ends and fluff it out before attaching it to the top of your Santa hat with a few stitches or some glue.
Step 7: Enjoy your Santa Hat!
Now that you have completed all of the steps, it’s time to show off your new Santa hat! Take a few photos of the finished product and share them with friends and family. And don’t forget to wear your hat proudly throughout the holiday season! You did an amazing job, so now it’s time to enjoy your crafty masterpiece.
That’s it! You’ve now learned how to crochet a Santa hat. With a few simple steps and some festive details, you can now create your own unique holiday accessory in no time at all. Get ready to spread some jolly Christmas cheer this season with your very own handmade Santa hat! Happy crafting!
Things You Need to Know Before Crocheting a Santa Hat
Before crocheting a Santa hat, it is helpful to know what materials you will need and prepare before beginning the project. You might need yarn or wool, a crochet hook, scissors, and a needle to sew in the ends. It would also be useful to have basic knowledge of the crochet stitches you’ll use in making your Santa hat such as double crochet, single crochet, and slip stitch. Furthermore, it’s important to familiarize yourself with the pattern before starting.

A detailed row-by-row guide or chart can make it easier to stay on track throughout the process. If you feel stuck at any point during this task, don’t hesitate to ask for help from an experienced crocheter online or at your local arts and crafts store. With enough dedication and patience, crocheting your own Santa hat can be a rewarding experience for your festive holiday season.
Benefits of Crocheting a Santa Hat
Crocheting a Santa hat this holiday season can come with some great benefits. From an entertaining and creative outlet to providing an economical holiday gift, crocheting a Santa hat is an easy way to get in the holiday spirit. Not only is it fun to work on a project of your own making, but the end product is a truly unique piece. On top of that, crochet projects require less expensive supplies than many other crafts and the materials are generally readily available at most craft stores.
Moreover, the fabric used for these hats is impressive in its sturdiness and durability allowing them to be enjoyed year-after-year – while also light enough so they don’t weigh heavily on anyone’s head. All in all, crocheting a Santa hat is not only a festive way to express yourself creatively this winter-time but also produce something special for family members or friends without breaking the bank!
6 Common Mistakes People Make When Trying to Crocheting a Santa Hat
1. Not Using the Correct Yarn
When crocheting a Santa hat, it is important to use the correct yarn. The best yarn to use is red worsted weight yarn. This type of yarn is thick and will help to keep your Santa hat looking nice and plump.
2. Not Using the Correct Hook Size
Another mistake people make when crocheting a Santa hat is not using the correct hook size. The best hook size to use is an H/8-5.00mm hook. This size hook will ensure that your stitches are tight enough so that your Santa hat holds its shape.

3. Not Crocheting in a Circle
When crocheting a Santa hat, it is important to crochet in a circle. If you crochet back and forth in a straight line, your hat will not be able to hold its shape and will end up looking more like a rectangle than a hat.
4. Not Increasing Enough Stitches in Each Round
Another common mistake people make when crocheting a Santa hat is not increasing enough stitches in each round. It is important to increase by two stitches every other round so that your hat has room to grow and doesn’t end up being too small.
5. Not Decreasing Enough Stitches at the Top of the Hat
When you get close to the top of the hat, it is important to start decreasing your stitches so that the top of the hat comes to a point. If you don’t decrease enough stitches, your hat will have more of a flat top instead of a pointed top.
6. Not Weaving in Your Ends Properly
The last mistake people make when crocheting a Santa hat is not weaving in their ends properly. When you finish crocheting your hat, you will have some loose ends that need to be woven in so that they don’t come undone. To weave in your ends, simply thread them through the remaining stitches on your hook and then trim them off
How Long Does It Take to Crochet a Santa Hat?
Crocheting a Santa hat is a fun and festive way to stay warm during the cold winter months! Generally, it takes around four hours to complete one hat. Of course, this all depends on how skilled the crocheter is. With enough patience and practice, however, even beginners can create a unique and high-quality Santa hat. It’s important to use an appropriate weight of yarn, along with the right size of crochet hook for the project.

Once you have these items assembled, you can begin planning your design. Whether you want a more traditional design, or something truly remarkable, you’ll be sure to end up with a beautiful hat that will keep you jolly all season long!
Can I Make My Own Pattern for Crocheting Santa Hats?
Crocheting your own Santa hat pattern can be a great way to get creative with your holiday spirit! If you’ve never tried it before, it may take a few tries until you get the hang of it. The best part is, once you have the basics down, you don’t have to stick to a plain-looking red and white design. You can make every hat unique with colors and patterns of your choice. With the right materials and knowledge of some basic techniques, there’s no limit to what you can create!
It’s easy to find tutorials online or in books where you can learn all the steps. So go ahead and have fun crocheting custom hats for friends and family this year!
What Type of Yarn Is Best for Making a Santa Hat?
When it comes to crafting Santa hats, you want to make sure that you are selecting the right type of yarn. Worsted weight, acrylic yarn is a good option because of its thickness and versatility. The medium-weight construction makes it ideal for getting the structure needed in this project, and the acrylic material ensures durability for repeated use. A fuzzy or fleecy effect can be achieved with appropriate selections in order to produce a festive finish.
Additionally, it can easily be machine washed if any spills occur due to holiday cheer! For these reasons, worsted weight, acrylic yarn is an excellent material for making a Santa hat that will last through many years of festivities.

Conclusion
Crocheting a Santa hat is not only fun but also surprisingly easy once you know how! With just a few simple supplies and steps outlined here today anyone can create their own beautiful Santa hats this winter season–all while spreading some extra holiday cheer! So grab those supplies and let’s get crocheting! Happy holidays! Thanks for reading our post about how to crochet a santa hat.