
Are you ready to learn how to crochet a rectangle? Crocheting can be an extremely rewarding and satisfying endeavor, but you must start with the basics. Knowing how to create something as basic yet integral as a rectangle is essential for mastering the art of crochet.

No matter what your skill level is when it comes to crocheting, this tutorial will help demystify the process so you can have success from the very beginning! Read on for all the tips and tricks needed for crafting perfect rectangles every time.
Tools You Will Need
- Crochet hook
- Yarn of your choice
- Tapestry needle
- Scissors
6 Steps Guide on How to Crochet a Rectangle
1. Create a Foundation Chain
Crocheting a rectangle is easy once you understand the basics of making a foundation chain! To start, make a slip knot on your crochet hook and then chain several stitches; typically the number of stitches you make corresponds to the width of your desired rectangle.
Once this initial chain is created, use only the single crochet stitch to complete your rectangle by turning your work and repeating the single crochet stitch across until you have reached your desired length. If it helps, think of each row as one entire side, then when that row is complete all four sides will be done, resulting in a perfect rectangle!
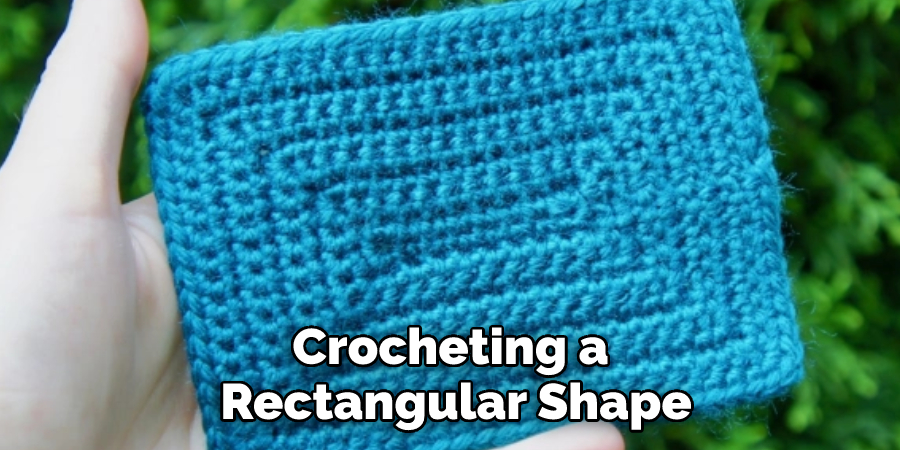
2. Start Making Your Rectangle
After you’ve mastered the foundation chain technique and created your base, the fun can really begin with crocheting a rectangular shape. To do this, you will use the single crochet stitch to start building out your rectangle. The beauty of crocheting is that you don’t have to worry about precise measurements as it’s easy to adjust when needed. As you work each row, make sure to pull gently at the ends of your fabric as this will help keep each side even and straight.
After a few rows have been worked, measure your progress against your desired measurement and adjust accordingly for color changes or size adjustments. With practice and patience, creating perfect rectangles with crochet will become second nature.
3. Fix Desired Shape and Size
How many rows you need will again depend on the yarn and hook you’re using as well as how big you want your rectangle to be.
Once you know how tall you’d like your crochet rectangle to be, repeating step two is the only way forward. The number of rows and stitches necessary will depend on the kind of yarn and hook being used, as well as the size of the rectangle desired.
For those just starting, it may take some trial and error before finding the perfect combination for their project! Regardless, before knitting a larger piece with intricate design details, mastering the basics and learning to Crochet a Rectangle is essential.
Once you’ve completed your rows, it’s time to move on to the next step.
4. Create One Final Single Crochet Row
Now that you’ve finished crocheting all the rows for your rectangle, it’s time to begin fastening off your work.
Congratulations on finishing the rows for your crochet project! It’s now time to secure all the stitches so that you can use and enjoy your rectangle. Start with a final single crochet row across the top of your project as this will reinforce the shape, helping to prevent stretching or warping over time.
After this, simply loop in the tail of yarn from the beginning of your work, and carefully tie off your project using a knot. Once you’ve done this, it’s complete; you now have a beautiful handmade crochet item ready to show off!
5. Cut a Length of Yarn
Make sure the end doesn’t come undone once you have secured it in place by pulling it tight and knotting it to the stitches.
Crocheting a rectangle can be accomplished fairly easily with a few simple steps. First, cut a length of yarn from your skein and use a tapestry needle to weave it through the previous row. Once you have done this.

Make sure the end doesn’t come undone by pulling it tight and tying off the stitches utilized. This will create an even edge that ensures durability and structure for whatever project you’re working on. With this technique, creating an evenly-edged rectangle has never been easier!
6. Weave in All Your Remaining Loose Ends
Once this is done, your rectangle is complete and ready to be added to any project you’re working on!
After all your hard work has paid off, it’s now time to neaten up your crochet masterpiece by weaving in any loose ends with a tapestry needle. Don’t worry if this sounds complicated, as the process is quite easy!
All you need to do is take your tapestry needle and thread it through each end loose end of yarn on either side of your rectangle. Once you have done this, you will have created a secure and polished product that can be added to just about anything – bags, headbands, blankets, bookmarks – the possibilities are endless!
You can use this basic shape for many projects. Whether it’s the foundation for a blanket or a piece of art, you have the tools and knowledge needed to create perfect rectangles every time. Happy crocheting!
Tips to Crochet a Rectangle
- Choose the right size crochet hook. The size of the crochet hook you use will determine the size of your finished rectangle. For example, if you want to make a small rectangle, you would use a smaller hook than if you wanted to make a large rectangle.
- Choose the right type of yarn. The type of yarn you use will also affect the size of your finished rectangle. For example, if you want to make a very thin rectangle, you would use a thinner yarn than if you wanted to make a thicker rectangle.
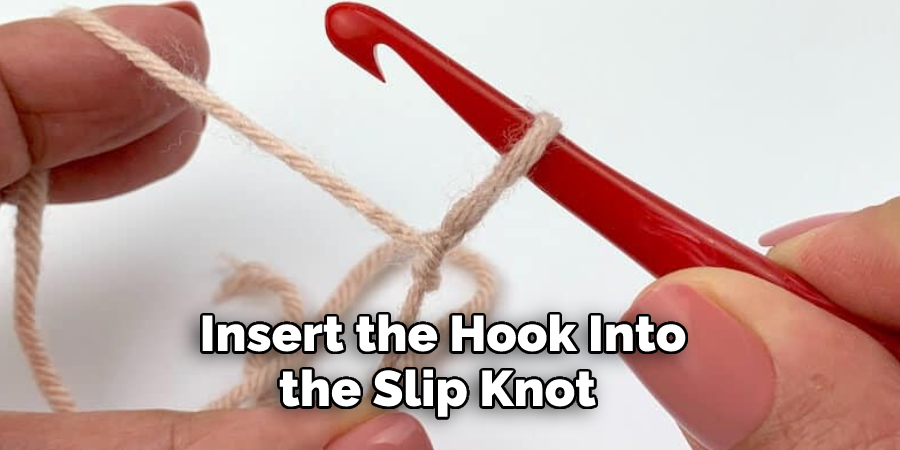
- Make a slip knot. To start crocheting your rectangle, you will need to make a slip knot on your crochet hook. This is simply a loop that is made with the yarn and then tightened around the hook.
- Insert the hook into the slip knot and pull up a loop. Once you have made your slip knot, insert the crochet hook into it and then pull up a loop of yarn through the slip knot. You should now have two loops on your crochet hook.
- Yarn over and pull through both loops on the hook. To complete this stitch, yarn over (i.e., wrap the yarn around) the crochet hook and then pull it through both loops that are currently on the hook. You have now completed one stitch!
- 6. Change colors (optional). If you want to change colors in your rectangle, simply tie off the current color that you are using and then start crocheting with the new color that you want to use.
- Crochet additional rows until you have reached the desired length for your rectangle. Once you have reached the desired length for your rectangle, you can move on to the next step.
- Fasten off and weave in ends (optional). To finish your rectangle, you can either fasten off or weave in any loose ends that remain. Fastening off simply means cutting the yarn and pulling it through the last loop that is on the hook; weaving in ends means taking each loose end and hiding it within the stitches of your work so that it is not visible.
How the Right Yarn and Hook Size Can Impact Your Crocheted Rectangle?
Choosing the right yarn and hook size is an important consideration when you are crocheting a rectangle, as the wrong combination can make it difficult to achieve your desired outcome. The yarn’s thickness will affect how dense or lightweight the fabric will be, while a too-small hook may give too tight of a tension that makes stitching difficult to work with.
Similarly, a too-large hook size can create an uneven stitch pattern that affects the shape as well as produces holes in the finished fabric. To ensure success and satisfaction with crocheting a rectangle, pay close attention to which materials you use – otherwise, your project may have less than favorable results!
How to Weave in Ends for Professional Results on Your Crocheted Projects?
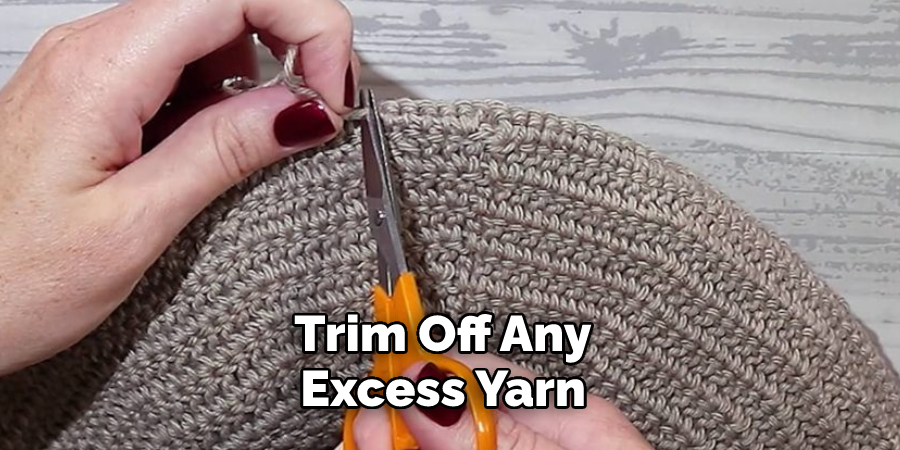
Weaving in yarn ends is the key to creating a professional look when crocheting. First, after you finish stitching your project, thread the remaining yarn end onto a yarn needle and draw it through several stitches on the wrong side of your work.
Then, adjust any tight or loose areas if needed. To complete the weaving-in process, trim off any excess yarn. For extra security, you can also apply a small amount of fabric glue near more visible ends. With just these few simple steps, you can make sure that your crocheted projects look polished and professional!
Conclusion
Now that you know how to crochet a rectangle, put your skills to the test and make something rectangular! A pair of cozy crocheted socks would be perfect for this winter weather.
If you need help, don’t hesitate to ask a friend or family member who knows how to crochet. With some practice, you’ll be able to whip up a handmade item in no time at all.
You Can Check It Out to Make Crochet Plant