
Are you looking for a new and interesting way to spruce up your crochet projects? The puff stitch, sometimes known as a “bobble stitch”, is the perfect technique for adding textural elements to garments or accessories. Although it looks intimidating at first glance, the puff stitch is actually quite simple and will give your work an eye-catching finish that is sure to impress.

In this blog post, we will walk you through how to crochet a puff stitch step by step. So grab some yarn and let’s get started!
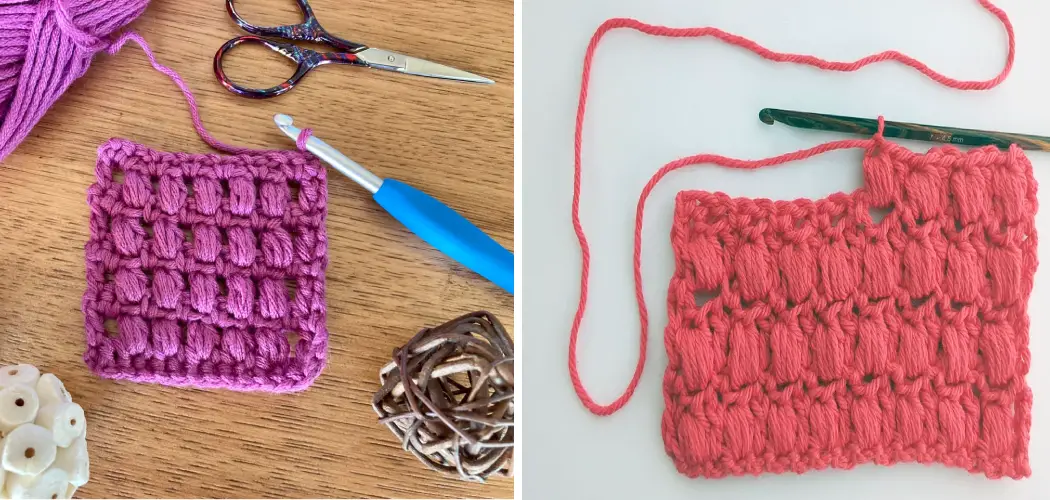
Supplies You Will Need to Crochet a Puff Stitch
- Yarn
- Crochet hook Scissors
- Tapestry needle (optional)
Step-by-Step Guidelines on How to Crochet a Puff Stitch
Step 1: Create the Foundation Chain
The first step in any crochet project is to create a foundation chain. You can use any type of yarn for this purpose, just be sure that your hook size is appropriate for your chosen yarn. To start, make a slip knot and then chain the desired number of stitches. For example, if you are making a swatch, you could chain 15 stitches.
Step 2: Make the First Puff Stitch
Now it’s time to make the first puff stitch. To do this, yarn over and insert your hook into the second chain from the hook. Yarn over and pull up a loop, then yarn over and draw through two loops on the hook. You should now have two loops remaining on the hook.
Repeat this process four more times, so you have a total of 6 loops on your hook. Yarn over and draw through all six loops at once to complete your first puff stitch!
Step 3: Continue Making Puff Stitches
Now that you’ve made your first puff stitch, you can continue to make more. To do this, yarn over and insert your hook into the next chain from the previous puff stitch (which should be the third chain from the hook). Yarn over and pull up a loop, then yarn over and draw through two loops on the hook. You should now have two loops remaining on the hook.

Repeat this process four more times, so you have a total of 6 loops on your hook. Yarn over and draw through all six loops at once to complete your next puff stitch! Repeat these steps until you have the desired number of puff stitches in your project.
Step 4: Finishing Touches
Once you’ve finished your puff stitches, you can either tie off the yarn and weave in any loose ends with a tapestry needle or continue to crochet another row for additional texture. If you are planning on creating a project with multiple rows of puff stitches, be sure to alternate them so that each row has the puff stitch facing up when it’s not being worked on.
And that’s it! Now you know how to crochet a puff stitch. Have fun experimenting with different colors and textures, and get creative with your projects. We can’t wait to see what you come up with!
Additional Tips and Tricks to Crochet a Puff Stitch
1. Keep Your Stitches Tight – When you’re working with puff stitches, it’s important to keep the tension of the stitches consistent and tight. You can do this by holding the working yarn firmly before making each stitch.
2. Make Sure to Add Enough Loops – For a puffier look, make sure that you add enough loops in each puff stitch. The number of loops will depend on the weight of your yarn and the size of your hook, so feel free to experiment until you find the right balance.
3. Use a Bigger Crochet Hook – To make sure that all of your stitches are even and consistent, using a larger crochet hook than what’s recommended for the yarn can help make sure that each loop is of even size.
4. Use a Stitch Marker – To make sure you don’t lose your place when crocheting a puff stitch, it can help to use a stitch marker at the end of each row or round. This will help keep your stitches organized and will save you time later on in the project.

5. Make Sure to Count Your Stitches – It’s important to count your stitches when crocheting a puff stitch, as this will help you keep track of where you are in the pattern.
6. Don’t be Afraid to Experiment – If you’re just starting out with crocheting, don’t be afraid to play around with different techniques and styles until you find the one that fits you best. This will help you develop your skills and create unique projects.
7. Have Fun! – Above all else, remember to have fun when crocheting a puff stitch. It’s easy to get lost in the details of the pattern, so take a step back every now and then and enjoy the process of creating something beautiful with your own two hands.
Following these tips and tricks will help you crochet a beautiful and unique puff stitch every time! Have fun and happy crocheting!
Things You Should Consider to Crochet a Puff Stitch
1. You should always use a crochet hook of the right size for your particular project. Every pattern will specify the type and size of hook that is needed to complete the project.
2. When starting a puff stitch, it is important to be aware of how many chains you are working with. This will affect the number of stitches in each row and can be adjusted as needed.
3. To make sure that the puff stitch looks uniform, you should always pull up the loop of each stitch to the same height. This will ensure that all of your stitches are even and look nice when finished.
4. You may need to adjust your tension depending on how tight or loose you want the finished product to be. Working with different weights of yarn can also affect the tension.
5. Once your puff stitch is complete, you can finish off your project with a few slip stitches. This will give your project a nice finished edge and help secure all of your stitches in place.

6. Lastly, it is important to practice your puff stitch technique so that you can become familiar and comfortable with the pattern. With a little bit of practice, you will be able to quickly and confidently create beautiful projects with this versatile crochet stitch.
Following these considerations will help you to get the most out of crocheting a puff stitch. It is a great versatile crochet stitch that can be used in a variety of projects, from hats and scarves to blankets and throw pillows. Once you have mastered this stitch, the possibilities are endless! Good luck and happy crafting!
Precautions Need to Follow for Crocheting a Puff Stitch
- Make sure you have all the right tools and materials: crochet hook, yarn, needle, and scissors.
- Get comfortable in your workspace – adjust the height of your chair or use a cushion for comfort if needed.
- Make sure your yarn is the right weight for the project you’re working on.
- Work within your skill level and don’t be afraid to try new techniques with caution.
- Have patience – crocheting can take time and practice, so don’t expect perfection the first time around!
Following these precautions will ensure a successful puff stitch crochet project. Now that you know what to do, it’s time to learn how to crochet the puff stitch!
Frequently Asked Questions
How Do I Crochet a Puff Stitch?
To crochet a puff stitch, start by chaining the desired number of stitches. Then, yarn over twice and insert your hook into the next chain stitch. Yarn over again and draw up a loop (you will have 7 loops on the hook). Yarn over and draw through the first 6 loops on your hook. Then, yarn over and draw through the remaining 2 loops. This completes one puff stitch.
To crochet multiple puff stitches in a row, simply repeat this process until you reach the desired number of stitches.

How Can I Use Puff Stitches?
Puff stitches are a great way to add texture and volume to any crochet project. They can be used to create hats, scarves, blankets, cowls, sweaters, and more! With just a few puff stitches you can create an eye-catching design element. You can also use them to make toys such as teddy bears or dragons. The possibilities are endless!
What Are Some Tips for Crocheting Puff Stitches?
When crocheting puff stitches, it’s important to keep your tension even. It can be difficult to crochet multiple puff stitches in a row without letting the loops slip off the hook. To prevent this from happening, you can use a locking stitch marker or some other way to mark your starting row. This will help you keep track of where you are in your project.
Additionally, if the puff stitch pattern calls for multiple stitches between each puff stitch, make sure to work those extra stitches loosely so that they do not pull too tight and distort your finished piece.
Finally, make sure that you are always working the last yarn over the puff stitch into the same stitch as your first chain. This will help keep all your stitches even and uniform.
Conclusion
All in all, knowing how to crochet a puff stitch can open up a world of possibilities for your crochet projects. With just a few simple steps, you can create beautiful and unique designs. Whether you’re making hats, scarves, blankets, cowls, or even toys, the versatility of puff stitches makes them an essential skill to have in your crocheting repertoire. So grab your hook and yarn and get puffing! Happy crocheting!