
Are you looking for an engaging way to express your creativity? Crocheting might just be the perfect hobby for you! Not only is it a great way to practice mindfulness and use up some of that extra yarn, but making crochet rosettes can help bring color, texture, and unique designs into your wardrobe or living space.

So let’s get started with learning how to crochet rosettes – this guide will teach you everything from determining which materials are best to working through the basic steps of crocheting a rosette. Here’s what we’ll cover so you know exactly what resources and skills you’ll need along the way:
Tools and Materials You Will Need to Crochet Rosettes
- Yarn (about 50 yards)
- Crochet hook (size G or H)
- Tapestry needle and scissors
- Optional embellishments such as beads or sequins
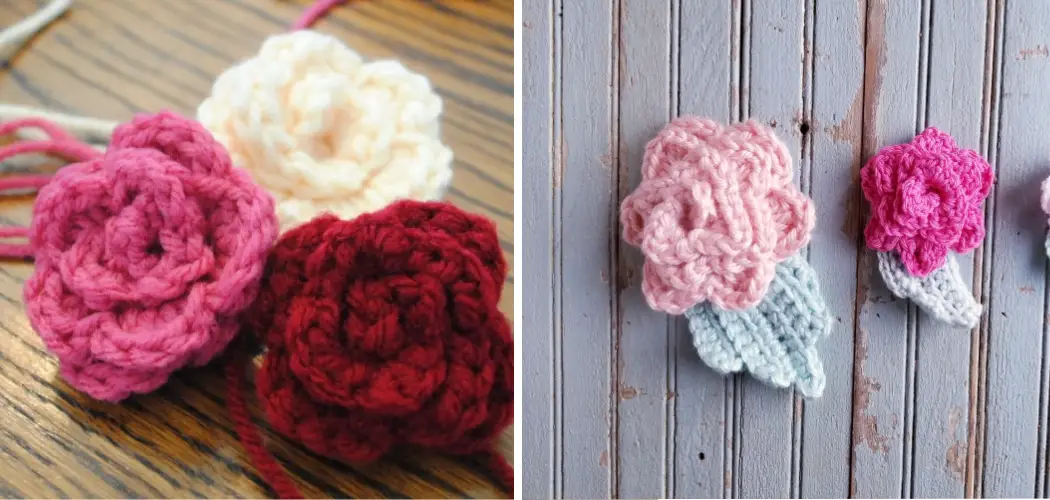
Step-by-Step Guidelines on How to Crochet Rosettes
Step 1: Choose Your Yarn
The type of yarn you choose is key to creating beautiful rosettes that are durable and easy to work with. Go for a medium-weight yarn such as worsted weight or even chunky for larger rosettes – avoid anything too thin or slippery. You can also mix and match colors to create unique designs. Choosing a color palette in advance can help make sure your rosettes will look great together when finished.
Step 2: Make the Foundation Round
Once you have chosen your yarn and crochet hook size, slip knot your thread and chain 6 stitches. Now, taking care to keep your tension even – and not too tight or too loose – join the first and the last chain together using a single crochet. Keep repeating that process until you have 6 single crochets. While making the foundation round, make sure you are crocheting closely around the base.

Step 3: Create a “V” Stitch
For the next step, we will create V-shaped stitches – chain 3 and then pull up one loop in the same stitch. Now, double-Croat twice in that same stitch and repeat until you reach the end. Join the last stitch with the first loop using a single crochet. Creating the V-stitch can be tricky at first, but with practice, you’ll get the hang of it in no time.
Step 4: Crochet the Outer Edge
The next step involves creating an outer edge. Chain 3 and then double crochet in each stitch around, joining with a single crochet at the end of each round. As you work through this process, make sure your tension is still even and the stitches are tight.
Step 5: Add Optional Embellishments
This is where you can get creative! If you want to add some extra pizzazz to your rosettes, consider adding beads or sequins as an embellishment. Simply thread them onto a needle and stitch them into the rosette for a unique addition. Other options might include tassels, pom-poms, or ribbons – whatever your imagination conjures up!

Step 6: Sew the Rosettes Together
Once you have crocheted all the rosettes and added any embellishments, you are ready to begin sewing them together. Assemble your pieces into a desired pattern and then use your needle and thread to sew them into place. For a more secure hold, make sure to stitch back and forth around the same spot.
And there you have it! With these steps, you can start crafting beautiful and unique crochet rosettes in no time. Have fun experimenting with colors, textures, and designs to make something truly special that stands out from the crowd. Good luck on your journey to becoming a crochet rosette master!
Additional Tips and Tricks to Crochet Rosettes
1. Use a bigger hook size than what is usually recommended for the yarn you are using. A larger hook will help ensure that your stitches have plenty of space to spread out and create a fuller look.
2. If you plan on making a large rosette, it may be helpful to use two strands of yarn instead of one. This will give your rosette more stability and a beautiful, full appearance.
3. When crocheting rosettes, it is important to make sure that your yarn is not stretched too tightly. This can lead to the stitches being pulled together, which may cause the edges of your design to be uneven or distorted.
4. If you struggle with making tight stitches, try using a smaller hook size or a different type of yarn. This will help ensure that your stitches are not too tight, which can make your rosettes look better and feel more comfortable.
5. When crocheting rosettes, it is important to always use the same number of stitches in each row. This will help keep the shape of your design consistent throughout the project.
6. To add some extra flair and texture to your rosettes, you can try using different stitches or incorporating beads into the design. This is a great way to create a unique look for your project.
7. If you are having trouble making consistent rosettes, it may be helpful to draw out your pattern on paper before starting. This will help ensure that all of your stitches are the same size and shape.
8. To make sure that your rosettes look even and consistent, it is important to always measure the circumference of each one before moving on to the next. This will help you make sure that they are all the same size so that the final design looks cohesive.
9. When adding extra details such as beads or ribbon, it is important to make sure that they are securely attached. This will help ensure that the details remain in place throughout the life of your project.
10. Finally, if you plan on washing and blocking your rosettes, make sure to use a gentle detergent and lay them out flat to dry. This will help keep them looking their best for years to come.
Following these tips and tricks will help make sure that your rosettes are beautiful and long-lasting. With a little bit of practice, you’ll be able to create stunning designs in no time! Happy crocheting!

Precautions Need to Follow for Crocheting Rosettes
When crocheting rosettes, it is important to be careful and follow the instructions closely. A few key precautions to keep in mind are:
- Always use a crochet hook that is the right size for your yarn weight. This helps avoid mistakes and ensures an even stitch count throughout your project.
- Make sure you know how many stitches you need to complete the rosette. Counting your stitches is a great way to ensure accuracy and uniformity.
- Start each round with a slip stitch, which will help keep the ends of your rosettes neat and tidy.
- Pay attention to tension when working with yarn – use too much or too little, and it can affect the look of the rosette.
- Lastly, take your time and be patient when crocheting a rosette – it’s an art form that takes practice and experience!
With these precautions in mind, you’re sure to create beautiful rosettes with ease! Now let’s get started on learning how to crochet them.
Frequently Asked Questions
How Do I Join Stitches?
To join stitches, you will need to complete a slip stitch. This is done by inserting the hook into the desired stitch and pulling up a loop before yarning over and drawing it through both loops on your hook.
How Do I Change Colors?
Changing colors in crochet is easy. Simply add the new color yarn to your hook and begin working with it as you normally would. When you reach the end of a row, cut off the old yarn and leave a tail for weaving later. Then, start with the new color.
Can I Make Patterns with Rosettes?
Yes! You can easily create beautiful patterns with rosettes. For an easy pattern, begin by making a solid base of crochet stitches and adding your rosettes to it. Make sure to stitch in the right places for a neat finish. You can also combine different color yarns and add texture for more intricate designs. Get creative with it!

How Do I Make a Rosette?
Making rosettes is easy and fun. All you need to do is insert your hook into a stitch, yarn over, and draw through the loop. Then, chain one and repeat the step until you have five loops on your hook. Finally, yarn over and draw through all of the loops. You’ve just made a rosette!
Conclusion
In conclusion, crocheting rosettes is not only an enjoyable craft, but it achieves stunning results. If you are looking for a creative way to adorn your clothing and home goods projects, crocheting rosettes is a great choice. You can make them as simple or complex as you like and use any color thread that fits your design ideas. With just the basic stitches and easy instructions, you can create detailed crochet rosettes that are sure to impress anyone who sees them.
Now that you have seen how to make these beautiful textures with tulle fabric, why not try making some of your own? Follow our step-by-step guide to learn How to Crochet Rosettes today!