
Crocheting, the art of creating intricate and beautiful fabrics using yarn and a hook, has stood the test of time as a beloved crafting technique. Among its myriad applications, crocheting a patchwork cardigan stands out as a remarkable fusion of creativity and practicality.

The patchwork design, characterized by the skillful arrangement of various crocheted squares, offers a unique canvas for self-expression and personal style. Whether you’re a seasoned crocheter or just beginning to explore the world of yarn, this endeavor presents an exciting opportunity to fashion a garment that seamlessly blends warmth, artistry, and fashion.
In this article, we will delve into how to crochet a patchwork cardigan. From selecting the right yarn hues to mastering the intricate stitching techniques, we will guide you step-by-step, helping you embark on a fulfilling creative adventure that results in a cozy, one-of-a-kind wearable masterpiece.
The Concept of Crocheting a Patchwork Cardigan
If you love to crochet, then why not create a stunning patchwork cardigan? This project is suitable for those of all skill levels and is a great way to show off your crafting skills. You can use any colors you like or even mix and match different yarns in order to create something truly unique. With the right supplies and some patience, you’ll be able to create a stylish cardigan that is sure to be the envy of everyone who sees it. Here’s how to get started:

First, you’ll need to decide what kind of cardigan pattern you want to make. You can either go for a traditional design or mix and match different colors and textures for something more unique. Once you have decided on your preferred motif, you can begin to purchase the necessary supplies. Look for a good quality yarn in colors that complement each other and choose a suitable crochet hook size based on your pattern requirements.
Next, you will need to plan out your cardigan pattern. Take the time to work out how many squares or pieces of fabric you’ll need and what order they should go in. This will also determine the size of your cardigan so you should take note of all measurements before beginning.
Once you have the supplies and plan ready, it’s time to get crocheting! Begin by making one square or piece of fabric in a particular pattern, then repeat this until all squares are finished. Then start connecting them together from top to bottom using the same crochet pattern that you used for the individual pieces. You may also want to add additional stitches or rows in order to make more intricate designs.
Importance of Patchwork Design as a Canvas for Creativity and Personal Style
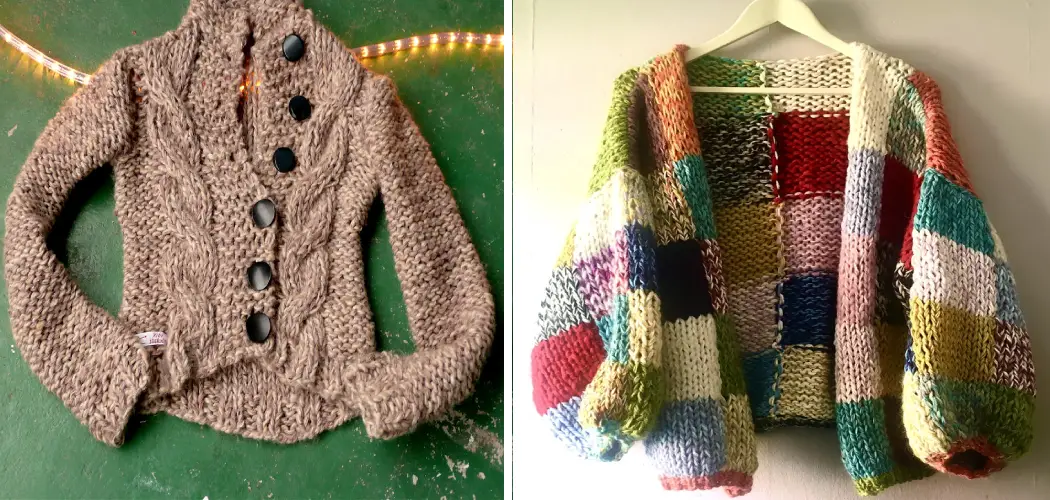
Patchwork cardigans are a unique and creative way to add a special touch of personality to your wardrobe. Unlike other knitted garments, patchwork design gives you the opportunity to crochet an entire piece of clothing from multiple pieces of yarns or fabric scraps that have been cut into small shapes and sewn together.
The result is an eye-catching design with many beautiful colors and textures that are combined in creative ways. You can create a one-of-a-kind piece that expresses your individuality, incorporating colors and patterns that you prefer. With patchwork, the possibilities are endless!

Furthermore, patchwork cardigans provide comfortable layers for your wardrobe as they often come with an open front or draping shawl collar. They can be worn over casual t-shirts and jeans or paired with dress pants and a blouse for a more formal occasion. They can also be layered together with other garments to help you stay warm in the winter months. Whatever your style, patchwork cardigans offer an endless array of possibilities to craft a truly unique statement piece!
10 Steps How to Crochet a Patchwork Cardigan
Step 1: Gathering Materials and Inspiration
Before you begin crocheting your patchwork cardigan, it’s important to gather all the necessary materials and get inspired by various patterns and color combinations. Here’s what you’ll need:
Crochet hooks in various sizes to achieve different stitch densities.
Yarn in a variety of colors and textures. Choose a mix of solid colors and variegated yarns to create an interesting patchwork effect.
Scissors and yarn needles for finishing touches.
Buttons, clasps, or other fasteners if desired.
A crochet pattern or your own design for the cardigan.
Take some time to browse crochet magazines, online platforms, and books for inspiration. Choose a color scheme that resonates with your personal style and matches your wardrobe.
Step 2: Choosing the Right Pattern
Selecting the right pattern is crucial for a successful patchwork cardigan project. You can find various patterns online or in crochet books. Choose a pattern that suits your skill level and desired cardigan style. Some patterns might involve basic stitches, while others might incorporate more intricate stitches and techniques. Read through the pattern instructions thoroughly before starting.

Step 3: Swatching
Crocheting a swatch is essential to determine your gauge and make sure your cardigan will fit properly. Follow the pattern instructions to create a small swatch using the yarn and hook size you intend to use for your cardigan.
Measure the number of stitches and rows per inch to compare against the pattern’s recommended gauge. Adjust your hook size as needed to match the gauge. Once you have the correct gauge, continue crocheting your patchwork cardigan according to the pattern’s instructions.
When it comes time to seam together your completed panels, use a whip stitch to join them together. This will create a more secure seam than using single crochet stitches and is much less bulky than double crochet stitches. To help make sure the seams line up correctly, hold the panels up to a light source and use pins to keep them in place while stitching.
Step 4: Creating Patchwork Squares
The heart of your patchwork cardigan lies in the patchwork squares. Depending on your chosen pattern, you might need to create a variety of square sizes and color combinations.

Start by crocheting each patchwork square individually, following the pattern’s stitch instructions and color changes. As you complete each square, weave in the ends using a yarn needle. Once all of your squares are complete, you’ll be ready to assemble them into one piece.
When deciding how to arrange the patchwork squares for your cardigan, the possibilities are endless! You can opt for a random arrangement or create an intentional pattern with strategic color placement. If you’re feeling daring, try creating an asymmetrical design or incorporating multiple shapes into your patchwork cardigan.
Step 5: Blocking
Blocking is a crucial step to ensure that your patchwork squares are all the same size and shape. Lay your squares flat on a blocking mat or towel, and gently steam or spritz them with water. Use pins to stretch and shape the squares to the desired dimensions.
Allow them to dry completely before proceeding. Once blocked, you’re ready to sew the squares into a cardigan! Though it may take some time, the effort is worth it in order to create a beautiful patchwork cardigan.
Step 6: Assembling the Cardigan
Once your patchwork squares are blocked and ready, it’s time to assemble the cardigan. Lay out the squares in the desired arrangement, considering the colors and patterns you want to feature prominently. Use stitch markers to hold the squares in place as you join them together. You can use slip stitches, single crochet stitches, or any other joining technique suggested by your chosen pattern.

Step 7: Adding Edging
To give your cardigan a polished look, add an edging around the front opening, sleeves, and hem. This can be a simple single crochet border or a more decorative stitch pattern. The edging not only adds a finished touch but also reinforces the edges and provides structural stability.
Start at the bottom of the cardigan and work up. For this example, we will use a single crochet stitch to create a simple border. Using the same color yarn used for the body of your cardigan, join with a slip stitch in any corner. Chain 1, then single crochet evenly around two sides of opening, making 2 single crochet in each corner. Fasten off, weave in ends.
Step 8: Creating Collar and Cuffs
If your pattern includes a collar or cuffs, follow the instructions to crochet these components separately. Attach them to the cardigan using the joining technique recommended in the pattern. The collar and cuffs can be worked in a contrasting color to add visual interest.
If you wish to add extra embellishments, such as buttons or trims, now is the time to do so. Sew them on securely and you are ready to wear your patchwork cardigan!
Step 9: Finishing Touches
With the major components of the cardigan assembled, it’s time for the finishing touches. Weave in any remaining loose ends using a yarn needle. Attach buttons, clasps, or other fasteners if your pattern calls for them. Try on the cardigan to ensure it fits comfortably and make any necessary adjustments.
If you want to add a special touch, try adding crochet flowers or other decorations. To do this, use the same yarns used for the cardigan and follow your desired pattern. Use fabric glue to attach them securely. You can also incorporate beads or embroidery into the design if you like.
Step 10: Blocking and Final Steaming
After all the components are joined and the finishing touches are added, block the entire cardigan one more time to ensure that it’s even, smooth, and properly shaped. Gently steam any areas that need a little extra shaping, being careful not to overly saturate the yarn. Allow the cardigan to dry completely before storing or wearing.
Once you’ve finished your patchwork crochet cardigan, take a few moments to admire your work! This project is sure to be a labor of love that will look great and keep you warm for many years to come.
Things to Consider When Crocheting a Patchwork Cardigan
Before you begin crocheting your patchwork cardigan, there are some things to consider. Choosing the right yarn is one of the most important factors when it comes to making a successful piece of knitting or crochetwear.

Yarns come in different weights which make them ideal for certain types of projects. A lightweight yarn will work best if you’re looking to create a piece of clothing that is lightweight and airy, while a thicker yarn will work better for something like a chunky cardigan.
When selecting the pattern you’d like to use to make your patchwork cardigan, consider the size of the person who will be wearing it or if the cardigan is intended as more of a decorative piece. If the person wearing the cardigan is a petite size, look for a pattern that doesn’t require too much yarn or crocheting time so that you can create something stylish and comfortable in the end.
Finally, consider the color palette of your cardigan before beginning to crochet it. Choose colors that work well together and complement each other. For example, a bright yellow and deep green look great together while pink and beige can be more subtle. Once you’ve decided on the colors, it will be much easier to plan out your patchwork design.
Conclusion
This cardigan is a great project that can be used for all seasons. You can make it as a wardrobe staple to carry you through the year, or as a special occasion piece that will get you many compliments. Whichever way you wear this cardigan, it will put your skills on display and have everyone asking where you learned how to crochet such a beautiful piece of clothing.
If you are looking for the perfect project to give you an edge in your creative tasks, try making this patchwork cardigan and show off what you can do with yarn and your imagination! With the information provided in this blog post, you should now be well on your way to mastering How to Crochet a Patchwork Cardigan. So grab some yarn and hooks, pick out the heartiest colors, and have fun crafting the perfect garment for any occasion!