
If you’re looking for a charming and delightful crochet project, crafting a mini octopus might just be the perfect choice. Crocheting these adorable sea creatures can be a rewarding endeavor that combines creativity with relaxation.
Whether you’re a seasoned crochet enthusiast or a beginner eager to explore the world of yarn crafts, making a mini octopus allows you to practice various crochet techniques while resulting in a cute and huggable end product.

From selecting the right yarn colors to mastering the stitches required, this article will guide you through the step-by-step process of how to crochet a mini octopus. So, gather your crochet hooks, choose your favorite yarn shades, and let’s dive into the joyful journey of crafting these endearing underwater companions.
The Appeal of Crocheting Octopus for Visual Appearance and Satisfaction
Crocheting your own mini octopus can be a rewarding and enjoyable experience! Not only are crocheted octopuses a great way to show off the skill level of a crafter, but they are also incredibly cute and perfect for friends or family members who love marine wildlife.
Plus, they’re fun to make in any color scheme you prefer, and the possibilities for customization are almost endless. Below, you will find instructions on how to crochet your own mini octopus — it’s easier than you might think!
First things first: You’ll need some basic supplies. Gather a crochet hook (size 5 is recommended), yarn in the colors of your choice, a pair of scissors, and a tapestry needle for weaving in the ends. Once you’ve got your supplies ready, it’s time to get started!
Begin by making a magic circle or “magic ring.” To do this, wrap the yarn around your middle finger twice and insert the crochet hook into the loop. Pull up a loop of yarn, and then yarn over the hook and draw the loop through. Continue working single crochet stitches into the circle until it’s tight – aim for about 5-7 stitches in total. Then, pull on the tail end of your yarn to close up the circle.
Next, you will begin making rounds that form each tentacle of the octopus. Chain one, and then work two single crochet stitches into the same stitch. Continue working two sc in each stitch around until you have reached your desired number of tentacle sets. If you’re going for a realistic octopus, aim for eight tentacles – but feel free to make as many or as few as you like!
Yarn and Hook Size Choices for the Project

Crocheting a mini octopus requires choosing the right yarn and hook size. Depending on your preferences, you can use either a 4mm or 5mm crochet hook with standard worsted-weight acrylic yarn for this project. To determine which crochet hook to use, consider the gauge of the pattern and how many stitches you need.
For example, if you are making a mini octopus with 8 stitches, then you will likely need to use the 4mm crochet hook. However, if you are making a mini octopus with 10 stitches or more, then the 5mm crochet hook would be better suited for this project.
Additionally, it is important to keep in mind that there are many types of yarn available and each one has its own unique properties. For example, some yarns are more elastic than others and this could make a difference when crocheting intricate patterns. If you are unsure which type of yarn to use for your project, it is best to do some research online or ask an experienced crafter for advice.
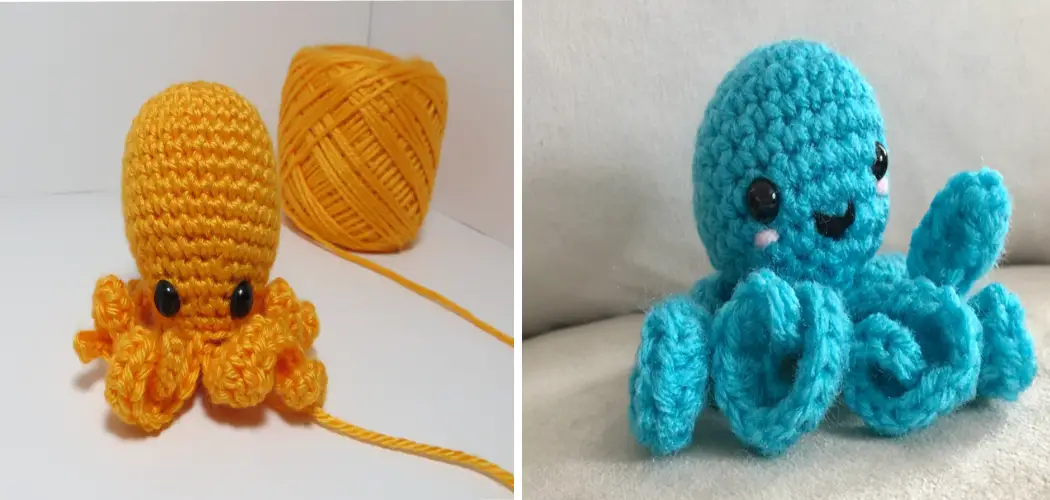
When selecting the right yarn for your mini octopus, remember that the colors you choose will have an impact on the final look of your project. If you are looking for a brighter-colored octopus, opt for bright, vibrant shades that contrast with each other.
If you want a more muted or classic look, then go for subtle pastels and earth tones. For more complex color combinations, consider using variegated yarns which feature multiple colors in one skein.
Finally, it is important to consider the overall size of your octopus when selecting yarn and hook sizes. If you are making a smaller octopus, then opt for thinner yarns such as sport or lace weight paired with a 3mm – 4mm crochet hook. For larger projects like amigurumi octopuses, consider using bulky yarns and larger crochet hooks (5mm – 6mm).
10 Steps How to Crochet a Mini Octopus
Step 1: Gather Your Supplies
Before you begin, ensure you have all the necessary materials: a selection of soft yarn in your preferred colors, a crochet hook that complements the yarn’s weight, stuffing material, safety eyes or embroidery thread, a yarn needle, and scissors. Having everything at hand will make the process smoother.

Step 2: Choose Your Colors
Decide on the color palette for your mini octopus. You can opt for realistic shades or go for whimsical, imaginative colors. This is where your creativity shines—select colors that resonate with you and the character you want your octopus to have.
Step 3: Begin with the Head
Start by crocheting a magic ring with your chosen yarn color. Crochet six single crochet (sc) stitches into the ring. Then, make two single crochet stitches in each stitch around to increase the stitch count to twelve. Continue to crochet in a spiral, adding more rounds until the head is the desired size. Stuff the head with stuffing material to give it a plump appearance.
Step 4: Form the Tentacles
For the tentacles, switch to another color if desired. Crochet six chains for each tentacle, and then work back along the chains, creating single crochet stitches. You can vary the length of the tentacles to add character to your mini octopus.

Step 5: Attach the Tentacles
Attach the tentacles evenly around the base of the head. Use your yarn needle to sew them securely in place, making sure they are evenly spaced.
Step 6: Add Safety Eyes or Embroider Eyes
If using safety eyes, insert them between rounds on the head, positioning them where you want the eyes to be. If you prefer embroidered eyes, use embroidery thread and a yarn needle to stitch the eyes onto the head.
Step 7: Shape the Head
To give your octopus a distinct head shape, use your fingers to gently pinch and shape the sides. This will create a slightly oval shape that adds character to your mini octopus.
Step 8: Crochet the Body
Continuing from the head, crochet the body in a spiral by making single crochet stitches in each stitch around. Continue crocheting until the body is the desired length, adding more stuffing as you go to maintain a consistent plumpness.
Step 9: Close and Finish the Body
Once the body is the desired length, close the opening by making decrease stitches evenly spaced around. Fasten off the yarn and use a yarn needle to weave in the loose ends.
Step 10: Final Touches and Finishing
Check your mini octopus for any loose yarn ends or areas that need reinforcement. Adjust the tentacles and head shape if necessary. Your mini octopus is now complete and ready to bring joy to your crochet collection or become a heartfelt gift for someone special.

Some Common Mistakes When Crocheting a Mini Octopus
Crocheting a mini octopus is fun and easy, but there are some mistakes that you should avoid. Here’s what to keep in mind:
- Taking too long of breaks between stitches. If too much time passes between your stitches, the pattern may shift or become uneven. To ensure consistent results, make sure to complete each stitch within a few seconds of the last.
- Using too long a hook. A longer hook can cause your stitches to become too tight and difficult to work with, so opt for one that’s no more than 4 inches in length.
- Not using enough yarn. To crochet a mini octopus, you need about 50 yards of yarn—one that’s soft and flexible.
- Not keeping track of your stitches. Make sure you count each stitch when crocheting a mini octopus, as this helps ensure you have the right number for the pattern to look its best.
- Crocheting too tight or too loose. When crocheting a mini octopus, it’s important to follow the pattern precisely. If you crochet too tight, the stitches will be too small and difficult to work with; and if you crochet too loose, the octopus won’t have enough structure.
Conclusion
In conclusion, crocheting a mini octopus is the perfect project for crafters of all levels. It can be finished off in so many different ways depending on your own unique style and preferences.
Whether you use the standard colors or mix up your own shades, this fun and creative craft is sure to result in a unique and adorable octopus. With the help of this guide, you’re sure to have everything you need to crochet your very own mini octopus and start inspiring others! So what are you waiting for? Get creative and give it a try – How to Crochet a Mini Octopus!