
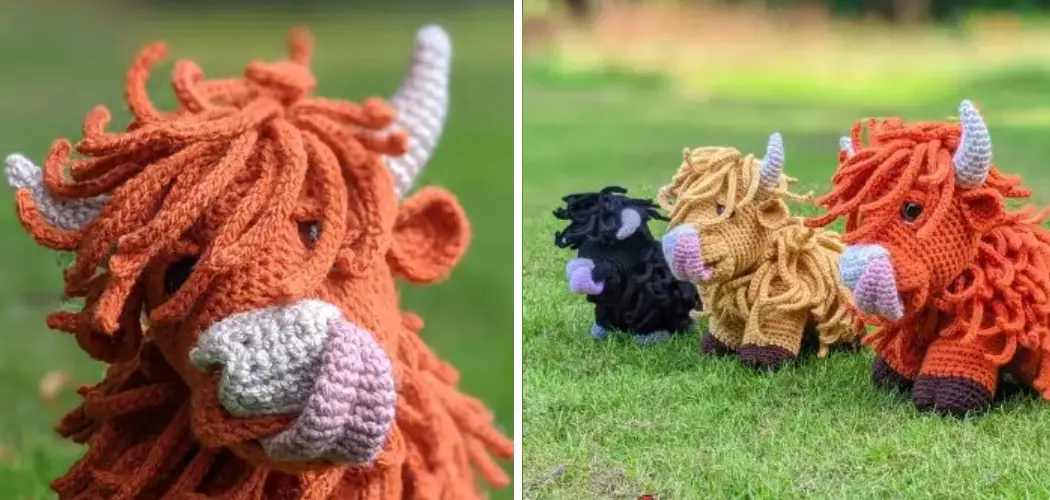
If you have ever marveled at the majestic beauty of Highland cows with their long, shaggy coats and impressive horns, you can now bring their charm into your own home with a crochet hook and some yarn. Crocheting a Highland cow can be a delightful and rewarding project that allows you to create a whimsical and cuddly replica of this iconic breed.
Whether you are an experienced crocheter or a beginner eager to try your hand at this craft, this article will guide you through the steps of how to crochet a highland cow.

From selecting the right materials and choosing the perfect color palette to mastering the essential crochet stitches and shaping techniques, you’ll soon be on your way to crafting a charming and lifelike Highland cow that will undoubtedly bring joy and warmth to any space it occupies. So grab your crochet hook and let’s begin this delightful creative journey!
Why Highland Cows Are a Popular Crochet Project
Highland cows are instantly recognizable for their fluffy, long coats and lovable faces. This makes them a popular crochet project among beginners and experienced crocheters alike! Crocheting a Highland cow can be an incredibly satisfying experience; the adorable result is sure to bring a smile to anyone’s face. Plus, you’ll have a unique piece of art that nobody else has!
Crocheting a Highland cow also allows you to practice your colorwork skills. You can use different colors of yarn to create the distinct coat patterns that make Highland cows so recognizable. Additionally, it’s an excellent way to hone your amigurumi-making skills — the stuffed animal technique used in this project requires precise stitches and careful attention to detail.
Whether you’re just starting out or you’ve been crocheting for years, a Highland cow project can bring hours of enjoyment. With patience and dedication, you can create an adorable toy that will be cherished for years to come! Get ready to crochet your own fluffy Highland cow!
Materials Needed for Crocheting a Highland Cow
Crocheting a Highland Cow is a fun and creative way to show off your crocheting skills. To get started, you’ll need some basic materials:
- Yarn in the colors of your choice (for the head, body, legs, and tail)
- Crochet hook size H/8 (5mm)
- Polyfill stuffing
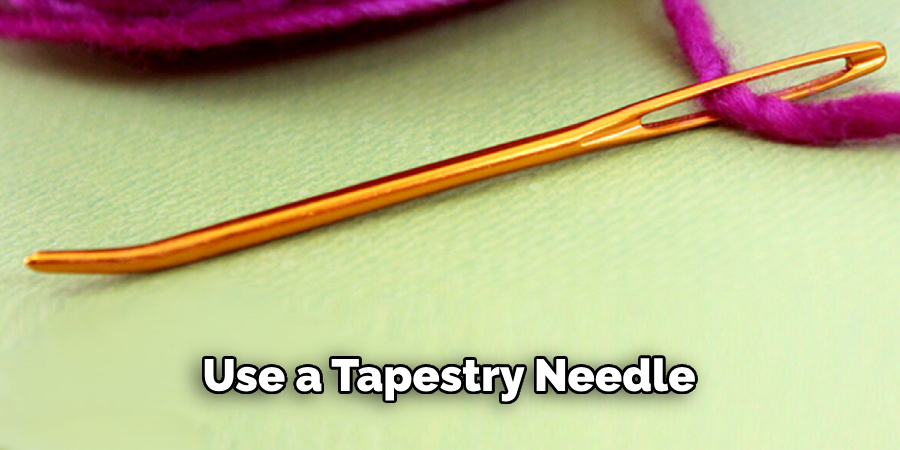
- Tapestry needle for stitching
- Stitch markers or safety pins
- Safety eyes or beads for eyes
- Medium weight cardboard

Once you have all these materials ready, you can start crocheting your very own Highland Cow! Be sure to read through the pattern carefully before starting so that you don’t miss any important steps. And if you have any questions, don’t hesitate to ask for help from a crocheting expert.
Basic Crocheting Terminology
When learning how to crochet a Highland Cow, it is essential to understand the most common crocheting terminology. Knowing these terms will help you become a proficient crocheter.
The crochet hook is the tool used to create stitches in crocheting. It can be made of metal, plastic, wood, or bamboo and comes in various sizes that correspond to the size of yarn you are using. The size number is usually written on the package or label.
Yarn is the material used for crocheting and comes in several varieties such as cotton or wool. Before beginning a project, it is important to read the label for any special instructions regarding care or gauge since each type of yarn has different properties.
A stitch marker keeps track of where you have been working and helps prevent mistakes while counting rows and columns; they can also be used to join two pieces of crocheted fabric.
10 Methods How to Crochet a Highland Cow
Method 1: Gathering the Materials
To begin your Highland cow crochet project, it’s essential to gather all the necessary materials. You will need a crochet hook, preferably in a size suitable for the yarn you have chosen. Additionally, select a soft and bulky yarn in a color that resembles a Highland cow’s shaggy coat.
Gather a pair of scissors for trimming yarn ends, a tapestry needle for weaving in loose ends, and stitch markers to help keep track of your stitches. It’s also helpful to have a measuring tape or ruler to ensure accurate sizing. With these materials on hand, you’re ready to embark on your Highland cow crochet adventure.

Method 2: Choosing the Pattern
Next, you’ll need to choose a crochet pattern for your Highland cow. Look for a pattern that provides clear instructions and includes photos or illustrations to guide you through the process.
You can find patterns in crochet books, online platforms, or even by joining crochet communities where fellow crafters share their patterns. Take your time to explore various options and select a pattern that matches your skill level and desired level of detail.
Method 3: Learning the Basic Stitches
Before diving into the Highland cow pattern, familiarize yourself with the basic crochet stitches. These include the chain stitch (ch), single crochet (sc), double crochet (dc), and slip stitch (sl st). Practice creating even and consistent stitches until you feel comfortable with the technique.
You can find numerous online tutorials and videos that demonstrate these stitches, allowing you to master them at your own pace.
Method 4: Starting with the Head
Begin your Highland cow crochet project by creating the head. The head typically consists of crocheted pieces that are later stitched together. Follow the pattern instructions to create the head shape, paying attention to details such as the placement of the eyes, ears, and snout. Use stitch markers to help you keep track of your rounds or rows, ensuring accuracy and symmetry.
Method 5: Crafting the Body and Legs
Once the head is complete, move on to crocheting the body and legs of your Highland cow. This may involve creating separate pieces for the body and legs, which will be assembled later.

Pay attention to the pattern’s instructions regarding shaping and increases or decreases to achieve the desired proportions. It’s crucial to maintain consistency in your tension and stitch size throughout the body and legs for a uniform appearance.
Method 6: Adding the Shaggy Coat
Highland cows are known for their shaggy coats, so it’s essential to capture that characteristic in your crochet project. Depending on the pattern, you may need to create individual strands or loops of yarn to attach to the body.
This can be achieved through techniques such as loop stitch, fringe, or attaching strands of yarn. Take your time to ensure the coat looks fluffy and realistic, and experiment with different yarn textures and lengths to achieve the desired effect.
Method 7: Incorporating Facial Features
To give your Highland cow its unique facial features, follow the pattern’s instructions for creating eyes, nostrils, and horns. This may involve crocheting small pieces separately and then attaching them to the head.
Pay attention to the positioning and shaping of these features to capture the Highland cow’s distinctive look. Use safety eyes or crochet your own eyes with yarn, depending on your preference and the pattern’s recommendations.
Method 8: Assembling the Pieces
Once all the individual parts are crocheted, it’s time to assemble your Highland cow. Follow the pattern’s instructions for attaching the head, legs, and any additional components to the body. Use a tapestry needle and matching yarn to stitch the pieces together securely. Take care to align the parts properly and ensure that the final structure is stable and able to stand or sit as desired.
Method 9: Finishing Touches
Now that your Highland cow is assembled, it’s time to add the finishing touches. Use the tapestry needle to weave in any loose ends and secure them neatly inside the crochet work.
Trim excess yarn carefully, ensuring that no loose ends or frayed strands are visible. You can also use embroidery techniques to add additional details, such as mouth, eyelashes, or decorative elements like a collar or a bow.
Method 10: Enjoying Your Crocheted Highland Cow
Congratulations! You have successfully crocheted your own Highland cow. Display your creation with pride, whether it becomes a charming addition to your home decor or a delightful gift for a fellow Highland cow enthusiast.
Share your accomplishment with others by taking photos and posting them on social media or joining online crochet communities. Remember that each Highland cow you create is unique, reflecting your creativity and skill. Enjoy the process of crocheting and take pride in your ability to bring the charm of these magnificent creatures to life through the art of crochet.
Conclusion
To conclude, crocheting a highland cow is an interesting and versatile project that can be easily completed by any level of crocheter. The design possibilities are practically endless, allowing for a customizable and unique finished product. As long as the basic steps are followed, the potential of creating your own version of this cuddly livestock is in reach.
Feel free to explore different colors, textures, and sizes when making this cow and use the tips discussed in this post to ensure successful results every time! So what are you waiting for? Grab some yarn and hooks and get started on mastering how to crochet a Highland Cow!