
Crocheting, a craft that weaves warmth and creativity into each stitch, offers a delightful way to express affection through handmade creations. Crocheting a heart plush, a symbol of love and comfort, transforms yarn into a huggable token of emotion. This project not only guides crafters through the art of crocheting but also encourages them to craft sentimental gifts from the heart.

The rhythmic dance of hook and yarn brings to life a soft and cuddly heart, ideal for gifting or personal keepsakes. In this article, we embark on a journey on how to crochet a heart plush, providing step-by-step instructions that cater to both beginners and experienced crocheters.
From selecting the perfect yarn to mastering the stitches required, you’ll be captivated by the process of creating a heartwarming plush that embodies the essence of love and creativity.
The Sentimental Value of Crocheting a Heart Plush as a Symbol of Love
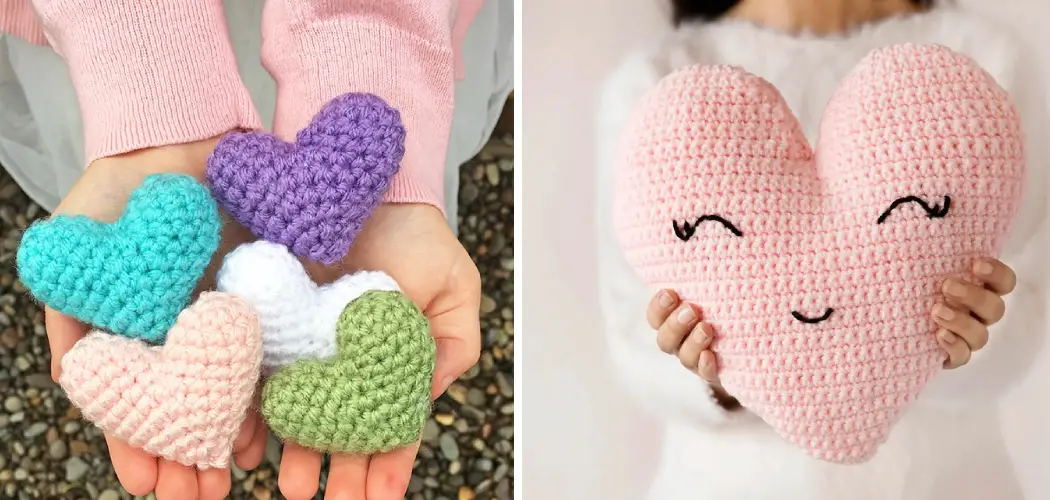
Creating homemade crafts is a wonderful way to express your love for someone. Crocheting is an especially great activity for crafting heartfelt gifts, and one of the most popular items you can create are heart-shaped plushies. These adorable little hearts have a lot of sentimental value, since they’re made with so much care and attention.
Besides being cuddly and cute, you can also personalize them with embroidery or a message. In this guide, we’ll show you how to crochet a heart-shaped plush that would make an excellent gift for someone special in your life!
First, gather the supplies needed for this project: yarn in the colors of your choice, a tapestry needle, crochet hook, stuffing, scissors, and a stitch marker. Now you’re ready to start crocheting!

Begin by chaining 10 stitches with the yarn of your choice. Then single crochet into the second chain from the hook and each chain across, making 9 single crochet stitches. Chain one and turn. For Row 2, single crochet in each stitch across; at the end of the row, chain one and turn. Repeat this process until you have a total of 24 rows.
Now it’s time to shape your heart! Single crochet in the first stitch, then decrease two stitches (by single crocheting two together) across the row. Chain one and turn; continue decreasing two stitches across each row until you get to the point of your heart. Cut yarn, leaving a long tail for sewing.
The Blend of Craftsmanship and Emotional Connection in This Project
Crocheting a heart plush is the perfect way to show your loved ones just how much you care. With this project, there’s no need for expensive gifts or complicated projects—the act of crocheting a heart plush from scratch speaks volumes and conveys true sentiment and emotion. The beauty of hand-crafted items lies in their imperfection; every heart plush is unique and made with love, making it a truly special gift for any occasion.
This project also allows you to combine the craftsmanship of crocheting with an emotional connection. The combination of these two elements makes this a truly unique project that can be enjoyed by both experienced crafters and those just starting out. With this tutorial, you’ll be able to explore the magical blend of craftsmanship and an emotional connection. You’ll learn how to create a simple yet beautiful heart plush that’s sure to make someone feel special!
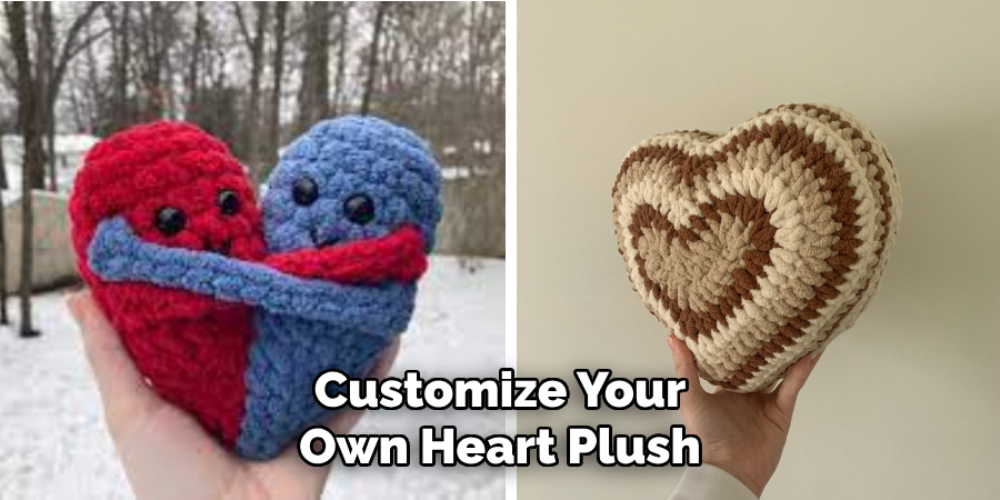
You can customize your own heart plush by varying the material and color used for the project. You could use soft colors, bright colors, or a combination of both. The possibilities are endless! Just remember to select a yarn that’s suitable for crocheting and doesn’t fray easily.
Once you’ve chosen the materials and colors, it’s time to begin! Follow our step-by-step tutorial below and soon you will have your very own unique heart plush. You can even get creative and add some extra embellishments such as buttons or beads to make it even more special. So, get creative and start crocheting the perfect heart plush today!
10 Steps How to Crochet a Heart Plush
Step 1: Gather Your Materials and Inspiration
To begin crocheting a heart plush, gather all the necessary materials and seek inspiration for your project. Here’s what you’ll need:
Crochet hooks: Choose an appropriate hook size based on the yarn you’re using. A smaller hook will create tighter stitches.
Yarn: Select soft and plush yarn in the color of your choice for the heart. You can also choose a contrasting color for any embellishments or details.
Fiberfill stuffing: This will give your heart plush its shape and volume.
Yarn needle and scissors: These are essential for weaving in ends and sewing parts together.
Embroidery thread or safety eyes (optional): For adding facial features if desired.
Embellishments (optional): Buttons, beads, ribbons, or other decorations to personalize your heart plush.
Gather inspiration from crochet patterns, images of heart plushies, and your own creative ideas.
Step 2: Choose a Pattern or Design
Select a crochet pattern that matches your skill level and desired heart plush size. Look for patterns that provide clear instructions, stitch explanations, and any additional details such as embellishments.

Step 3: Start with the Heart Shape
Begin crocheting your heart plush by creating the heart shape itself. You’ll typically start with a magic ring and work double crochet stitches to form the curved top of the heart. Then, work decreases to shape the bottom point of the heart.
Step 4: Add Fiberfill Stuffing
As you crochet the heart, stuff it with fiberfill to give it a plush and huggable texture. Make sure to stuff it evenly, filling out the curves and point of the heart.
Step 5: Creating a Smooth Edge
Crochet an additional round or two of single crochet stitches around the heart’s edge to create a smooth and neat finish. This also helps secure the stuffing and ensures that the heart keeps its shape.
Step 6: Embellishments and Details
Depending on your chosen design, you can add embellishments to your heart plush. This might include attaching buttons or beads, embroidering details, or using surface crochet to create patterns on the surface of the heart.
Step 7: Adding Facial Features
If you’d like your heart plush to have a face, you can attach safety eyes or embroider eyes using embroidery thread. You can also embroider a small mouth or other features to give your plush personality.
Step 8: Finishing Touches
Weave in any loose yarn ends using a yarn needle. Take time to ensure that all your stitches are secure and that the embellishments and facial features are well-attached
Step 9: Attach a Hanging Loop (Optional)
If you’d like to hang your heart plush as a decoration, you can crochet a small loop at the top of the heart. This loop can be used to hang the plush from a hook or display it as a ornament.

Step 10: Display and Enjoy Your Heart Plush
With your crocheted heart plush complete, you have a delightful and meaningful creation that can be displayed in your home or gifted to a loved one. Your heart plush represents the care and creativity you’ve put into your crochet work, and it carries with it the symbol of love and affection.
Some Common Mistakes When Crocheting a Heart Plush
Crocheting a heart plush can be very enjoyable and rewarding. However, like any craft project, it is important to know what mistakes to avoid in order to make sure that your finished product looks great! Here are some of the most common mistakes people make when crocheting a heart plush:
- Not Using the Right Yarn or Hook Size: It is important to use the correct size yarn and hook for your project. If these two items are not correctly matched up, it will be difficult to make clean stitches and have the plush turn out correctly.
- Forgetting to Count Stitches: When crocheting a heart plush, it is essential that you count each stitch as you go! Without counting, it will be difficult to keep track of your progress and make sure that you are not missing any stitches.
- Not Finishing Off: When crocheting a heart plush make sure to finish off the final stitch and secure your yarn. This ensures that the plush does not unravel and stays together until you are ready to put it in its new home!
- Skipping Steps: Make sure to follow each step of the pattern carefully. Even if something seems simple, skipping steps can lead to gaps in the stitches or an overall wonky-looking finished product.
Conclusion
Crafting heart plush is a unique and fun hobby to partake in. It’s not only enjoyable, but it can also teach you valuable skills like hand-eye coordination and patience. By following the directions outlined in this post, anyone can create their own heart shaped plush. And when you’re done, just remember there’s no limit to what you can craft with a little bit of yarn, some stuffing, and patience!
With the right tools and know-how, you too can make something special out of a simple piece of fabric. We hope that this blog post has shown you how to crochet a heart plush; go ahead and give it a try! You never know you might find your new favorite hobby in crafting these beautiful plushies.