

Adding pockets to a crochet cardigan can be a fun and creative way to give your project some extra personality. It can help you add more convenience for carrying small items and also looks great. It’s especially useful if you want to ensure all the weight from any items carried in the pockets is evenly distributed.

Adding pockets to a crochet cardigan can be a great way to make an item of clothing more functional and stylish. Pockets are often used as an extra storage space, but they can also add a subtle accent to the overall design of the garment. You can easily make two pockets that will complete your project with just some simple stitches. In this blog post, You will learn in detail how to add pockets to crochet cardigan.
Step-by-step Instructions for How to Add Pockets to Crochet Cardigan
Step 1: Inspect the Cardigan
Inspect the cardigan you are going to be adding pockets too. Look for any stitches that may need to be adjusted before beginning the pocket work. Measure the length and width of where your pocket should go, and then use this dimension to determine how big your pocket needs to be.
Step 2: Choose the Stitch Type
Choose the type of stitch you are going to use for your pocket. Single crochet is the most common type of stitch used for crochet pockets. However, if you want a more decorative pocket, then double-crochet and triple-crochet stitches can also be used.
Step 3: Calculate How Many Stitches You Will Need
Calculate how many stitches you will need to complete your pocket by multiplying the width of the area where it will be placed by the number of stitches per inch in your chosen stitch. This number should give you a good indication of how many stitches you need to make.
Step 4: Crochet the Necessary Stitches
Once you have calculated the number of stitches, begin crocheting the pocket. Starting from one end and working your way towards the other, crochet each stitch in turn until you reach your desired length. Once you have crocheted all the necessary stitches, tie off your work with a slip stitch.

Step 5: Sew the Pocket to the Cardigan
Once you have finished crocheting the pocket, use a yarn needle and thread to sew it onto the cardigan. Start by inserting the needle into one of the edges of the pocket and then pull it through one of the corresponding stitches on the cardigan. Continue working your way around the pocket in this manner until you have fully sewn it onto the cardigan.
Finally, weave in any loose ends, and your pocket is complete! You can now enjoy your new pocketed crochet cardigan.
Safety Tips for How to Add Pockets to Crochet Cardigan
- Ensure you have the correct size hook for your yarn, as using the wrong hook can cause problems in achieving an even result.
- Before continuing with the project, check that your calculated row counts and measurements are accurate.
- Take care when slipping stitches to prevent accidental dropping of loops or uneven tension in your fabric.
- When joining two pieces, check that the edges line up evenly before continuing with your project.
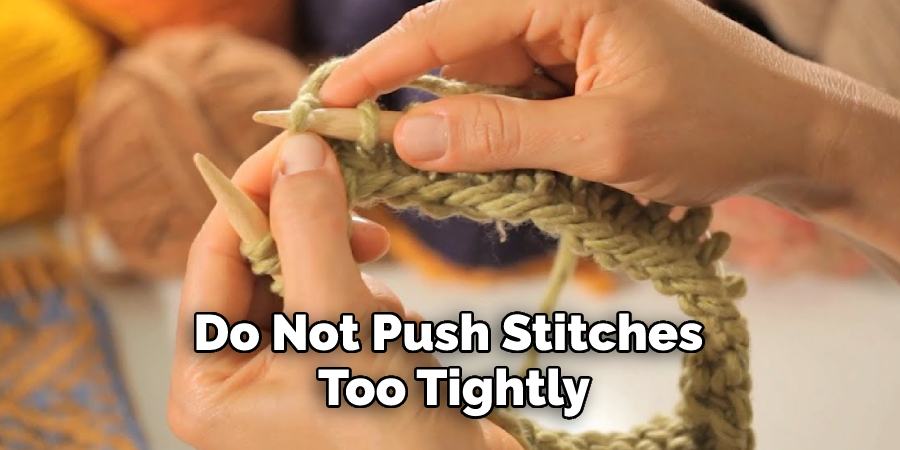
- Do not push stitches too tightly, as this can cause fabric puckering.
- Make sure you are using an even tension when working around pockets to ensure they stay securely in place without any bulging outwards or gaps between stitches.
- When making increases or decreases to shape your pockets, make sure you do so correctly and evenly to avoid any distortions in the pocket size or shape.
- If at any stage you feel uncertain about how to proceed with adding pockets to your crochet cardigan project, consult a pattern guide or an experienced crocheter for advice and guidance.
Following these safety tips can help ensure the success of your Adding Pockets to Crochet Cardigan project.
How Do You Add Buttons to an Open Cardigan Crochet?
- Choose your buttons – they should be large enough to fit through the holes created by crocheting stitches but small enough that they won’t overwhelm the look of the cardigan.
- Place one button on each side of the front of the cardigan where you want the pockets to go and mark their position with a pin or stitch markers.
- Attach the buttons to the cardigan using your crochet hook and thread. To do this, thread your needle with thick yarn and insert it through the wrong side of the fabric at one of the marked positions, then slip a loop of yarn through one buttonhole from front to back.
- Pull the thread so it is tight and secure, and knot it securely at the back of the cardigan fabric.
- Insert your crochet hook into a stitch near where you’ve just secured the first button and make a chain stitch.
- Continue to make chain stitches until you have created a chain that is long enough to wrap around the button and the fabric of the cardigan.
- Secure the chain with a slip stitch in the first chain stitch you made.

By following these steps, you can easily add pockets to open the cardigan crochet. This will add a unique and stylish look to your handmade pieces. You can turn an ordinary cardigan into something truly special with just a few simple stitches.
How Do You Prevent Your Pockets From Sagging Once They’re Attached to the Cardigan?
- Before attaching your pockets to the cardigan, ensure you’ve adequately reinforced them with stitches so they won’t stretch out. This will help prevent them from drooping down over time.
- Additionally, you can use a piece of interfacing or heavy-weight fusible stabilizer between your pocket and the cardigan to provide extra support.
- After attaching your pockets, you can use buttonhole threads to sew around them and further strengthen their attachment points. This will help keep them firmly in place against the weight of whatever you put inside them.
- Once your pockets are securely attached, it’s best to only load them with lightweight items such as coins, keys, and smaller items. Heavier objects may cause the pockets to sag over time.
By reinforcing your pockets before attaching them and adding additional support afterwards, you can help ensure that your pockets remain securely attached to your crochet cardigan and won’t droop or sag too much.
How Long Does It Take to Add a Pocket to a Crochet Cardigan?
The time it takes to add a pocket to a crochet cardigan can vary depending on the size and complexity of the pattern. You may be able to add a basic pocket in an hour or two, but for more intricate designs, you might need several hours or even days. To make sure your pockets look polished and professional, take your time and don’t rush the process.
For simple pockets, you may only need to crochet a few rows of stitches and attach them to the cardigan. If you are familiar with crochet stitch patterns, this could be done in as little as an hour or two. However, it may take longer to complete for more complex designs, such as zippered pockets or patch pockets.

How Can You Hide the Seams of Your Pocket After It’s Attached to the Cardigan?
- Stitch the sides of the pockets to the cardigan and pull tight to secure.
- Wrap the yarn around the pocket area that meets the cardigan, pulling tight as you go.
- When finished wrapping, tie a knot at the end and weave in the remaining tail of yarn before trimming off any excess.
- To make sure that your seams are hidden, flip the cardigan over and take a look. If you can still see any visible seams, use small stitches to sew them down.
- Finally, add buttons or other closures to the pockets if desired. Your new crochet cardigan is now ready to wear! Enjoy wearing your new garment with stylish pockets.
By following these simple steps, you can easily add pockets to your crochet cardigan. Not only do pockets make the cardigan look more stylish, but they also provide extra space to store items.
How Do You Make a Cardigan Look Professional?
Adding pockets to a crochet cardigan can be a great way to make the garment look more professional and stylish. It also adds a practical element as you can use the pockets to store small items such as keys or phones. Here’s how you do it:
- First, pick out some suitable yarn for the pocket that will match the color and texture of the cardigan. You can use a matching yarn from your cardigan’s pattern or find something similar.
- Next, crochet two pocket liners. How many stitches you need depends on how deep and wide you want your pockets to be. Be sure to make them a little bit bigger than the desired size, as they will shrink when you wash them.
- Once you’re done, sew each pocket liner onto the cardigan using a matching thread. Position them slightly lower than where you would want your pockets to be so that they are hidden when worn.
- Now for the interesting part; crocheting the pockets. How many stitches and rows you will need to make your pocket depends on the desired size. For example, if you want a 6-inch deep pocket, then chain 8 + 1 stitches.
- When making the pocket, be sure to leave enough room between your stitches. This will help the pocket to expand and contract depending on how much you use it.

Finally, sew the two pieces of crocheted pockets together and attach them to the cardigan by sewing along the edges. And that’s it! You now have a professional-looking crochet cardigan with pockets.
Conclusion
In conclusion, adding pockets to a crochet cardigan effectively adds function, convenience, and style. You can easily create beautiful pocket details for crocheted garments with just a few simple steps. Whether you’re looking to give your cardigans an extra special touch or just want to make them more accessible, adding pockets can be a great way to do it.
With a little practice and patience, adding pockets to crochet cardigans can be easy and enjoyable. I hope reading this post has helped you learn how to add pockets to crochet cardigan. Make sure the safety precautions are carried out in the order listed.
You Can Check It Out to Embroider Leaves