
Are you attempting to knit a garter stitch pattern but are confused about how to count the rows? Don’t worry. It’s easier than you think!

The garter stitch is one of the most basic and versatile knitting stitches out there. It’s a simple combination of knit stitches that creates a fabric with alternating ridges of exposed loops, giving it a distinctive texture.
Garter stitch can be used for everything from scarves and wraps to sweaters and blankets, making it an essential part of any knitter’s repertoire. One important factor in executing garter stitch correctly involves understanding how to count rows – fortunately, this isn’t difficult!
In this blog post, we’ll look at the basics behind counting rows in garter stitch and some helpful tips on how to count rows in garter stitch. So grab your yarn and needles; let’s dig into counting those gorgeous garter-stitch patterns!
What Will You Need?
To count rows in garter stitch, you’ll need a few basic supplies:
- Yarn
- Knitting needles
- A row counter (optional but helpful)
- Scissors
- Tapestry needle
Once these items are in place, you’re ready to begin counting your rows.
10 Easy Steps on How to Count Rows in Garter Stitch
Step 1. Use Your Knitting Needles
Begin by inserting your right needle into the top of the first stitch on your left needle. Be careful not to miss the stitch. If you do, you’ll end up with an extra stitch!
Step 2. Bring Your Yarn Across
Wrap the yarn around your right needle and pull it through to create a loop. This is how you make a knit stitch. You can then move the stitch from your left to your right.
Step 3. Continue Across the Row
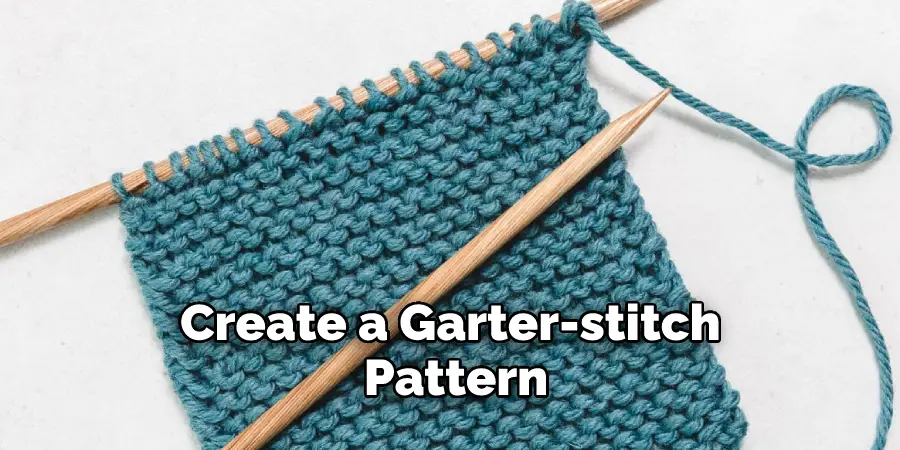
Continue making knit stitches across the row until all the stitches on your left needle have been transferred to your right needle. This is how you create a garter-stitch pattern. If you’re using a row counter, be sure to click it once you complete the row.
Step 4. Count Your Rows
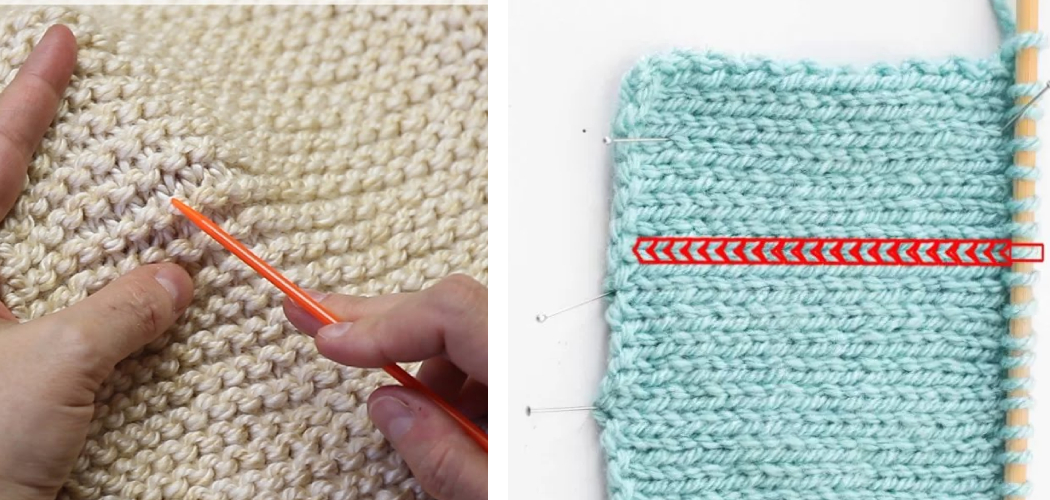
At this point, you’ll want to count how many rows you’ve done so far; this will help you track how much progress you’re making on your project. To do this, count how many ridges (also known as “bumps”) are in each row. Each bump indicates one row has been completed.
Step 5. Start the Next Row
When you’re ready to move on to the next row, insert your right needle into the top of the first stitch on your left needle. Then wrap the yarn around your right needle and pull it through to create a loop. Continue making knit stitches across the row until all of the stitches have been transferred over to your right needle.
Once again, if you’re using a row counter, be sure to click it once you complete each row. Repeat steps four and five until you’ve reached your project’s desired number of rows. Be sure to count how many bumps there are in each row, as this will help you track how much progress you’re making.
Step 6. Try a Different Gauge
If you want to change the gauge of your knitting project, simply use a different-size needle. A larger needle will result in fewer rows per inch (also known as “gauge”), while a smaller needle will create more rows per inch. It will take some trial and error to get the perfect gauge for your project, but it’s worth it in the end.
Step 7. Check Your Results
Once you’ve reached your project’s desired number of rows, it’s time to check your results. Lay out your work and count how many bumps there are in each row. This will give you an indication of how effective the garter stitch pattern is.
Step 8. Bind Off
When you’re finished counting how many rows have been completed, bind off by inserting your left needle into the first stitch on your right needle. Wrap the yarn around the left needle, then pull it through the stitch to release it from the right needle. Continue this process until all of your stitches have been removed from your needles.
Step 9. Weave in Any Loose Ends
Now that you’ve finished counting how many rows have been completed use a tapestry needle to weave in any loose ends. This will ensure that everything is securely held together and looking its best! Don’t forget to tie off the ends securely.

Step 10. Enjoy Your Project
Congratulations! You’ve successfully learned how to count rows in garter stitch and can now confidently enjoy your project. Have fun knitting, and happy counting! Remember to keep track of how many rows you’ve completed, as this will help you follow your pattern correctly. Enjoy!
Following these steps, you can count how many rows have been completed in the garter stitch. This knowledge will help you confidently complete any knitting project and ensure your finished product looks great. Good luck!
You Can Check It Out to Crochet a Mini Whale
5 Additional Tips and Tricks
- If you’re knitting a large project, such as a blanket or scarf with a garter stitch, it can be helpful to mark how many rows you have completed. This will help you track how far along you are and how many more rows you need to complete.
- Don’t forget to count the turning row, which is sometimes forgotten when counting rows in garter stitch – this row begins each new side and takes one extra stitch.
- To make it easier to keep track of how many rows you’ve done, use a counter or tally system: either write down how many times you’ve knit a certain number of stitches (e.g., two for every row) or count on your fingers how many rows you’ve completed.
- If you have a pattern, check how many rows are required in each section and keep track of how many you’ve completed by marking it off on the pattern or keeping a tally with a pen/pencil.
- Don’t be discouraged if your count isn’t perfect – practice makes perfect! With enough practice, you’ll be an expert at counting how many rows of garter stitch you’ve done in no time!
With these helpful tips and tricks, you can confidently count how many rows have been completed in your garter stitch project. Good luck and happy knitting!
5 Things You Should Avoid

- Don’t Try to Count the Loops on Your Needle: although it may seem like a good idea, it is not always reliable. There are often extra or missing stitches that can confuse you and throw off your counting.
- Don’t Count Individual Snit Stitches: because garter stitch involves knitting every row, there will be two identical stitches side-by-side in each row. Counting these individually will double your results, so make sure to take this into consideration when counting rows.
- Avoid Using Markers if Possible: while they might appear helpful at first, markers can easily get lost or moved around without you noticing, making it difficult to track how many rows you have knitted accurately.
- Don’t Forget to Count Your Cast on Row: the first row you knit is also counted as a row, so make sure to include it when counting how many rows you have completed.
- Avoid Counting the Purl Bumps: while it may seem like a good idea, this can be inaccurate and lead to an incorrect number of rows being counted. Instead, focus on counting how many full rows you have completed.
By following these tips and taking care when counting how many rows you’ve knitted in garter stitch, you can ensure that your project turns out just how you anticipated! Good luck!
Is Garter Stitch Knit Row Purl One Row?
No, the garter stitch is knit every row. If you want to create a pattern that alternates between knitting and purling, this is known as a stocking stitch (or stockinette stitch). Garter stitch is simply the process of knitting each and every row. This creates beautiful ridges along your project and adds a unique texture. So while garter stitch isn’t necessarily knitted one row or purl one row, it’s an easy technique to learn. Happy counting!
Additionally, it’s important to note that garter stitch is typically used for projects with small amounts of fabric, such as scarves or washcloths. A stocking stitch may be more appropriate if you’re looking to do a larger project, like a blanket. Happy knitting!

Conclusion
The garter stitch is one of the most basic knitting stitches and one of the most textured and springy. It’s perfect for projects like blankets, hats, and cowls that need a little extra drape.
And because it’s so easy to work up, garter stitch is often used in beginner patterns. If you’re new to knitting or just want to brush up on your skills, this tutorial will show you how to count the rows in garter stitch so you can keep track of your progress as you knit.
So there you have how to count rows in garter stitch to accurately count the number of rows you’ve knit in garter stitch without having to rip back or start over. Remember, no matter which method you choose, once you get in the habit of counting your rows as you go, it will become second nature and save you a lot of headaches (and time!) down the road.
You Can Check It Out to Embroider Leaves