
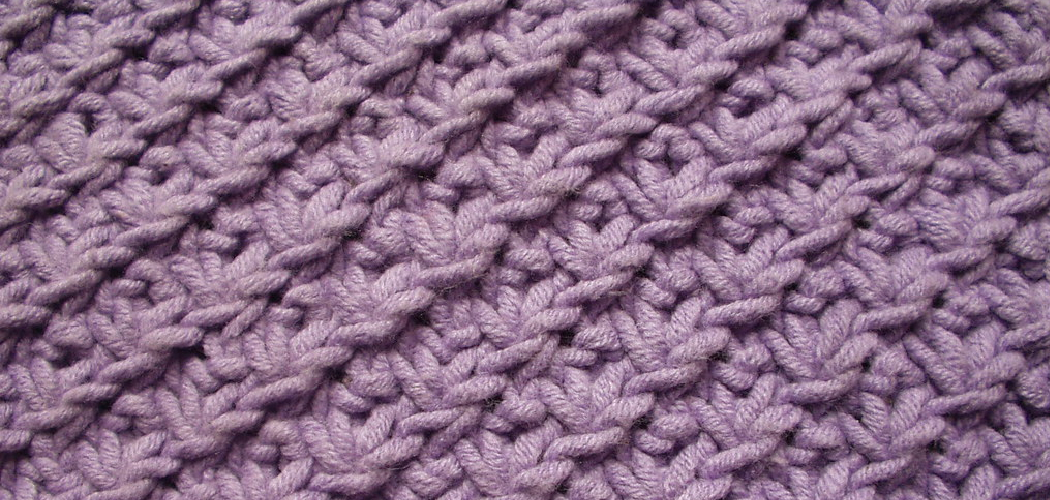
Are you looking for a beautiful and innovative way to embellish your crafts with an eye-catching design? Look no further than the primrose stitch.

This unique crochet technique produces richly detailed, vivid flowers that will make any project pop! With just some basic supplies and a bit of practice, you’ll be able to create gorgeous primrose in whatever colors and size combinations your heart desires.
Not only can it be used to create stunning stand-alone pieces, but this pattern also looks lovelily layered over other patterns or simply when used to decorate the edging of a project.
In this blog post, we will show you how to crochet primrose stitch so you can see firsthand how easy it is to create beautiful designs with your crochet hook!
What Will You Need?
Before you start, it is important to have the basic supplies required for this stitch. You’ll need the following:
- A crochet hook
- Yarn (in your chosen color/s)
- Scissors
Once you have gathered your supplies, you’re ready to learn how to crochet the primrose stitch!
10 Easy Steps on How to Crochet Primrose Stitch
Step 1: Begin by Making a Foundation Chain
The number of chains for this pattern will depend on how wide you want the final piece to be. For reference, eight stitches will create a 4” square.
To make a foundation chain, simply loop your yarn over your crochet hook and then pull it through each existing loop until you have the desired number of loops.
Step 2: Create Primrose Stitches
Now that you have your foundation chain in place, it’s time to begin creating primrose stitches. To do this, start by pulling up a loop from the fourth chain from the end of your foundation chain (this will be your first primrose stitch).

Next, insert the hook through the next chain stitch and pull up a loop. Now, you will have three loops on your hook.
Step 3: Yarn Over and Pull Through All Loops
After creating each primrose stitch, yarn over and pull through all three loops to secure them in place. This will form one petal for your flower. Repeat Steps 2 – 3 for Each Flower Petal.
Repeating steps two and three until you have created four petals for your first flower (or however many you need for each pattern). Once complete, you can create more flowers or add additional decoration to each petal you have created.
Step 4: Make Additional Stitches for Decoration
If desired, use additional stitches such as treble or half double crochet to decorate each flower petal further. This is a great way to add texture and interest to your designs!
Repeat Steps 1 – 4 Until Desired Length is Reached
Continue repeating steps one through four until you reach the desired length of your project. Once complete, tie off the yarn and snip away any extra strands.
Step 5. Try out Different Color Combinations
With the primrose stitch, you can create stunning designs by combining different colors of yarn. Try out bold and bright color combinations for an eye-catching effect, or use muted tones for a more subtle look! Be careful not to mix too many colors, as this can make the project look cluttered.
Step 6: Add Edging
To finish off your project and make it look even more beautiful, consider adding an edging with other stitches, such as single crochet or reverse single crochet around the entire piece. This will help give the edges a nice clean look. Be careful not to pull the stitches too tightly, as this can cause the edges to ripple and curl.
Step 7: Block Your Project
Blocking is an important step in finishing your project and will help ensure that all your stitches are even and uniform. To block, lay the piece out on a flat surface, such as a blocking board or ironing board, spray with water (or dampen lightly with a sponge), and then pin it into place. Allow it to dry completely before unpinning and to remove from the surface.
Step 8: Weave In Ends
Once you have finished blocking, it’s time to weave in any remaining ends. Carefully thread each one onto a yarn needle and weave them securely into their surrounding stitches. If necessary, use a crochet hook to help tuck away any excess strands.

Step 9: Enjoy Your Work
Congrats! You’ve now successfully completed your primrose stitch project. Show off your beautiful work to friends and family or even post it online for others to admire! Don’t forget to take a moment to enjoy how far you’ve come and how much progress you’ve made. Enjoy!
Step 10: Keep Practicing
The best way to get better at any craft is to keep practicing, so don’t be afraid to give this stitch a go again, and always strive to make each piece better than the last. Remember, practice makes perfect! Good luck, and happy crocheting!
By following these steps, you should have no problem learning how to crochet the primrose stitch in no time at all. With a bit of practice, you’ll be able to create stunning designs that are sure to impress! Have fun crocheting!
You Can Check It Out to Crochet Backpack
5 Additional Tips and Tricks
- To ensure the stitch looks even, ensure your stitches are the same size.
- Chain more loops than necessary to be able to adjust how tightly or how loosely you would like it to be.
- Remember to keep the same tension throughout your project when working with a pattern.
- Always check how the primrose stitch looks on the back side of your work; this will help ensure everything is consistent and neat-looking.
- Different yarn weights can create different appearances for the primrose stitch, so experiment with different kinds to find what works best for you.

Following these tips will surely help you master how to crochet primrose stitch in no time! With a bit of practice and patience, you’ll have a beautiful piece that will be admired by all who see it! Good luck!
5 Things You Should Avoid
- Don’t pull the loops too tightly, or your primrose stitch will be difficult to work with.
- Don’t skip any steps when crocheting the primrose stitch; if you do, it might not come out correctly.
- Don’t forget to count how many stitches you have in each row to ensure your pattern is correct.
- Avoid using too thick yarn for this type of project as it will be hard to work with and may cause frustration because of inconsistencies in your stitching.
- Don’t rush through the process; take your time and follow directions closely for the best results! Happy crocheting!
With these tips, you should have no problem crocheting a beautiful and even primrose stitch. Remember to follow each step closely, and don’t be afraid to practice until it comes out perfectly!
What is the Hardest Thing to Crochet?
The hardest thing to crochet will depend on how experienced the crocheter is. For those just starting out, intricate and lacy patterns such as the primrose stitch can be difficult because of the multiple steps involved and how time-consuming they can be.
Other difficult projects might include amigurumi (crocheting 3D objects), cable stitches, and color work. More experienced crocheters may find that complex tapestry crochet or intarsia are some of the most challenging projects they take on.
Overall, complicated designs with small details often require intense focus and many hours of practice before you master them! Happy crocheting!
What Sells Most With Crochet?
Many crocheters are able to make a living off their craft, and some of the most popular items that sell well include hats, scarves, sweaters, blankets, baby clothes, and home decor items.
Other things that can be sold profitably include ponchos, shawls, bags, socks, toys, and jewelry. Crochet has become an art form, and there is no end to what can be created with it!

If you’re looking to start selling your crochet work online or at local markets or craft fairs, these are all great options for getting started.
Conclusion
The primrose stitch is a lovely and easy crochet pattern that’s perfect for beginners. It’s also great for more experienced crocheters who want to create something quick and beautiful. Give the primrose stitch a try the next time you’re looking for a new project!
Now that you know how to crochet the primrose stitch, put your new skills to the test. Practice makes perfect, so keep at it until you feel confident using this stitch in your next project. With a little bit of time and effort, you’ll be creating beautiful pieces in no time.
Hopefully, this article has shown you how to do it and how it can be used in many different projects. Don’t forget that the most popular items that sell well are hats, scarves, sweaters, blankets, baby clothes, home decor items, ponchos, shawls, bags, and jewelry. With a bit of practice and patience, you will soon become an expert in how to crochet primrose stitch! Good luck!
You Can Check It Out to Fasten off Crochet