

Are you a knitting enthusiast who loves the idea of creating intricate patterns and shapes with your projects but finds blocking daunting? Blocking – stretching out knits to achieve desired measurements – can be a challenging experience with pins and more. Fortunately, there are unique methods that make sliding yarn into pretty displays simple and straightforward without using any supplies at all!
In this blog post, we’ll discuss a few innovative steps on how to block knitting without pins or other tools. From steaming to needle-weaving, you’ll discover how easy it is to turn out flawless pieces. Let’s explore these handy tips for perfecting your next project!
Why Block Knitting is Important
Blocking is a crucial step when working with knitted fabrics. It sets the stitches, adjusts and evens out the tension between pieces, and helps to create desired shapes. As for what works best for different projects, it all depends on your pattern design and fiber choice.
Synthetic materials are less likely to shrink or change shape after blocking than natural fibers, for instance. That’s why blocking is even more important when working with yarns made of wool, cashmere, and other natural fibers.
Blocking opens up the fibers in the fabric, allowing it to better show off its unique qualities. Additionally, blocking helps add extra stability to your project, ensuring that it lasts longer and retains its shape over time.
Without blocking, knits tend to come out too tight or have an inconsistent pattern shape. You can easily cure this by using the right blocking method so that your pieces turn out perfectly!
Required Tools
Fortunately, blocking knitting without pins doesn’t require any special tools! You can use items from around the house, such as towels, or go for a more professional look by investing in foam mats. Regardless of what you choose to block your knits with, make sure that it’s clean and free of dust.
10 Steps on How to Block Knitting Without Pins
Step 1: Placing
Place your knitted piece in a sink or on a flat surface with towels underneath. It will help provide stability and prevent slipping. The towels will also absorb moisture when blocked with steam.
Step 2: Washing
Gently hand-wash your knitted piece using lukewarm water and a mild detergent, then rinse thoroughly. Avoid twisting or wringing the wool out of shape – this can cause irreparable damage to the fabric.
Step 3: Spreading
Lay the piece out flat and carefully shape it into your desired form. Be sure to spread the fabric out evenly so that all the edges are even and straight. Uneven edges can lead to crooked patterns.
Step 4: Weighing
Weigh down each corner and side of the fabric using books or other heavy objects for support. This will help keep the shape in place while you’re blocking it. Weighing down the edges also helps to stretch out any tight stitches.
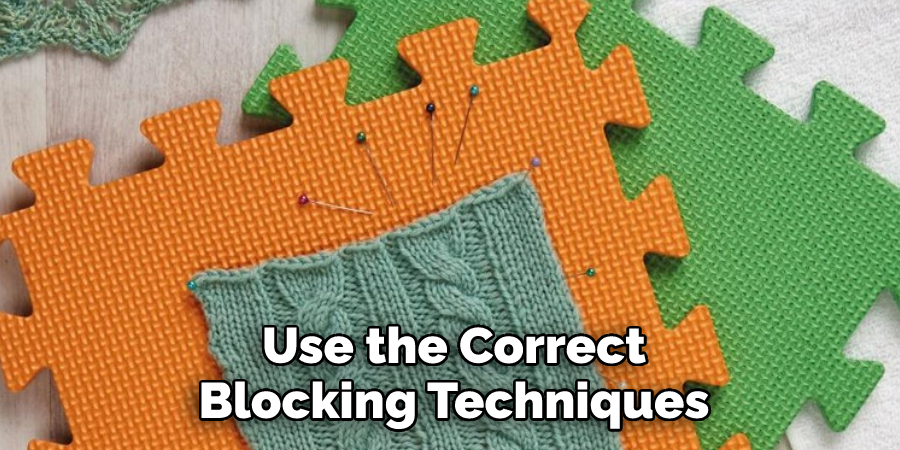
Step 5: Pinning Alternatives
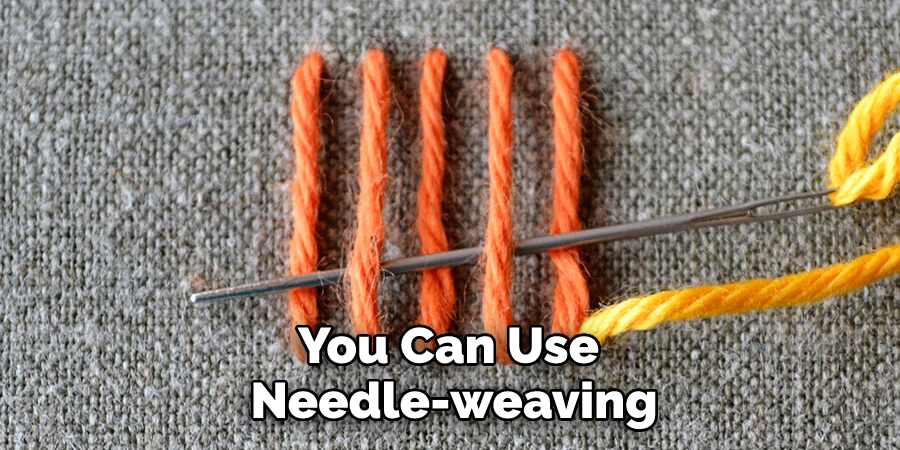
If you don’t have pins handy, you can use needle-weaving or loose basting as alternatives. With needle-weaving, pull a looped thread through each stitch of your knitted piece and secure it in place with a slip knot. With loose basting, use yarn to stitch along the edges and secure with a slip knot or two.
Step 6: Blocking
Once your knitting is pinned or needle-weaved, you’re ready to block it! For steam blocking, place a damp cloth over your knitted piece and hold a steam iron 6-8 inches away. Move the iron over the fabric slowly, allowing the steam to penetrate the fabric and help it relax into shape.
Step 7: Drying
Let your knitted piece air dry naturally overnight or until completely dry. You can also press lightly with a towel if you need to speed up the process. Avoid wringing or squeezing the fabric, as this can cause it to shrink.
Step 8: Pinning (optional)
For a more precise finish, you can use pins to hold the fabric in place while drying. This is especially helpful when blocking intricate patterns or lace shawls that require an extra level of detail.
Step 9: Finishing Touches
Once your knitted piece is dry, carefully remove the pins or needle-weaving threads. For a professional finish, use a fabric brush on the surface to make sure all the stitches are even and straight.
Step 10: Finishing
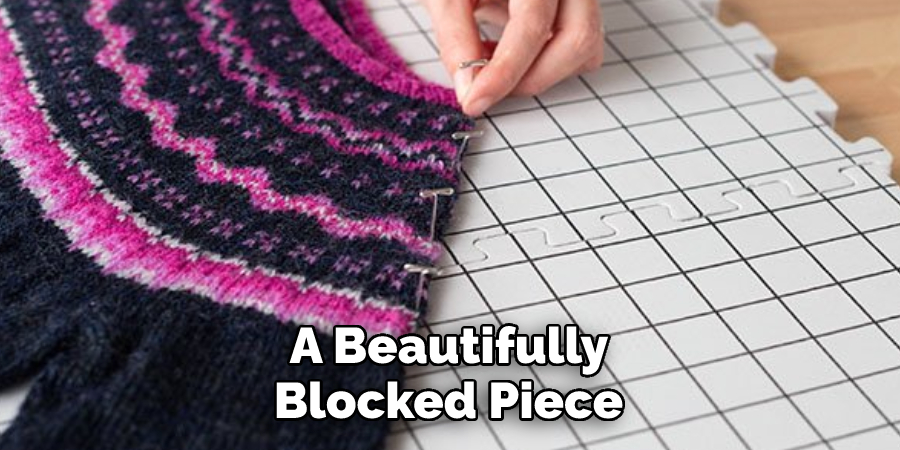
Finally, give your knitted piece a light stretch to make sure that it has retained its shape, and you’re done! You can now enjoy the fruits of your labor – a beautifully blocked piece that looks like new!
Blocking knitting without pins is an easy and stress-free way to make sure your projects turn out perfectly every time. With just a few simple steps and the right tools, you’ll be able to block your knits like a pro in no time.
10 Safety Measures to Follow
- Always be sure to use clean and dust-free tools for blocking. Dust-free tools can help prevent lint or other particles from sticking to your knitting.
- Cover the surface where you’re blocking with a clean cloth or towel to help protect it from getting stained by any moisture that may be used during the blocking process.
- Use soft water for soaking, as hard water can leave unsightly mineral deposits on the fabric.
- Blocking should always be done on a flat surface, such as a table or countertop, to ensure even results.
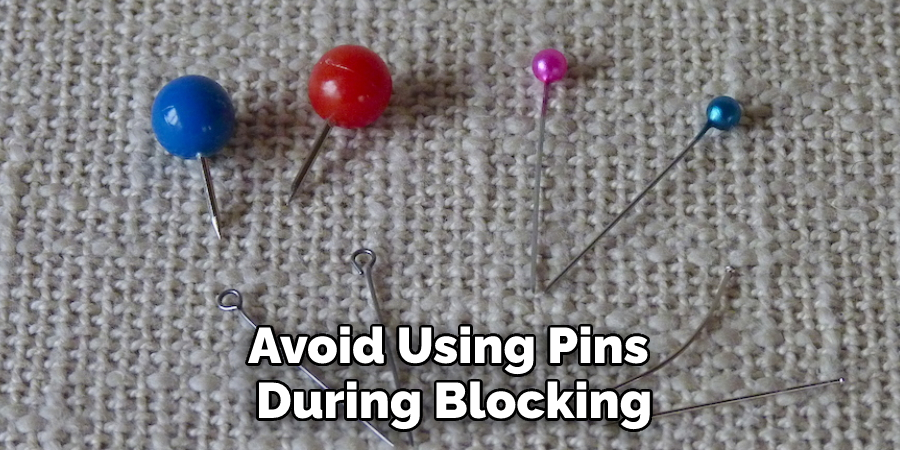
- Avoid using pins during blocking, as they can damage the delicate fibers of your knitting project.
- When steaming the fabric, do not hold the steam head too close to the knitting, as it can cause the fabric to scorch.
- Always use a pressing cloth between the knitting and the steamer to help protect against moisture damage or staining.
- When using weights to block, make sure they are only ever used on flat surfaces, as using them on other fabrics may leave an imprint of the weight behind.
- Allow the knitting to cool and dry completely before removing it from the blocking surface, as this will help ensure that the desired shape is maintained.
- When finished with the knitting project, be sure to store it in a dust-free container such as an airtight bag or box. This can help prevent future damage or staining of the fabric.
Following these safety measures will help ensure that your knitting projects look as good as new after blocking without pins! With a few preventative steps, you can be sure that your knitted creations will stay looking beautiful for years to come.
Frequently Asked Questions
What Are Important Elements in Block Knitting?
When block knitting, it is important to use clean and dust-free tools, a flat surface for blocking, soft water for soaking and avoid using pins. Steaming should also be done with caution with the use of a pressing cloth between the knitted fabric and the steamer, and weights should only ever be used on flat surfaces.
Lastly, the knitted fabric should be allowed to cool and dry before removing from the blocking surface and stored in an airtight container afterward. Airtight container storage can help prevent future damage or staining to the fabric.
What Are Other Ways to Block Knitting?
In addition to pinless block knitting, other methods for blocking include wet-blocking (where yarn is soaked in water and then stretched into place), steam blocking (where a steamer is used to block the fabric), and spray-blocking (where fabric is sprayed with water before being stretched into place).
All of these methods should be done carefully, using the proper tools, techniques, and materials for the best results.
Does All Knitting Require Blocking?
No, not all knitting requires blocking. If the project is a garment that will be stretched or fitted when worn, it may not need to be blocked and instead can simply be seamed together and then laundered in order to achieve the desired shape. However, if you are working with lace or intricate stitch patterns, blocking may help bring out the full beauty of the piece.
No matter what type of knitting project you are working on, it is important to pay attention to the pattern instructions and use the correct blocking techniques for the best results.
Conclusion
If you want to block your knitting without using pins, there are two main methods you can use. The first is wet blocking, which involves soaking your finished project in water and then shaping it as it dries.
The second is steam blocking, which uses a steam iron to set the shape of your knitting. Whichever method you choose, make sure to follow the instructions carefully so that you don’t damage your hard work.
Blocking knitting can seem like a daunting task, but with a little patience and attention to detail, it’s actually quite easy. Don’t worry if you don’t have any pins on hand, as there are plenty of other ways to block your knitting without them.
Just remember to take extra care when using steam or weights, and always store your projects in airtight containers afterward. With these tips on how to block knitting without pins, you will be ready to block your knitting the pin-free way! So grab those needles and get started on your next project – your blocked masterpiece awaits!
You Can Check It Out to Carry Yarn in Knitting