
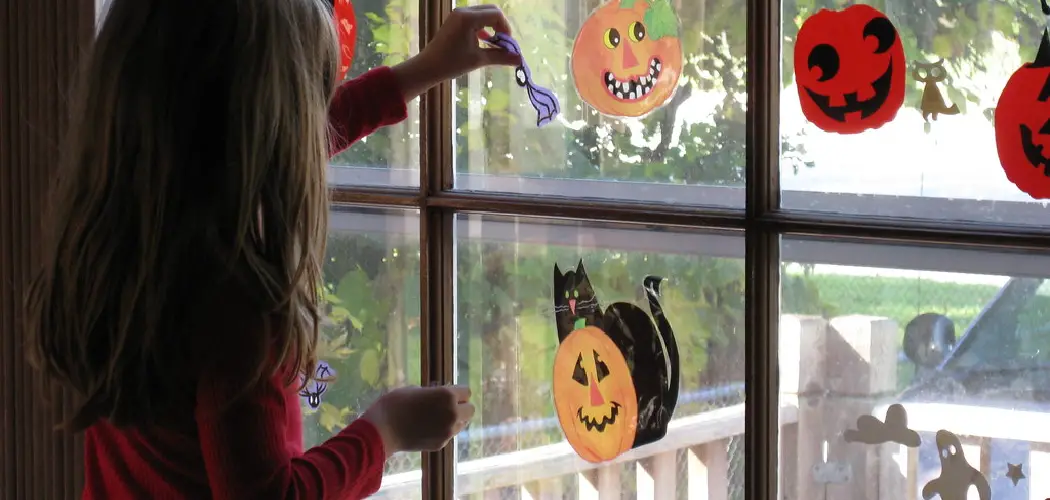
Do you want to give your home a spooky twist this Halloween? Decorating windows with festive window clings is an easy and fun way to make sure your house is ready for the holiday.

Window clings are perfect for adding some whimsy style—whether of pumpkins, bats or ghosts—to your living space. Not only are they incredibly simple to apply, but they can easily be removed once October 31st arrives, leaving no mess behind!
In this blog post on how to apply Halloween window clings, we’ll explain exactly how to apply window clings so you can get creative in time for trick-or-treaters coming down the block. So pull out those creepy decorations and let’s get started!
Necessary Tools and Materials
Given below are the tools and materials you will need to complete this task:
- Window Clings (Available at Most Department Stores or Online)
- Glass Cleaner
- Water
- Paper Towels or Soft Cloth
- Scissors (Optional)
11 Step-by-step Guidelines on How to Apply Halloween Window Clings
Step 1: Clean the Window Surface
Before applying window clings, it’s very important to make sure the surface of your windows is clean and smooth. Any dirt or dust particles on the glass can cause air bubbles between the cling and the window, making it difficult for them to stick properly. To clean the window surface, use a glass cleaner and wipe it with a paper towel or soft cloth.
Step 2: Prepare the Window Clings
Carefully remove the window clings from their packaging. Before applying them, lay them flat on a clean surface and use a credit card or your fingers to smooth out any wrinkles or air bubbles. You can also use scissors to trim any excess backing if needed. This step will ensure that the clings stick smoothly to your window without any creases.

Step 3: Wet the Window Surface
Moisten the surface of the window using a spray bottle filled with water. This will make it easier for you to reposition the clings, as they will be able to slide around on the wet surface. It also helps to prevent air bubbles from forming. You can also use a sponge or damp cloth if you do not have a spray bottle. This step is especially important if you are working with larger window clings.
Step 4: Peel off the Backing
Carefully peel off the backing from the cling, starting at one corner. Be sure to avoid touching the adhesive side of the cling with your fingers as this can reduce its sticking ability. If necessary, use a pair of tweezers or gloves to avoid transferring oils from your skin onto the cling.
Step 5: Position the Cling on the Window
Place the cling on the damp window surface, starting from the top and pressing it down gently. Slowly slide it around until you have found your desired position. The water will make it easier for you to reposition if needed. You can also use a credit card or your fingers to gently press out any air bubbles.
Step 6: Smooth Out the Cling
Use a credit card or your fingers to smooth out the cling on the window. Start from the center and work your way towards the edges, making sure there are no wrinkles or air bubbles. This step will ensure that the cling adheres firmly to the window surface. It’s important to be gentle while smoothing out the cling to avoid any tears or damage.

Step 7: Remove Excess Water
Use a paper towel or soft cloth to gently remove any excess water from the surface of the cling. This will help it adhere better and prevent any potential air bubbles from forming. Be careful not to press too hard on the cling as this may cause it to tear. This step is especially important if you are working with smaller clings.
Step 8: Continue Applying Clings
Repeat steps 4-7 for all the remaining window clings until your desired design is complete. Be sure to keep the surface of the window damp while applying each cling to make it easier to reposition and smooth out any air bubbles. However, if you are using smaller clings, it is best to apply them one at a time to ensure they stick properly.
Step 9: Let the Clings Dry
Once all the window clings have been applied, leave them to dry for about an hour. This will allow the adhesive to set and ensure that the clings stick firmly to the window surface. It’s important to avoid touching or moving the clings during this time. But if you notice any air bubbles or wrinkles, gently smooth them out with a credit card or your fingers.
Step 10: Add Finishing Touches (Optional)
If desired, you can add some finishing touches to your window clings by using a black marker or paint to outline the design. This will make them stand out even more and give them a professional look. You can also add some fake spider webs or other spooky decorations around the window to complete your Halloween look.
Step 11: Remove Window Clings
When it’s time to remove your window clings, gently peel them off starting from one corner. If they are not coming off easily, use a hairdryer on low heat to soften the adhesive and make them easier to remove.

Once you have removed all the clings, use a damp cloth to clean any residue on the window surface. The clings can be stored and reused for next Halloween if properly taken care of.
And that’s it! You’re now ready to decorate your windows with festive Halloween window clings. Get creative and have fun with different designs, shapes, and sizes. Happy haunting! Following these guidelines on how to apply halloween window clings will ensure that your window clings last throughout the Halloween season and provide a spooky atmosphere for everyone to enjoy.
Do You Need Any Help?
If you encounter any difficulties while applying your window clings, don’t hesitate to seek help from friends or family. You can also refer back to these step-by-step guidelines or look for online tutorials for further assistance.
With some practice and patience, you’ll become a pro at applying window clings in no time! So go ahead and show off your spooky decorations this Halloween with perfectly applied window clings. Happy haunting!
How Much Could It Cost?
The cost of window clings varies depending on the type, size, and design. You can find them at various price points in stores or online. However, if you’re feeling creative, you can also make your own spooky window clings using materials like vinyl sheets, paint, markers, and stencils.
This option may be more budget-friendly and allows for customization. Have fun and experiment with different materials to create unique designs for your windows.
So, whether you choose to purchase them or make your own, Halloween window clings are an affordable way to add some festive spirit to your home decor. Make sure to properly store them after use so that they can be reused for many Halloweens to come!
Frequently Asked Questions
Q1. Can I Reuse My Window Clings?
A: Yes, you can reuse your window clings if properly taken care of. Store them flat in their original packaging or between sheets of wax paper to prevent any damage or tears. It’s important to avoid folding or creasing them when storing.
Q2. Can I Apply Window Clings to Any Surface?
A: Window clings are designed to stick on smooth surfaces such as glass, mirrors, or plastic. Avoid applying them to rough or textured surfaces as they may not adhere properly and could potentially damage the cling. You can test the cling on a small area first to ensure it sticks properly before applying it to a larger surface.
Q3. Will Window Clings Damage My Windows?
A: No, window clings should not damage your windows as long as they are applied and removed properly. Be sure to avoid using any sharp objects or abrasive materials when applying or removing the clings.
If there is any residue left on the window after removing the cling, you can use a damp cloth to gently clean it off. So go ahead and have fun decorating your windows without worrying about any damage!
Q4. Can I Use Window Clings Outdoors?
A: Window clings are not recommended for outdoor use as they may not adhere properly in harsh weather conditions. They are best used indoors on smooth and clean surfaces for long-lasting results. If you do choose to use them outdoors, make sure they are protected from rain or wind to prevent any damage or loss.

Conclusion
Now that you know the steps to apply Halloween window clings, it’s time for some DIY fun. You can come up with creative window designs and showcase your Halloween spirit to everyone! What was once a logistical challenge now feels easy and straightforward. Plus, you get to have a fun activity with friends or family; what more could we ask for? Take out those clings now and start creating!
Out of all the decorations this Halloween season, there is really no better way to spookify your windows than with these simple but fun clings. Go ahead: craft some festive vibes in your home and let everyone see them! Thanks for reading this article on how to apply halloween window clings.