

If you’re an avid crocheter looking for a new skill to add to your toolkit, learning how to waistcoat stitch crochet could be the perfect challenge. Waistcoat stitching is a crochet technique that results in a firm and sturdy fabric with distinct V-shaped stitches that look almost handmade – like something you’d expect from professional crafters!
This tutorial will help you understand this versatile stitch and give advice on using it successfully. We’ll go over what tools you’ll need, basic instructions on creating the V-shape of the stitch, common mistakes to avoid along with helpful tips and tricks. With everything we cover here, you’ll soon be able to create beautiful fabrics worthy of entering any competition or gift-giving occasion.
Tools You Will Need
Before you start waistcoat stitch crocheting, make sure to gather the right tools.
You’ll need a crochet hook that is suitable for the yarn weight you are working with (size 4-7 mm usually works best).
You’ll also need some:
- Scissors,
- A measuring tape, and
- A tapestry needle.
6 Steps Guide on How to Waistcoat Stitch Crochet
1. Create a Chain of the Desired Length
Creating a chain of the desired length for your project can be challenging, but with the help of Waistcoat Stitch Crochet, it can be done quickly and easily! Waistcoat stitch crochet is an innovative technique that creates thicker and more stable stitches compared to classic single crochet.
It reinforces both sides of the fabric while keeping it flexible, and eliminates the need to add rows of chains at the beginning, as well as other stabilizers. Plus, it’s great for using up scrap yarn, so don’t toss out that stack of mini balls – use them to make something truly special!
Whether you’re designing a garland or a blanket, try using waistcoat stitch crochet today to effortlessly create your next masterpiece!
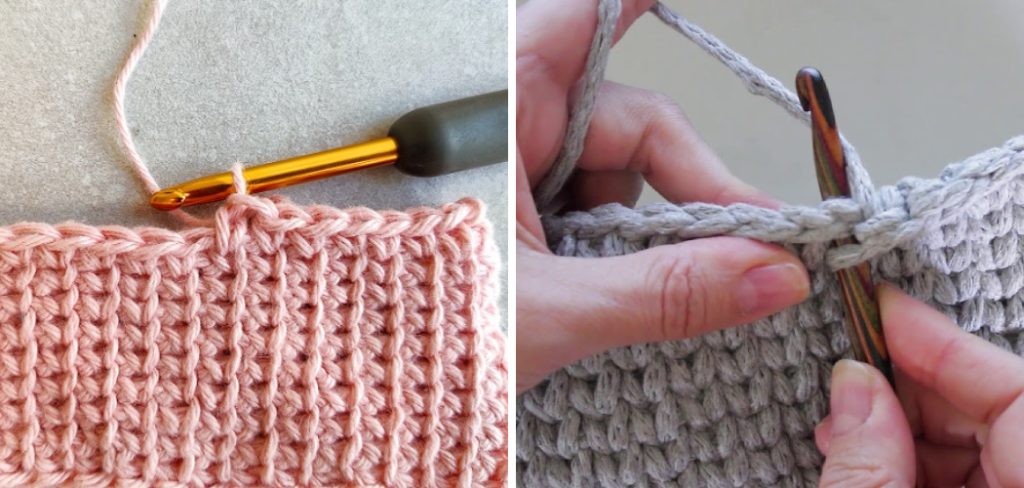
2. Insert the Hook
Waistcoat stitch crochet, otherwise known as the center single crochet or knit stitch, is a unique way of crocheting or knitting that substitutes the traditional ‘v’ with an elongated one. The chain into the second hook loop allows it to stand above the fabric rather than lie flat against it and creates a look that is much closer to knitted stitches.
This technique can help give projects extra texture, and also adds durability to items like bags and hats. It’s also fairly simple once you master how to insert the hook – just be sure to go back one more space after the skip! With practice, waistcoat stitching will soon become an invaluable addition to your repertoire of crafting skills.
3. Yarn Over and Draw
The Waistcoat Stitch Crochet is an interesting stitch to work with and gives amazing results in a variety of projects. The waistcoat stitch is created by crocheting into the chain, yarn over, and drawing through both loops on the hook. This forms one stitch in the chain resulting in flattering waistcoats.
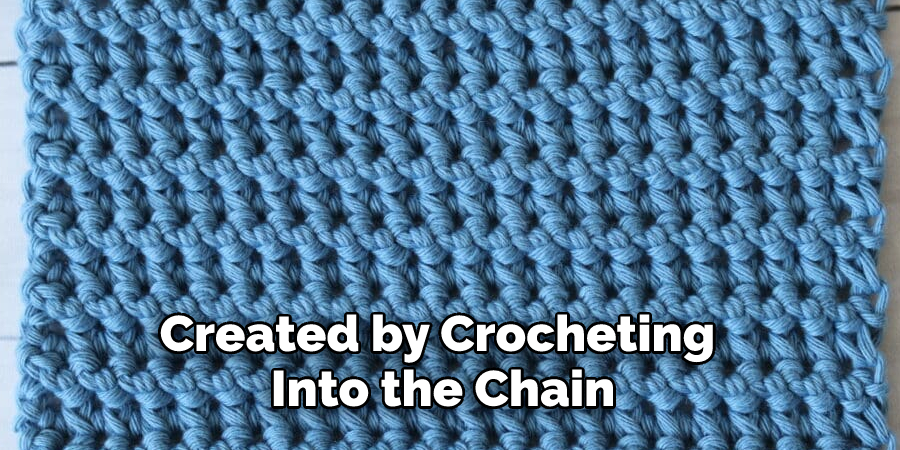
Moreover, it produces a very solid, stable fabric with amazing texture and stretch capabilities that makes it perfect for sweaters, cardigans, blankets, and much more. On top of that, this stitching technique requires nothing more than double crochet stitches, so if you know how to do those then you can easily wield this newfound knowledge of waistcoat stitching as well!
4. Pull Up a Loop
Mastering the art of waistcoat stitch crochet has never been easier! All that’s needed is a simple combination of chains, double crochets, and a few loops. To start, you will need to insert your hook into the next chain and pull up a loop.
This loop acts as the foundation for each half of your waistcoat stitch and creates an intriguing texture that gives this stitch its unique texture. With a little practice, you’ll soon be able to craft beautiful products with just these simple steps!
5. Complete One Waistcoat Stitch
The waistcoat stitch also referred to as a knit stitch or center single crochet, adds texture and stability to any crocheting project. To start the waistcoat stitch in crochet, it is simply a matter of looping through the chains on the hook in one solid movement.
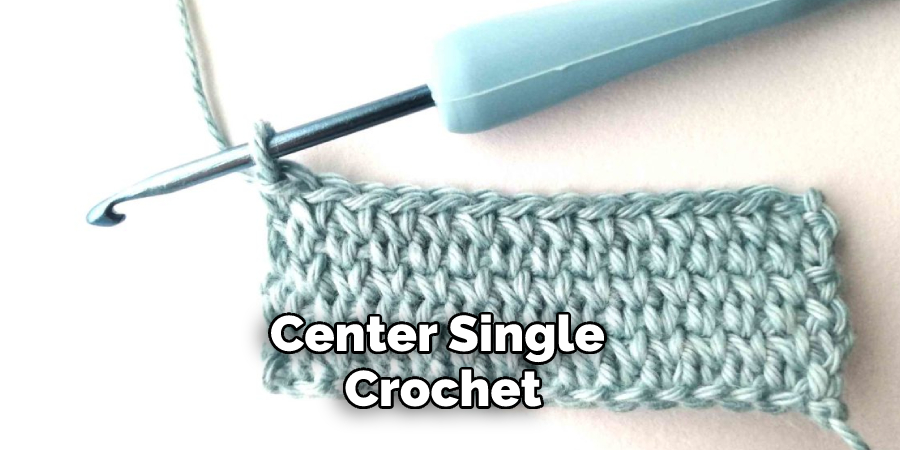
The step-by-step process starts with yarn over, then drawing through all three loops of the preceding chain. By repeating this process of yarn over and drawing through all three loops on the hook for each chain, you will be well on your way to completing one waistcoat stitch! It’s quite simple and quite rewarding once you have mastered it; creating unique and textured designs out of something that would otherwise look completely flat. So why not give it a try today?
6. Be Persistent
Crocheting a fabric of Waistcoat Stitch can be a great project for anyone with intermediate or advanced crochet experience. To start this task, yarn over your hook and insert it through the 2nd stitch from the left in the previous row. Yarn over, draw the loop through, then yarn over, and draw through both loops on your hook.
The remaining steps fit together the same way: keep repeating steps 2 to 5 until you have completed creating one full row of Waistcoat Stitch Crochet fabric. It’s important to remember that each stitch should be worked in the center post of the next stitch so that everything looks neat and even. Don’t forget to practice patience, as completing an entire row can take some time!
Common Mistakes & Tips
- Not securing your foundation chain. One of the most common mistakes made when learning to waistcoat stitch crochet is not securing the foundation chain properly. This can result in your work becoming loose and uneven. To avoid this, make sure to secure your foundation chain at both ends before you start crocheting.
- Using the wrong type of yarn. Another mistake that is often made when using the wrong type of yarn. This can result in your work being too stiff or too loose. To get the best results, use a medium-weight yarn such as worsted weight or DK weight.
- Not inserting your hook into the right space. It is important to insert your hook into the right space to create a neat and even stitch. If you insert your hook into the wrong space, your work will be loose and uneven. To avoid this, make sure to insert your hook into the space between the two stitches, not through both stitches themselves.
- Not holding your yarn correctly. This can result in your work being too tight or too loose. To get the best results, hold your yarn in your dominant hand and use your non-dominant hand to guide the hook through the stitches.
- Not using the correct tension. If you use too much tension, your work will be too tight and will likely curl up on itself. If you use too little tension, your work will be too loose and may unravel easily. To get the best results, practice finding a happy medium between these two extremes.
- Not turning in your work correctly. This can result in an uneven edge and may cause your work to curl up on itself. To avoid this, make sure to turn your work so that the right side is facing you before starting each new row.
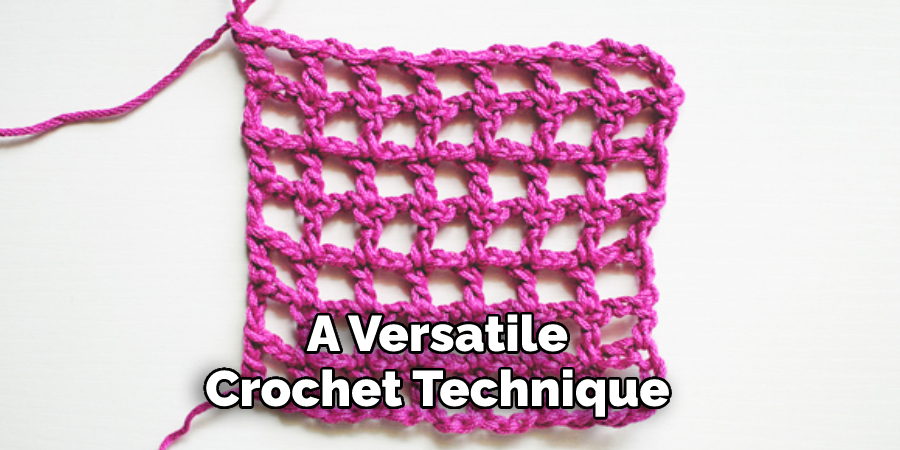
Unlocking the Secrets of Waistcoat Stitch Crochet
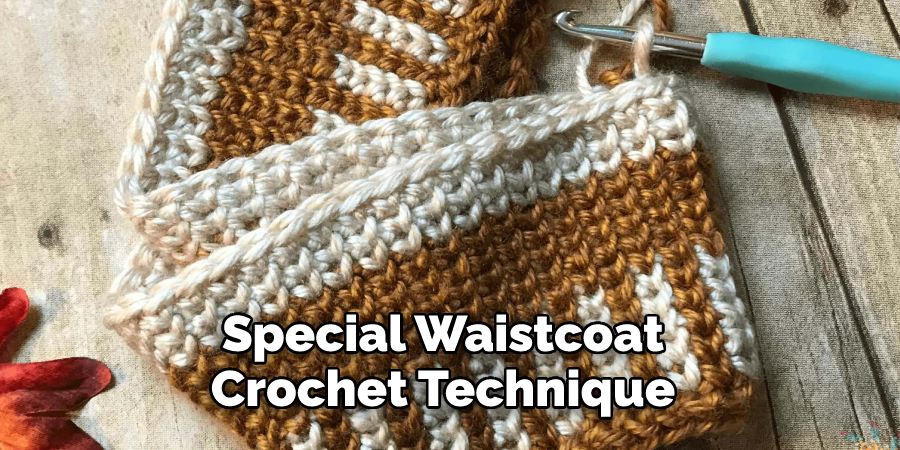
Waistcoat stitch crochet is one of the most versatile forms of crochet. It’s very popular among experienced and novice crocheters alike, as its structure creates a sturdy fabric with a smooth finish. It produces an evenly textured stitch that lies flat, making it perfect for your afghan, sweater, or accessory projects.
To get started with the waistcoat stitch you will need to learn the special waistcoat crochet technique. This unique technique involves inserting your hook into the top loops of an imaginary post, instead of going between the posts like most other crochet stitches.
Once mastered, you can use waistcoat stitch to make any kind of project like scarves and hats or even sweaters and blankets! The possibilities are endless when you unlock the secrets of waistcoat stitch crochet.
How Do I Use the Waistcoat Stitch Crochet Technique?
The waistcoat stitch is a versatile crochet technique that allows you to create a strong, even fabric. To use this technique, start by making a foundation chain and then single crochet into each loop of the chain.
For the rest of the row, insert your hook under the top two loops of the stitch below instead of going between the posts. Once you complete your row, turn your work and single crochet into each loop before repeating the waistcoat stitch for the next row.
With practice, you can use the waistcoat stitch to create a wide variety of projects!
Conclusion
So there you have it, a step-by-step guide on how to do the waistcoat stitch in crochet. You should carefully determine how to waistcoat stitch crochet. This technique is great for creating dense and firm fabrics and can be used in a variety of projects. Give it a try the next time you’re looking for an alternative to traditional crochet stitches!
You Can Check It Out to Make Crochet Plant