
Transfer tape is a great tool to have in your crafting arsenal, especially when you want to move adhesive designs from one surface to another. If you’re new to using transfer tape with paper, don’t worry! This guide will take you through each step of the process, step by step. Whether you’re working on scrapbooking, card making, or any other paper-based project, transfer tape can make your life easier.
In this blog post, we’ll discuss how to use transfer tape with paper, from preparing your workspace to applying the transfer tape and peeling it off. We’ll also share some tips and tricks to ensure that your transfer tape application is smooth and successful. So, without further ado, let’s dive into the world of transfer tape and paper crafting!

What is Transfer Tape?
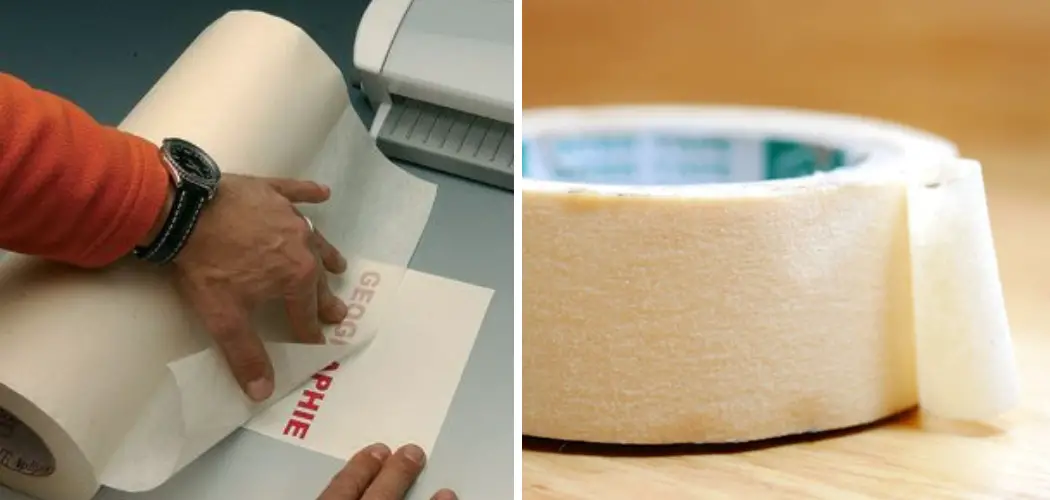
Transfer tape, also known as application tape or pre-masking tape, is an adhesive material used to transfer graphics from one surface to another. This type of tape is designed to keep your design in place and make it easier for you to move it around without losing the integrity of the design.
It’s typically used with vinyl decals on walls, but it can also be used with paper and other materials. Transfer tape is available in a variety of colors, sizes, and shapes, so you can find the type that suits your needs.
12 Step-by-step Instructions on How to Use Transfer Tape With Paper
Step 1: Gather Materials
Before you start, gather all the materials you’ll need for the project. You’ll need:
- Transfer Tape
- Paper
- An X-acto Knife or Scissors
- A Cutting Mat (Optional)
Step 2: Cut the Transfer Tape
Next, cut a piece of transfer tape to the same size as your design. If your design is larger than your transfer tape, you can cut multiple pieces of transfer tape and use them to transfer different parts of the design.

For example, if you’re transferring a large quote onto a wall, you may need to use several pieces of transfer tape to move the letters. It’s important to keep the pieces of transfer tape as close together as possible. This will make it easier to peel off the transfer tape later.
Step 3: Apply the Transfer Tape
Now it’s time to apply the transfer tape to your design. Carefully press the transfer tape onto the design, making sure there are no air bubbles or wrinkles. Use a scraper tool or a credit card to smooth out any bubbles or wrinkles. It’s important to apply pressure evenly and consistently for best results. It may take a few tries to get the pressure, and placement, just right. But don’t worry, with practice you’ll get the hang of it!
Step 4: Peel Off the Transfer Tape
Once you’ve applied the transfer tape, it’s time to peel it off. Slowly lift one corner of the transfer tape and begin pulling away from the paper. Use a scraper tool or a credit card to help peel away any stubborn areas. It’s important to keep the transfer tape as flat as possible while you’re removing it, and make sure that no part of the design is left behind.
You may want to go slowly and check the paper often to make sure you’ve removed all parts of the design. It’s also a good idea to inspect the transfer tape for any pieces of paper that might be stuck to it.
Step 5: Position the Design
Now that the transfer tape is attached to the design, carefully position it onto the surface you want to transfer it. Use a ruler or a level to ensure that the design is straight and in the right position. This is the time to make any adjustments before you press down on the transfer tape.

It’s also a good idea to use a pencil to trace around the edges of the design, so you know where to place it. It’s important to be patient when positioning the design, as any mistakes can cause the transfer tape to stick unevenly.
Step 6: Apply the Design
Once you’re happy with the position of the design, press it firmly onto the surface you want to transfer it. Use a scraper tool or a credit card to smooth out any air bubbles or wrinkles. Start at the center of the design and work your way out, pressing firmly as you go.
But be careful not to press too firmly, or the design might stick unevenly. It’s also important to make sure that you’re applying pressure evenly over the entire surface.
Step 7: Peel off the Transfer Tape
Once the design is applied, it’s time to peel off the transfer tape. Starting at one corner, slowly peel back the transfer tape at a 45-degree angle. Take your time and make sure the adhesive is sticking to the surface.
If you notice the design starting to lift, press it back down and continue to peel the transfer tape. It’s important to keep the transfer tape as flat as possible during this process, so no parts of the design are left behind.
Step 8: Check for Air Bubbles or Wrinkles
After peeling off the transfer tape, check for any air bubbles or wrinkles in the design. Use a scraper tool or a credit card to smooth out any irregularities. If you notice any imperfections, carefully peel off the design and start again. This time, make sure to press the design firmly and evenly onto the surface.
Step 9: Repositioning the Design
If you need to reposition the design after it’s been applied, carefully peel it off the surface and start the process again from step 4. It’s important to remember that the transfer tape will lose its adhesive properties if it’s peeled off more than twice, so try to get it right the first time. But don’t worry, with practice you’ll get better at it.

Step 10: Storing Your Transfer Tape
When not in use, store your transfer tape in a clean and dry area. Keep it flat and away from direct sunlight, as this can cause the adhesive to break down over time. It’s also important to inspect the transfer tape before use, as any cracks or tears may cause it to fail during the application process. But if you take good care of your transfer tape, it should last for many projects.
Step 11: Troubleshooting
If you’re having trouble with the transfer tape sticking to the design, try using a lighter touch when applying it. Sometimes, too much pressure can cause the design to stick to the transfer tape instead of the surface. A scraper tool or credit card can help keep the design in place while applying the transfer tape.
Step 12: Experimenting with Different Surfaces
Try experimenting with different surfaces to transfer your design onto, such as wood, metal, or glass. Keep in mind that different surfaces may require different types of transfer tape or adhesive. If you’re unsure, test a small area before applying the design.
If you’re using a delicate surface, such as glass, it’s also important to use a softer touch when applying the transfer tape. This will help prevent any damage to the surface during the application process. It’s also a good idea to use a ruler or level when positioning the design, as this will make sure it’s straight and in the right place.
Following these steps on how to use transfer tape with paper will help you get the best results when using transfer tape with paper. With a little practice, you’ll be able to create beautiful designs that will last for years. And don’t forget, if something doesn’t work out the way you expected it to, try again and have fun!
Frequently Asked Questions
Q: How Can I Make Sure the Transfer Tape is Stuck Firmly to the Design?
A: To ensure the transfer tape is properly adhered to the design, use a scraper tool or credit card to press it firmly onto the paper. Make sure there are no air bubbles or wrinkles, and apply pressure evenly across the surface. It’s also important to check that all parts of the transfer tape have adhered properly before peeling off.

Q: What Kind of Transfer Tape Should I Use for My Project?
A: The type of transfer tape you should use will depend on the surface you’re transferring onto. Different surfaces may require different types of adhesive, so it’s important to do your research beforehand. It’s also a good idea to test a small area before applying the design, as different surfaces may have specific application requirements. If you’re unsure, check with an expert for advice.
Q: How Can I Reapply the Design if it’s not in the Right Place?
A: If you need to reposition the design, carefully peel it off and start again from Step 4. Remember that the transfer tape may lose its adhesive properties after being peeled off multiple times, so try to get it right the first time. With practice, you’ll become better at positioning the design correctly.
Q: How Should I Store My Transfer Tape?
A: When not in use, store your transfer tape in a clean and dry environment away from direct sunlight. Keep it flat and inspect it before use, as any cracks or tears can cause the transfer tape to fail during application. With proper care, your transfer tape should last for many projects.

Conclusion
Congratulations, you’re now an expert in using transfer tape with paper! While the process may seem intimidating at first, with practice and patience, you can create beautiful designs on a variety of surfaces. Remember to take your time and work carefully, checking for any imperfections along the way.
Before you know it, you’ll be creating stunning paper crafts with ease. Happy crafting! Thanks for reading this article on how to use transfer tape with paper.