
Are you searching for ways to spruce up your knitting projects? Have you ever heard of using knitting barber cords? If not, then read on! Knitting barber cords can add some serious pizzazz to any project by adding texture and dimension with their unique design.
In this blog post, we’ll explain what exactly a barber cord is, walk through the step-by-step process of how to use knitting barber cords in your own work, discuss some tips and tricks to make it easier, and even provide some ideas for inspiration. So grab those needles, and let’s get started!
What is Barber Cord?
Barber cord is a type of yarn most commonly used for decorative knitted edgings. It may also be referred to as a bobble cord or buttonhole twist. The unique textured design of the barber cord gives it an eye-catching element that can really bring a project to life. Barber cords come in various colors, sizes, and weights. Some even have novelty designs like hearts and stars, which make them great for kids’ or holiday-themed projects. You can buy barber cords either as a single cord or in a bundle of several.
Things to Keep in Mind Before Buying Barber Cord
Before you buy a barber cord for your project, there are a few things to keep in mind. The size and weight of the cord should match the other yarns you plan to use with it, so make sure you double-check that before making your purchase. Also, be aware that using barber cords can add some bulk to your work, so it’s important to check if the pattern you intend to use can accommodate this extra dimension.
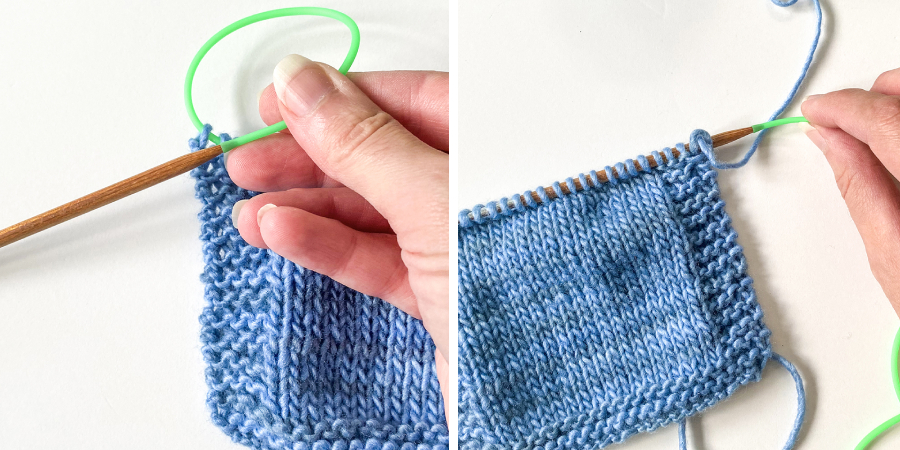
10 Steps on How to Use Knitting Barber Cords
Using knitting barber cords is a fairly simple process that can be accomplished with just a few steps. Here’s how you can incorporate it into your own work:
Step 1: Choosing
Choose the appropriate size cord for your project. The weight and size of the cord will depend on the type of project you are working on as well as personal preference. It also depends on the other yarns you plan to use in combination.
Step 2: Preparing
Gently unravel the barber cord until it is flat and all of the loops are exposed. You can do this by hand or with a crochet hook. Doing this by hand will give you more control over the tightness of the cord while using a crochet hook can be faster.

Step 3: Joining
Next, join the barber cord to your work by inserting your needle through one side of the loop and then passing it through another. This helps secure the cord in place and ensures that it stays in place as you work.
Step 4: Knitting
Using the appropriate knitting method, begin to knit the barber cord into your project. Remember that this type of cord can add some bulk, so plan accordingly and adjust your gauge if necessary.
Step 5: Finishing
When you’ve finished knitting with the barber cord, secure the end with a knot or by weaving in the loose ends. Make sure that your knot is tight enough to prevent it from coming undone.
Step 6: Blocking
Depending on the type of project you are working on, it may be necessary to block the barber cord once you’ve finished knitting with it. Blocking can help relax the stitches and even out any irregularities.
Step 7: Cutting
Once you have blocked the cord, carefully cut away any excess yarn to prevent it from fraying or unraveling. If you are using a novelty design, be careful not to cut too close to the pattern so that it remains intact.
Step 8: Trimming
If desired, you can also trim the loops of the cord so that they are all uniform in length. This can help make your project look more professional and polished. Trimming the loops can also help reduce bulk.
Step 9: Writing Down Your Notes
Remember to take notes about your project as you go along. This is especially important with barber cords since it can add some unexpected bulk. Writing down gauges, measurements, and other details will help you replicate the look of the cord in other projects or make adjustments as needed.
Step 10: Enjoying Your Work!
Once you have finished working with the barber cord, it’s time to sit back and enjoy your work! Be proud of yourself for taking on this challenge and learning a new skill. Now, go show off your project to family and friends or start another one!
Using a barber cord is an excellent way to add texture and visual interest to your knitting projects. With these steps, you’ll be able to incorporate this unique type of yarn into your work with ease.

10 Tips to Take Care of Your Barber Cord
- Clean your barber cord regularly. Make sure to remove any dirt, dust, or other debris that may accumulate on the cord.
- Store your barber cord properly when not using it. This can help to ensure that the cord stays in good condition and is readily available when needed next time.
- Inspect your barber cord regularly for wear and tear. Replace any frayed or worn cords as soon as possible to minimize the risk of injury while using them.
- Follow the instructions provided by the manufacturer when using your barber cord. This will maximize the efficiency of its use and help to reduce any potential risks associated with it.
- Avoid stretching out your barber cord. This can cause the cord to fray and could lead to injury if used without proper caution. It may also prevent the cord from functioning as it should.
- Be aware of how much pressure you are applying to your barber cord. Too much pressure can cause the cord to snap, leading to possible injury or damage if not used cautiously.
- Keep your barber cord away from any sharp objects or knives that may snag on it and lead to unnecessary damage.
- Be patient when using your barber cord. Rushing the process can cause it to fray or break, leading to possible injury and damage.
- Regularly check for any signs of fraying on the barber cord, as this is a sign that it needs replacing soon in order to avoid any potential mishaps.
- Never use a damaged or frayed barber cord, as this could cause injury if not handled properly and could also lead to damage to any other items you may be working with. Always check for signs of damage before using it each time. By following these tips, your barber cord can last longer, and you can ensure that your experience with it is a safe and enjoyable one. With proper care and attention, you can ensure that your barber cord is in good working order for years to come.

Frequently Asked Questions
How Much is a Barber Cord?
The cost of a barber cord can vary depending on the size and material used, but generally, a good quality cord should cost between $10-$20. It might even cost more if you’re looking for something more specialized.
How Do I Clean My Barber Cord?
It’s important to clean your barber cord regularly in order to keep it in good condition. To do this, you can use warm soapy water and a soft brush or cloth. Make sure to rinse off all of the soap thoroughly before allowing it to air dry. You should also inspect the cord for any signs of damage and replace it when necessary.
Can I Use My Barber Cord For Other Uses?
Yes, you can use your barber cord for other uses, such as braiding or weaving as well. However, you should make sure that the cord is in good condition and not frayed before attempting to use it for anything other than cutting hair. This will help minimize any potential risks associated with using it for something other than its intended purpose.
How to Take Care of the Barber Chord?
Taking care of your barber chord is essential to ensure that it lasts longer and remains in good condition. Make sure to clean the cord regularly with warm soapy water and a soft brush or cloth, inspect it for any signs of damage such as fraying, store it properly when not in use, follow manufacturer instructions when using it, avoid stretching it out, apply the right amount of pressure when using it and keep it away from sharp objects or knives. By taking all of these steps, you can ensure that your barber cord is in good condition for years to come.

Conclusion
After reading this blog post, you now know how to use knitting barber cords! Whether you’re a beginner or an experienced knitter, these tips will help you create beautiful projects.
Be sure to practice with different techniques and stitch patterns to perfect your skills. With a little patience and effort, you’ll be able to make stunning pieces that family and friends will admire.
You Can Check It Out to Wrap a Tumbler With Straw