
Have you ever wondered how to create beautiful quilts and fabric projects without having to sew all of the pieces together? If so, then heat-and-bond is the answer you’ve been looking for! Using this easy method, you can bond two pieces of fabric together without threading a needle.

Heat and bond is a type of fusible web that is activated by heat, allowing you to fuse fabrics together without the use of pins or sewings. It is often used in applique projects, fabric crafts, and even repairs on clothing.
In this blog post, we’ll explore what heat and bond are, their advantages over traditional sewing methods, and tips on how to use them to make stunning cloth creations. Read on if you’re interested in learning more about how to use heat and bond.
What Will You Need?
To get started, you’ll need a few essential tools and materials. Here’s a quick list of items that will come in handy when using heat and bond:
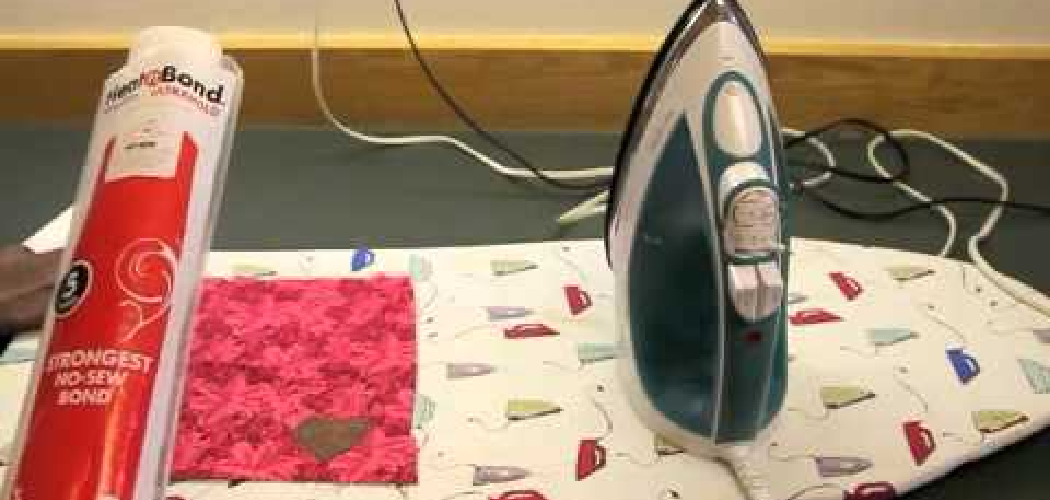
- Heat-and-bond (of course!)
- Fabric
- Iron
- Scissors
That’s it! With these simple tools, you can easily create beautiful projects without the hassle of sewing.
10 Easy Steps on How to Use Heat and Bond
Step 1. Prepare Your Fabric:
Begin by ensuring both pieces of fabric you intend to bond are clean and ironed. Any wrinkles or debris can hinder the bonding process, so it’s essential to start with flat, pure material. If desired, you can also starch the fabric for a crisper finish.

Step 2. Cut the Heat and Bond:
Once your fabric is prepared, it’s time to cut your heat and bond. Measure and cut a piece of the heat and bond that is the same size as the fabric piece you want to adhere to. Precision is key here, as any overlapping edges of the fusible web can stick to your iron.
Step 3. Apply the Heat and Bond to the Fabric:
Next, place the heat and bond on the fabric with its adhesive side down on the wrong side of the fabric. Ensure that the edges of the heat and bond and the fabric align perfectly.
With your iron set to a medium heat setting, gently press down on the heat and bond for about 2 to 3 seconds. Avoid moving the iron around too much, as it can cause the heat and bond to shift. Once the heat and bond are securely adhered to the fabric, allow it to cool. Ensure not to rush this step, as proper cooling is crucial for a strong bond.
Step 4. Remove the Backing Paper:
After the heat and bond have thoroughly cooled, gently peel off the backing paper. You should now have a piece of fabric with the adhesive side (the shiny side) of the heat and bond exposed. Ensure the adhesive is properly stuck to the fabric. If it’s not, reapply the iron until it is.
Step 5. Bond the Fabrics Together:
Now, place the second piece of fabric on your work surface with the right side up. Then, position the fabric piece with the adhesive side of the heat and bond down onto the second fabric piece.
Ensure the fabric pieces align perfectly, then press the iron onto the fabric for about 8 to 10 seconds on each section until the entire piece is bonded.

Allow the fabric to cool completely. This step is crucial in ensuring a seamless bond between the fabrics. After cooling, check the bond, and if any areas are not adequately adhered, repeat the ironing process.
Step 6. Test the Bond:
After the fabric has cooled, check the bond to see if it’s secure. Gently tug at the edges of the fabric to ensure the bond holds. If you notice any areas that are loose or not stuck together, repeat step 5 until you achieve a seamless bond. Remember, patience is vital—rushing the bonding process can lead to shoddy results.
Step 7. Trim and Finish:
With your fabrics securely bonded together, you can now trim any excess material. Also, if you wish to add a professional touch, you can stitch around the edges of the bonded fabric.
This additional step provides a finished look and adds extra durability, but it’s completely optional. Your heat and bond project is now complete! Remember, heat and bond is versatile and can be used on various projects, so feel free to experiment and let your creativity shine.
Step 8. Care for Your Finished Project:
Heat and bond provide a stronghold, but it’s essential to take some precautions when caring for your finished project. If the item will be washed regularly, consider adding some stitches around the edges for extra durability.

When washing, use a gentle cycle and avoid high heat in the dryer. If possible, air-dry your project to preserve the bond. With the appropriate care, your heat-and-bond project will maintain its beauty and functionality for a long time.
Step 9. Troubleshooting Common Issues:
Despite your best efforts, you may encounter common issues when using heat and bond. If the bond isn’t holding, it may be due to not applying enough heat or not allowing the project to cool sufficiently before moving on to the next step.
Ensure the iron is on a medium setting and give ample time for cooling. If the fabric discolors or burns, the iron may be too hot. Adjust the heat setting and test on a small piece of fabric before applying to your project again. Remember, practice makes perfect, so don’t be disheartened if you face challenges initially.
Step 10. Explore & Experiment:
Now that you’ve got the basics down feel free to explore and experiment with different fabrics and projects. Heat and bond are incredibly versatile, and the possibilities are practically endless. From fabric craft projects to clothing repairs and even home décor creations, the world is your oyster!
Remember, the key to mastering any new skill is persistence and practice. So keep experimenting, keep creating, and most importantly, have fun! This is your journey into the wonderful world of fabric crafting with heat and bond. Embrace it!
By following these ten simple steps, you can easily create beautiful projects without the hassle of sewing. With a little practice and patience, you’ll be able to master this versatile bonding method and open up a whole new world of creative possibilities.
5 Additional Tips and Tricks
- Pre-Cut Your Pieces: To ensure precision and avoid waste, pre-cut your fabric and HeatnBond to the desired size before bonding.
- Use a Medium Heat Setting: While it’s tempting to use a high heat, a medium setting is usually enough to bond the materials properly. High heat can cause the adhesive to melt too much and seep through the fabric.
- Smooth Motions: When ironing the HeatnBond onto your fabric, use soft and steady movements. This ensures an even distribution of heat, leading to a stronger bond.
- Cool Before Cutting: After ironing, give your project some time to cool before cutting or sewing. This gives the adhesive time to set, creating a more secure bond.
- Test on Scraps: Like with any new material, it’s a good idea to test HeatnBond on scrap fabric first. This helps you get a feel for how it works and allows you to practice your technique without risking your main project.

With these tips and tricks, you’ll be a pro at using Heat and Bond in no time! Remember to always follow the instructions on the product packaging for best results.
5 Things You Should Avoid
- Avoid Rushing: Patience is vital when using HeatnBond. Rushing the process can lead to uneven bonding and potentially ruin your project.
- Don’t Skip Pre-Cutting: Neglecting to pre-cut your pieces can result in waste and inaccuracies. Always pre-cut your materials to the correct size before bonding.
- Avoid High Heat: Using a setting that is too hot on your iron can cause the adhesive to over-melt and seep through the fabric, spoiling your project.
- Never Ignore Cooling Time: Cutting or sewing your project immediately after ironing may cause the bond to be weak. Always allow sufficient cooling time for a sturdy bond.
- Remember to Test: Even if you’re confident, always test the Heat and Bond on a scrap piece of fabric first. This can save your main project from potential mishaps.
By following these do’s and don’ts, you can ensure a successful project every time. Always use proper safety precautions when working with heat and ironing tools.
Conclusion
In conclusion, using heat and bond is an efficient way to finish up any project you may have. You can also use this technique to help strengthen fabrics that need extra holding power. By following these simple steps, you can create a professional-grade bond between your fabrics that will last for years. Don’t be intimidated by the process. With practice and patience, you will be able to achieve great results!
Hopefully, the article on how to use heat and bond has provided you with a good understanding of this versatile tool and its various applications. Remember to experiment and have fun with your projects. There are endless possibilities when using heat and bond! Happy bonding!
So, whether you’re a seasoned crafter or a beginner, HeatnBond is an essential addition to your crafting toolkit.