

A Peter Pan collar is a timeless accessory that can elevate any outfit. It is an easy-to-make sewing project, perfect for all levels of sewing expertise, and requires minimal supplies. While this sewing technique might initially seem intimidating, knowing the basics will make you make a beautiful, perfectly tailored Peter Pan collar in no time.
The biggest advantage of learning to sew a Peter Pan collar is that it adds a charming touch to any outfit. The iconic look was popularized in the 1950s, and its popularity still remains today. It’s versatile enough for casual and formal attire and can easily be tailored to match any style or fabric choice.
It’s also an easy project to tackle if you’re a beginner sewer, and the steps are simple enough that even those with no experience can create their own custom piece. In this blog post, You will learn how to sew a peter pan collar in detail.
Step-by-Step Processes for How to Sew a Peter Pan Collar
Step 1: Inspect the Fabric
Before starting the project, make sure that the fabric you have chosen is suitable for this project. Check if it has sufficient stiffness and strength to withstand the seam allowance. Take measurements of your neckline and draw a pattern piece accordingly. If using a paper pattern, trace out two pieces onto card stock.
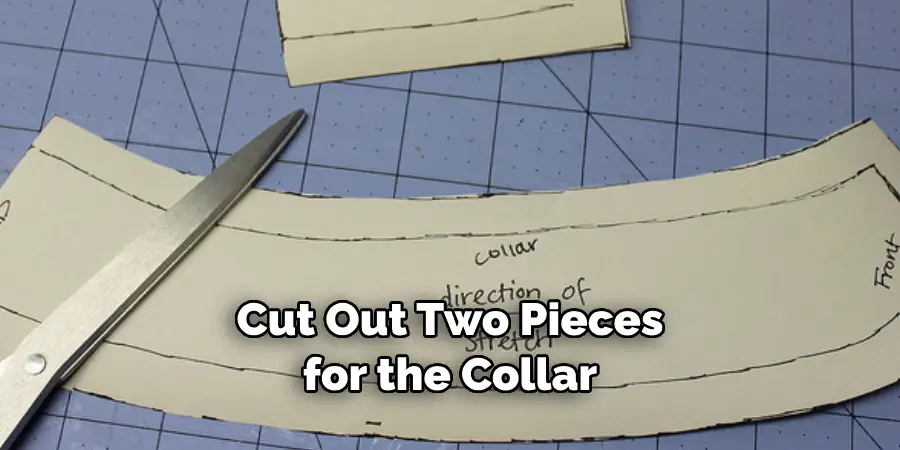
Step 2: Cut Out the Pieces
Place your card stock on top of your fabric and cut out two pieces for the collar. Make sure you have right side up so that the pattern shows how it is supposed to look once sewn together. After cutting out your pieces, pin them together with the wrong sides facing each other. Ensure you have a good fit and that all edges line up properly.
Step 3: Sew Your Collar Together
Using a sewing machine, stitch around the edge of the collar leaving about 1/4” seam allowance. Backstitch at the beginning and end of your seam. Once you have sewn the collar together, turn it right-side out using a pair of tweezers or a chopstick. Make sure to press the seam open once it is completely turned right-side out.
Step 4: Press Your Collar
Press the seam open once you have turned the Peter Pan collar right-side out. Make sure to use a pressing cloth if necessary, as some fabrics may scorch from the heat of an iron. To finish off the edges, turn them under 1/4” and press. Then, topstitch along the edge to secure the hem.
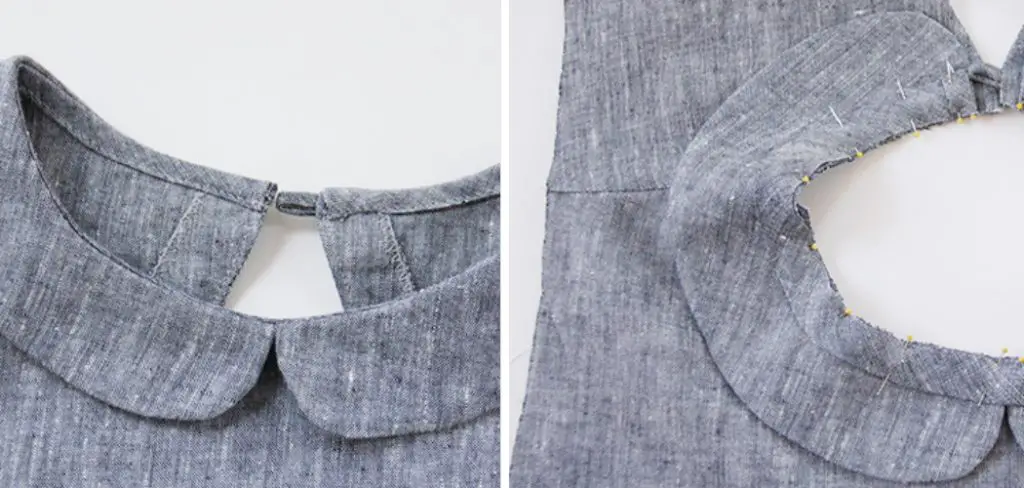
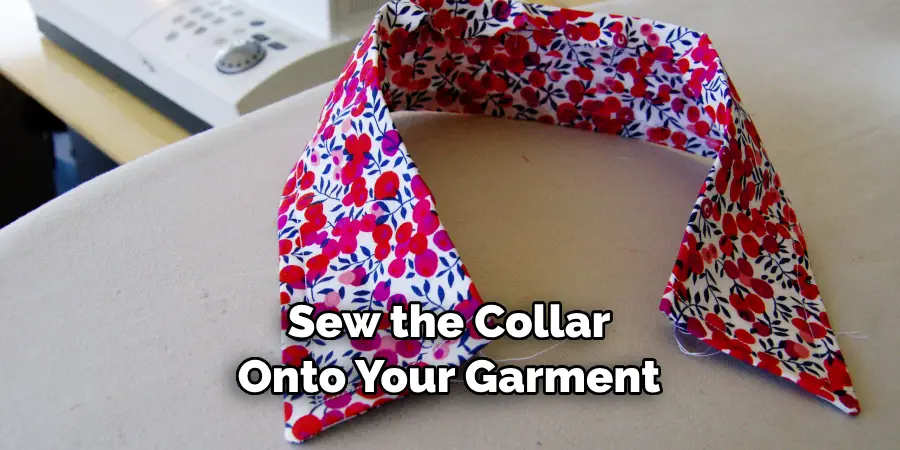
Step 5: Attach The Collar To The Garment
Sew the collar onto your garment using a basting stitch around the neckline. Make sure to backstitch at the beginning and end of your seam. To finish off the collar, press the seam allowance towards the garment. Then, topstitch along both edges of the collar for a neat and professional look.
Once you have completed these steps, your Peter Pan collar is ready to be worn. With a few simple tools and a bit of practice, you can make beautiful collars for any occasion.
Safety Tips for How to Sew a Peter Pan Collar
- Wear safety glasses when using a sewing machine or scissors to prevent eye injuries.
- Make sure the area you are working in is well-lit and uncluttered so you can avoid tripping over objects while doing your sewing task.
- Use a thimble to protect your fingers from accidental pricks.
- Check that the needle on your sewing machine is properly secured and not loose or damaged before you start sewing.
- Make sure to unplug the machine when changing thread, needles, bobbins etc., so as to avoid any risks of electric shock.
- Be careful not to catch your skin while using a hot iron.
- Check the integrity of the fabric and be sure not to sew over any loose threads or holes in the material, as this could weaken it.
Following these safety tips ensures that your Peter Pan collar sewing process is completed safely and successfully. Be sure to take the necessary precautions to keep yourself safe when tackling any sewing project.
What is the Best Way to Attach a Peter Pan Collar to a Garment?
Hand sewing is the best way to attach a Peter Pan collar to a garment. Hand sewing allows you to make the necessary adjustments and ensures the stitching is secure and durable. To begin, use an iron to press the fold along the center of your Peter Pan collar. Then, place it on top of your garment, with the folded edge aligned against the garment’s neckline.
If you are sewing a lined garment, make sure that the collar is facing up and not down.
Once your collar is in place, use a small running stitch to attach it to the garment. Begin by tying a knot at the end of your thread and then inserting the needle through both the fabric and the collar. Pull the thread tight so it is hidden between the fabric and collar. Then, insert your needle back into the fabric a few stitches away from where you started.
Keep repeating this process until you have gone all the way around your garment’s neckline.
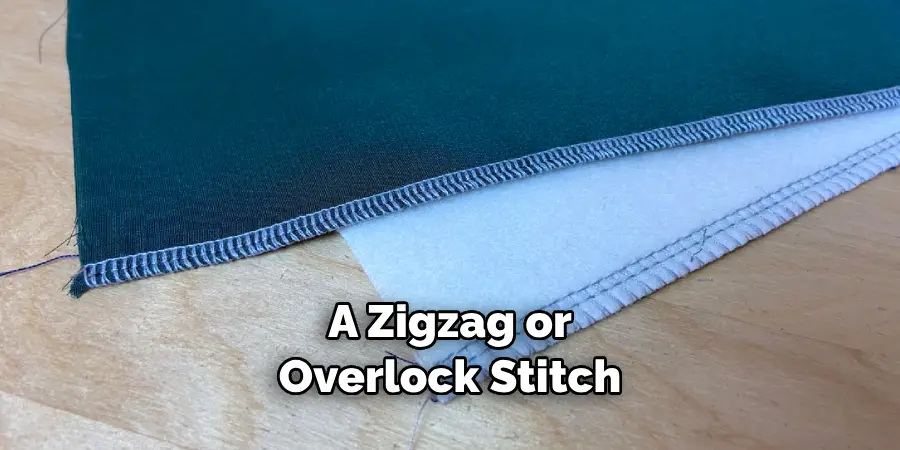
How Do You Finish the Edges on Your Peter Pan Collar to Make Sure It Looks Neat and Polished?
Once you have your Peter Pan collar sewn together, the final step is to finish the edges. Doing this will help keep your collar looking neat and polished. To do this, fold one end of the collar towards the wrong side of the fabric and stitch along the edge using a straight stitch. Repeat with the other end of the collar.
Now, there are several ways to finish the edges of your Peter Pan collar. You can use a zigzag stitch or an overlock stitch, both of which will give a nice, neat finish and help prevent fraying. If you want to go the extra mile, you could also add bias tape as a decorative edge along your collar.
No matter which method you choose, make sure to take your time and really go slow so that you get perfect results. Then press the collar with an iron for a finished look.
What Are the Best Fabrics for Creating a Statement Peter Pan Collar?
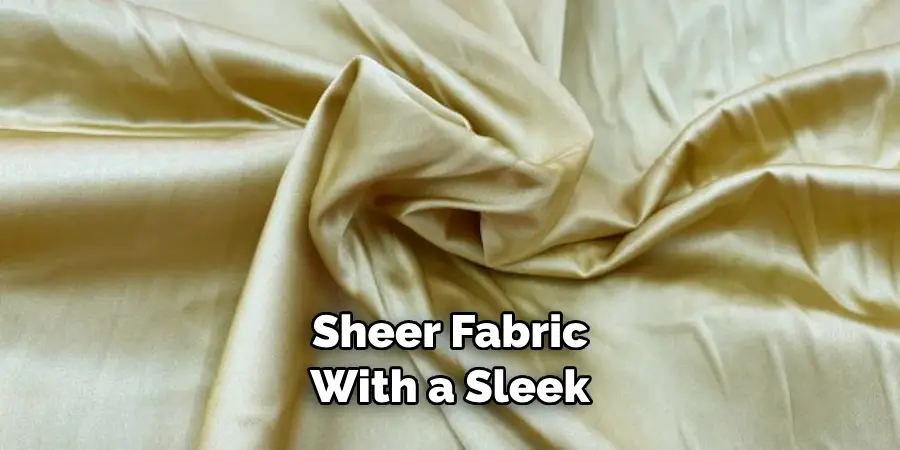
When it comes to selecting a fabric for your Peter Pan collar, you want to make sure that you select something that will stand out and create the look you’re going for. The most popular fabrics used to create a statement Peter Pan collar include chiffon, lace, velvet, and satin. Chiffon is a lightweight, sheer fabric with a sleek and elegant look.
It’s perfect for creating a delicate Peter Pan collar that will give your garment an air of sophistication.
Lace is another popular choice for making Peter Pan collars. It’s usually made from cotton or synthetic fibers and available in many colors and patterns. It’s perfect for creating an ultra-feminine and romantic look. Velvet is a heavier fabric that adds texture and dimension to a Peter Pan collar. If you want something bolder than chiffon or lace, velvet is the way to go.
It adds a luxe feel that can make any outfit stand out.
Satin is a smooth, shiny fabric that gives off an elegant, glamorous vibe. It’s perfect for creating a classic Peter Pan collar that will look timeless and sophisticated. Whichever fabric you choose for your Peter Pan collar, make sure it’s of high quality so it will last over time.
What is the Best Way to Attach a Peter Pan Collar So That It Stays Securely in Place?
Hand-sewing techniques are one of the best ways to attach a Peter Pan collar. Doing this ensures that the fabric and thread are secured tightly together so that the collar stays in place. Start by placing your two pieces of cloth right sides together, then pinning them in place. Next, use a running stitch to sew around the outside of the collar, ensuring that the stitches are close together.
Finally, knot the thread securely at each end and trim the excess fabric away. This will create a secure attachment between your two pieces of cloth and keep your Peter Pan collar in place for years to come.
Another way to attach a Peter Pan collar is to use a machine. Start by setting up your sewing machine and threading it with the appropriate color of thread. Place the two pieces of cloth right sides together and pin them in place. Next, sew around the outside of the collar using a zigzag or overlock stitch. Finally, knot the thread securely at each end and trim away the excess fabric.
Are There Any Tips for Avoiding Common Mistakes When Sewing a Peter Pan Collar?
Sewing a Peter Pan collar is not as difficult as some might believe. But there are still a few tips to keep in mind that can make the process go more smoothly. First, it’s important to select the right interfacing for your fabric. Interfacing helps give structure and stability to the collar and should be chosen according to the weight of your fabric. Next, be sure to press the collar so that all pieces are properly aligned before beginning to sew.
This will also help make sure that the pieces line up correctly and look as neat and professional as possible.
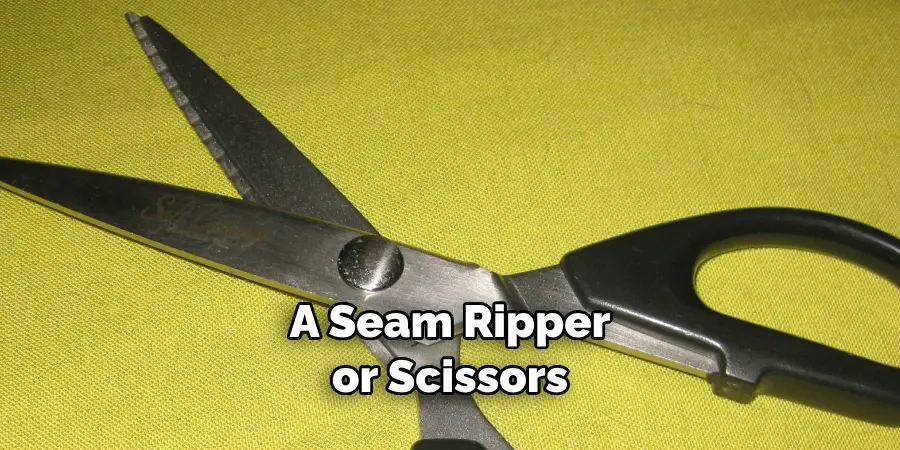
It’s also important to double-check each seam allowance before sewing them together. Making sure that they all have the same measurement is important for keeping the shape of the collar intact. Finally, using a seam ripper or scissors is essential to trim away any excess fabric and threads. This will help ensure that the finished Peter Pan collar looks as neat and tidy as possible without any bumps or lumps.
Following these simple tips will help ensure that your Peter Pan collar looks its best and is as professional as possible.
Are There Any Special Ways to Embellish or Decorate a Peter Pan Collar to Make It Unique?
Yes. There are many ways to embellish and decorate a Peter Pan collar to make it unique and special. For example, you can add embroidery or hand beading, use lace detailing around the edges, or add small fabric appliques for a fun look. You could also choose to sew on vintage buttons in a pattern or use fabric markers to draw a design on the collar.
With these techniques, you can create something completely unique and one of a kind.
If you’re feeling extra creative, you could even combine multiple techniques together for a stunning effect. No matter which way you choose to embellish your Peter Pan collar, it will be sure to turn heads and make your outfit stand out. If you’re intimidated by embellishing or decorating a Peter Pan collar, don’t worry. You can find lots of great tutorials online that will help walk you through the process step-by-step.
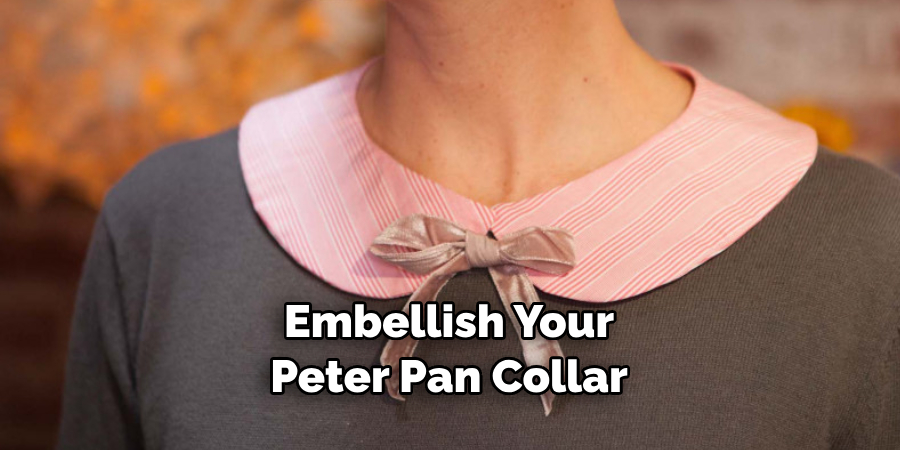
It’s also helpful to practice on fabric scraps before trying out any of these techniques on your collar.
Conclusion
One disadvantage of sewing a Peter Pan collar is that the sewing process can be quite time-consuming. Depending on the complexity of the design, you may need to spend several hours working on the project. In addition, if you are not an experienced seamstress, it can be difficult to get the edges and points of the collar even and symmetrical.
In conclusion, sewing a Peter Pan collar can be done by following the simple steps above. You can easily make an eye-catching addition to any outfit with patience and practice. Whether it’s a shirt, dress, or accessory, the Peter Pan collar adds a unique touch to any garment. With some creativity and fun fabric choices, your homemade Peter Pan collars are sure to become a fashion statement.
I hope this article has been beneficial for learning how to sew a peter pan collar. Make Sure the precautionary measures are followed chronologically.