
Are you looking for a creative and useful way to store your chapstick? Or you want to learn how to sew something that has a practical application. Look no further because we’re here with an easy-to-follow tutorial on how to sew a chapstick holder.

If you have any basic sewing supplies, like a needle and thread, fabric of your choice for the holder, and scissors, you should be able to get started in no time! All you need is some time and patience to craft this useful item.
This craft project is perfect for any beginner sewer – all it takes is simple supplies and just a few steps. Once completed, you’ll have an adorable accessory to clip onto your backpack or purse! So grab your needle and thread – let’s get started!
What Are the Benefits of Sewing a Chapstick Holder?
Sewing your chapstick holder has many advantages! It can be a fun and creative way to show off your sewing skills, plus it’s an excellent way to make something practical that you can use every day. Doing small projects like this helps you to become more familiar with the basics of sewing – which could lead to bigger and better projects down the line!
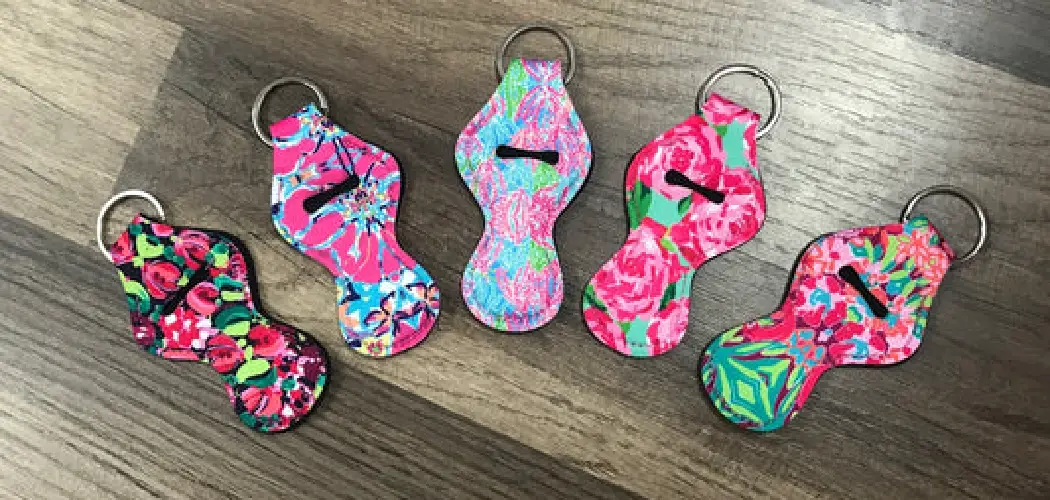
Plus, you can customize the fabric to suit your style. Whether you opt for a bright pattern or a subtle color, a chapstick holder will surely be an eye-catching accessory.
Overall, sewing a chapstick holder is an easy and practical way to show off your skill and creativity.
What Will You Need?
- Fabric of your choice – you will need about two pieces that measure 4″ by 3″.
- Scissors
- Thread to match the fabric you have chosen.
- A sewing needle
- Chapstick
Once you have all your supplies, it’s time to get started!
8 Easy Steps on How to Sew a Chapstick Holder
Step 1. Prepare the Fabric:
Start by laying out your fabric on a flat surface. Grab your scissors and carefully cut out two pieces measuring 4″ by 3″. Make sure the edges are as straight and neat as possible. These two pieces will eventually form the body of your chapstick holder, so it’s important to take your time and ensure they’re cut accurately. If you have any pins handy, you can pin the two pieces together to keep them in place for the next steps.

Step 2. Sew the Sides:
Now that your fabric pieces are prepared, align them with the patterned or desired side facing inwards. Begin sewing along the longer sides of the fabric using a basic straight stitch, leaving about a 1/4″ seam allowance.
Make sure to leave the top and bottom ends open. Remember to thread your needle with a color that matches your fabric to ensure the stitches blend well. This will create a tube-like structure, which will be the main body of your chapstick holder.
Step 3. Turn the Fabric Right Side Out:
After you’ve finished sewing the sides, it’s time to turn the fabric right side out. To do this, carefully reach into the tube of fabric you’ve just sewn and pull it through. This may seem tricky at first, but it’s important to be gentle to avoid tearing your stitches.
Once you’ve turned it right side out, use a pencil or a chopstick to push out the corners and ensure the sides are fully extended. Now, you should have a neatly sewn tube with the pattern on the outside ready for the next step.
Step 4. Create the Bottom of the Holder:
The next step is to seal one end of the tube to form the bottom of your chapstick holder. Flatten the tube so the side seams are in the middle, creating a folded edge on either side. Sew across one of the open ends of the tube, again leaving about a 1/4″ seam allowance. Trim off any excess fabric, careful not to cut through your line of stitches.
This will create a neat, flat bottom for your chapstick holder, keeping your chapstick in place when inserted. Make sure to reinforce the ends of your stitching by backstitching a few times to ensure it’s secure.
Step 5. Prepare the Loop for Attachment:
Next, you’ll need to create a loop that can be used to attach your chapstick holder to a bag or keyring. To do this, cut a small strip of fabric that measures about 3″ long and 1″ wide. Fold this strip in half lengthwise with the patterned side facing inwards, and sew along the open edge.
Turn the strip right side out, and you’ll have a neat little fabric loop. Attach this loop to the inside of the top open end of the tube, ensuring it’s securely stitched. This will allow you to clip your chapstick holder wherever you want, providing easy access at all times.

Step 6. Hem the Top of the Holder:
Now, let’s work on finishing the top of your chapstick holder. Start by folding the top edge about 1/2″ down towards the inside of the tube; this will be your hem. Iron this fold to make the hem lay flat and crisp, making it easier to sew. Then, carefully stitch around the tube’s circumference, close to the edge, to secure the hem in place.
Remember to reinforce your stitching at the beginning and end to ensure it’s secure. This will create a neat and finished look on the top of your holder. With this step, the basic structure of your chapstick holder is complete!
Step 7. Insert the Chapstick:
Now that your chapstick holder is almost complete, it’s time to insert the chapstick. Slide the chapstick into the holder through the top opening. It should fit snugly inside the holder, with the top of the chapstick still accessible for easy use. Make sure that the holder is tight enough for the chapstick, as this could either strain the fabric and stitches or cause the chapstick to fall out. Adjust the stitches in Step 4 to ensure a perfect fit if necessary.
Step 8. Test and Adjust:
After inserting the chapstick, it’s time to test your newly sewn chapstick holder. Attach it to your keys, purse, or backpack using the loop you sewed in earlier. If the chapstick slides out too easily, you may need to adjust the tightness of the bottom seam to ensure a secure fit.
Consider loosening the seam slightly if the chapstick is too hard to remove. Your chapstick holder must be both secure and functional. Adjustments are a normal process, so don’t be discouraged. Once you’re happy with the fit, you can move on to the next step.
Following these 8 simple steps, you’ll have your handmade chapstick holder! This project is a great opportunity to show off your creativity and put your sewing skills to use. Whether for yourself or a friend, this practical and useful item can be enjoyed by all. Now go ahead and show off your new creation with pride!

5 Additional Tips and Tricks
- Make sure to have all the necessary materials ready before starting your project. It will save you time and ensure you can use your chapstick quickly.
- Use a large needle so it’s easier to sew through the material – this will make the process go much faster!
- Use a sewing machine for sturdier construction and quicker results.
- To make a pocket in the chapstick holder, simply sew two pieces of material together before assembling the project.
- Make sure to use high-quality thread to withstand wear and tear better than regular thread. This will ensure that your chapstick holder lasts longer!
With these tips, you can make a durable and stylish chapstick holder that will last you for years. With just a few supplies and some basic sewing skills, anyone can craft their own chapstick holder! So get started creating your own today!
5 Things You Should Avoid
- Avoid using a low-quality thread – it won’t last as long and may unravel after a few uses.
- Don’t use pins to hold the fabric in place while sewing – this can create holes in your material and make the chapstick holder look less professional.
- Be careful not to sew too close to the edge, as it can cause the material to tear or fray.
- Avoid using a fabric that stretches too much, as it will be difficult to sew, and the chapstick holder won’t hold its shape well.
- Don’t forget to test your chapstick holder before use – this can help ensure that it is durable and looks great!

Avoiding these mistakes will help you ensure that your chapstick holder is durable and stylish. You can sew the perfect chapstick holder quickly with just a few simple tips!
Conclusion
Overall, how to sew a chapstick holder can be a fun project for novice and experienced sewers alike. It is an enjoyable way to contribute to your fashion wardrobe and a useful product that can easily be created with household materials. The great thing about the tutorial provided in this blog post is that it allows users to customize their chapstick holders according to their preferences.
Whether you stick with simpler stitches or get creative with embellishments, completing a chapstick holder will provide you with endless satisfaction! In addition, these projects make great gifts for friends and family members as well.
So next time you are looking for a unique gift idea or simply have some extra time, grab your material and take on this crafty challenge!