
If you’ve ever accidentally applied heat transfer vinyl (HTV) onto your garment or fabric, you know the panic that sets in when you try to remove it. Luckily, with a few simple steps, you can easily remove HTV without damaging your fabric or the vinyl design. In this blog post, we will be discussing how to remove HTV quickly and efficiently.

Can You Remove HTV?
Have you ever tried to remove HTV (heat transfer vinyl) from a garment? Whether it’s a mistake during your DIY project or you simply want to change up the design, it can seem like an impossible task. However, with a few steps and the right tools, it is possible to remove HTV without damaging your garment.
From using a heat gun or iron to peeling the vinyl off by hand, there are several methods to choose from. So don’t worry if you need to make a change to your favorite shirt or bag – with a bit of patience and practice, you can become a pro at removing HTV.
Why Should You Remove HTV?
If you’re considering adding a new design to your wardrobe, you may want to consider removing any old HTV before doing so. HTV, or heat transfer vinyl, is a material used to add designs or lettering to clothing through a heat press or iron. While it can give an item a personalized touch, it’s important to note that HTV doesn’t last forever.
Over time, the vinyl can crack, fade, or peel off, leaving your garment looking worn and unappealing. Removing HTV not only assures a fresh canvas for new designs but also helps extend the life of the clothing item. So, why should you remove HTV? Because doing so will help you keep your wardrobe up-to-date and looking its best.

7 Methods to Follow on How to Remove HTV (Heat Transfer Vinyl)
1. Heat Method
One of the effective methods for removing HTV is to use heat to loosen the vinyl adhesive. To do this, place your fabric in the oven at 150-170°F, allowing the vinyl to loosen. This will allow the vinyl to be peeled off easily. Be sure to constantly check your garment to ensure it is not overheating or getting damaged. Remember, the vinyl should only be heated for a short time and not for too long of a duration.
2. Iron Ash Method
If you don’t have an oven around you, then the iron ash method is the best one to proceed. In this method, you will need to put a cloth on top of the vinyl (face up) to avoid sticking on the iron.
With hot iron, start Ironing the cloth and vinyl together with a towel on the back side of the cloth(this towel will absorb heat), until you see some greasy marks starts to appear. Once you see the greasy marks, instantly remove the cloth from the vinyl.
3. Chemical Method
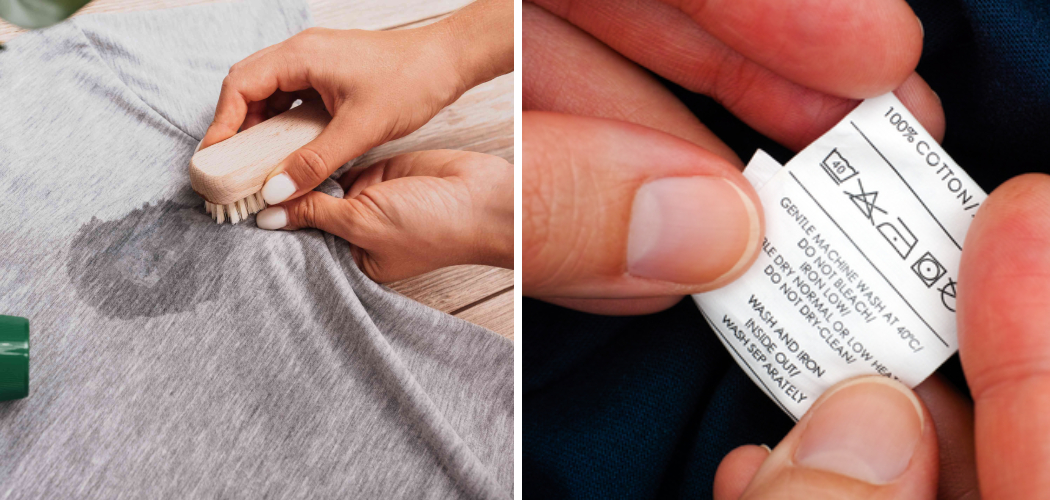
Another method involves the use of chemicals. This method involves the use of acetone or rubbing alcohol, which will dissolve the adhesive and make it easier to remove the vinyl. Begin by applying the acetone or rubbing alcohol onto the adhesive with a cotton ball and gently scrubbing it with a brush until it becomes loose.

Then, peel off the vinyl from the fabric once it has loosened up. However, this method should not be used on delicate fabrics since it can cause discoloration or damage.
4. Razor Blade Method
This method involves the use of a sharp razor blade to scrape off the vinyl from the fabric. Gently run the blade along the edge of the vinyl and slowly peel it off. This method is effective, but it requires a bit of patience and practice since it can cause damage to the garment if not done carefully.
5. Sandpaper Method
If you want to remove a small area of HTV vinyl, using sandpaper is a good option. It involves taking sandpaper and rubbing it over the vinyl until it starts to come off. This method can be used for small areas of HTV and requires very little preparation.
6. Hair Dryer Method
This method involves using a hair dryer to blow hot air over the vinyl. This will cause the adhesive to heat up and loosen, making it easier to peel off the vinyl from the fabric. Be sure to keep the heat on low and move the dryer around in circles until it loosens (but not too long so that it melts).

7. Peel & Stick Method
This method involves applying a piece of masking tape to the vinyl and then peeling it off. The adhesive on the tape will help to loosen the vinyl from the fabric, making it easier to peel off. However, this method may damage delicate fabrics so be sure to test it out first before using it.
Removing HTV vinyl can be a tricky task, but with the right methods and tools, it can be done safely and effectively. Be sure to follow the instructions carefully for each method to ensure that you don’t damage your fabric or cause any harm to yourself.
5 Considerations Things When You Need to Remove HTV
1. Safety
When removing HTV, the safety of yourself and those around you should always be your top priority. Be sure to wear protective clothing, such as gloves and a face mask, to protect yourself from any potentially hazardous materials that may be present in the vinyl.
Additionally, make sure to work in a well-ventilated area and avoid inhaling any fumes or particles that may be released during the removal process.
2. Heat Source
The type of heat source you use will significantly impact how successful your HTV removal is. When selecting a heat source, it is important to choose one that is powerful enough to effectively remove the vinyl without causing damage to the underlying surface. Popular options include heat guns, hair dryers, and irons.
3. Type of Vinyl

The type of vinyl you are attempting to remove will also play an important role in determining how successful your HTV removal is. If possible, try to identify what type of vinyl was used before beginning the removal process, as different types of vinyl require different removal techniques and tools.
4. Scraping Tool
In addition to a heat source, you will need an appropriate scraping tool for removing HTV from surfaces such as wood or metal. The best scraping tools for this job are those with sharp edges that can easily get underneath the vinyl without damaging the underlying surface. Popular options include plastic putty knives and razor blades.
5. Cleaning Solution
Once you have removed all of the HTV from the surface, it is important to clean off any remaining adhesive residue using an appropriate cleaning solution, such as rubbing alcohol or acetone nail polish remover. Be sure to read all instructions carefully before using any cleaning solutions and test them on a small area before applying them over larger areas of your project surface.
By following these five considerations, you will be well on your way to successfully removing HTV from any surface with minimal effort and damage! Remember that safety should always be your top priority when handling potentially hazardous materials and tools. If you are unsure how to proceed safely, it is best to seek professional advice before starting the project.
5 Benefits of Remove HTV
1. Improved Air Quality
Removing HTV from homes and businesses can improve air quality in a space. HTVs contain volatile organic compounds (VOCs), which can cause health problems such as asthma and allergies when released into the air.

Removing these VOCs from the air can help to reduce the health risks associated with them. Additionally, removing HTV can also help to reduce odors in a space, making it more pleasant to be in.
2. Increased Energy Efficiency
Removing HTV can also help to increase energy efficiency in a home or business. HTVs are porous and absorb heat, which means that they act as an insulator and can make a space harder to cool or heat. By removing them, you can reduce energy costs by allowing your cooling or heating system to work more efficiently.
3. Reduced Risk of Fire Hazards
Another benefit of removing HTV is that it reduces the risk of fire hazards in your home or business. HTVs are highly flammable, and if exposed to an open flame or other source of heat, they can easily catch fire and spread quickly throughout a space. Removing these materials helps to reduce the risk of fires starting in your home or business.
4. Improved Aesthetics
Removing HTV from your home or business also improves its aesthetics by creating a cleaner look and feel in the space. Removing old, worn-out materials will give your space an updated look without having to do any major renovations or remodeling projects. This is especially beneficial for businesses as it helps create a better first impression for customers and clients who visit the premises.
5. Healthier Environment
Finally, removing HTV from homes and businesses creates a healthier environment for those who live or work thereby eliminating potential sources of mold growth, which could lead to health issues such as respiratory problems and allergies if left unchecked. Removing HTV also reduces the dust and dirt in a space which can trigger asthma attacks or worsen allergies.
Overall, there are many benefits to removing HTV from homes and businesses that make it an important part of home maintenance and upkeep. Not only does it reduce the risk of fire hazards, but it also helps create a healthier environment where people can live and work more comfortably.
Additionally, it also improves the aesthetics of a space and increases energy efficiency while reducing costs at the same time. Thus, removing HTV is an important part of creating a safe and healthy home or business environment.
6 Common Mistakes People Make When Trying to Remove HTV
1. Not Using the Right Temperature Setting
One of the most common mistakes people make when trying to remove HTV is not using the right temperature setting on their iron or heat press. Different fabrics require different temperatures, so it’s important to check the instructions for your HTV and adjust your iron or heat press accordingly.

If you use too low a temperature, the HTV won’t adhere properly, and if you use too high a temperature, it may scorch or damage the fabric.
2. Not Pre-pressing
Another mistake people often make is not pre-pressing their fabric before applying HTV. Pre-pressing ensures that any wrinkles are removed from the fabric, allowing for better adhesion of the HTV. It also helps to ensure that the adhesive on your HTV will activate correctly and stick to your fabric properly.
3. Not Pressing Long Enough
Many people also don’t press their HTV long enough when they’re trying to remove it from a garment. To ensure that all of the adhesive has been removed from your fabric, press each area of your HTV for at least 10 seconds with an iron or heat press set to medium heat. This will help ensure no adhesive remains on your garment after removal.
4. Not Using Heat Transfer Tape
Using heat transfer tape is an important step in removing HTV from a garment, as it helps keep all the pieces in place while pressing them off of your fabric. Without this extra layer of protection, pieces may move around during pressing and cause uneven adhesion or even damage to your garment in some cases.
5. Not Letting It Cool Down
It’s also important to let your fabric cool down completely before attempting to remove any remaining pieces of HTV from it with tweezers or other tools. If you try to remove any pieces while they are still hot, you risk damaging or stretching out the fibers in your fabric, leading to an uneven finish on your final product.
6. Not Testing On Scrap Fabric
Finally, it’s always a good idea to test any new techniques on scrap fabric before applying them directly to a finished project, such as clothing or accessories made with vinyl graphics and lettering. By testing different techniques on scrap material first, you can determine which ones work best for removing various types of HTV without risking damage to any finished products.
By avoiding these common mistakes, you can ensure your HTV removal projects are successful and leave your final products looking great! Additionally, seeking professional advice before starting a project can go a long way towards ensuring success as well.
With the right tools and techniques, removing HTV from garments is easy and can help to create beautiful finished products for personal or commercial use.
Conclusion
In conclusion, removing HTV vinyl is a simple process that can be done with a few simple steps. Whether you choose to use a heat method, chemical method, razor blade method, or sandpaper method, always take care when working with delicate fabrics.
By utilizing these methods, you can easily remove HTV and start again with a fresh design you can be proud of. Thanks for reading our post about how to remove htv.